Food

Sweet Potato Pie

My first-born, Isaiah, missed out on the grand-parent experience, and I’ve always felt somewhat bad about that. My folks passed away at an early age, as did his dad’s father. And though the time they had together was limited, he DID get to know his dad’s mother, and she absolutely adored him!

One of her gifts to him was his love of sweet potato pie. His grandmother had been born and raised in Louisiana and brought this southern treat with her when she and her husband moved out to the west coast in the 1950’s.

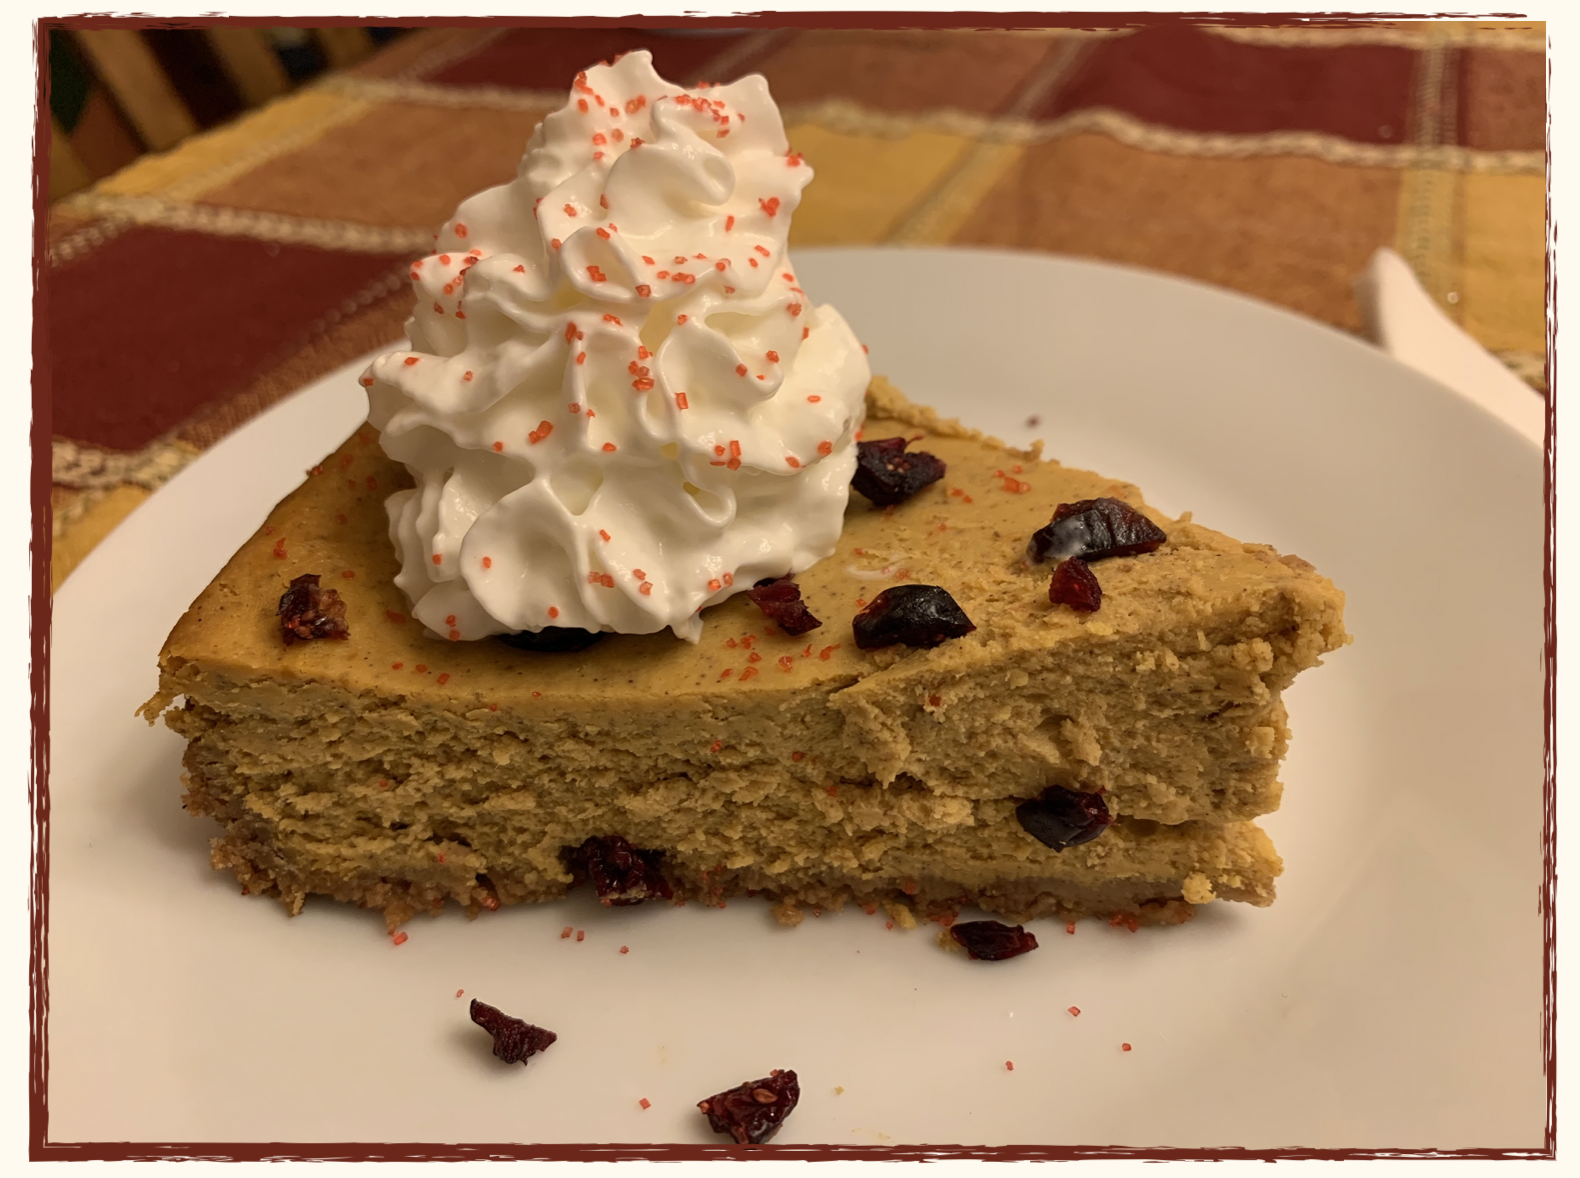
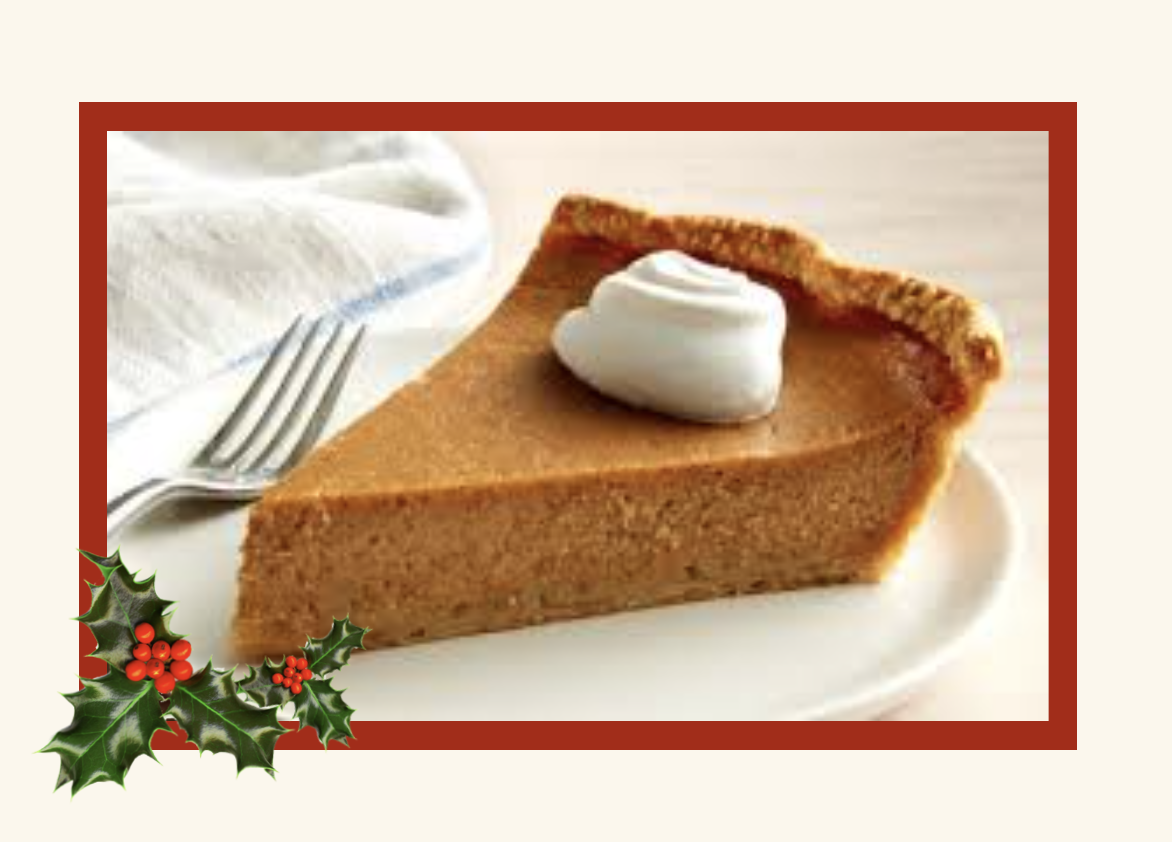
When he was young, he was quick to tell me my attempts were good, but not quite like his grandma’s, by now I think I’ve got it nailed. It’s a must-have for every holiday dessert table and it puts in an appearance for birthdays and other celebrations too.

It’s a lot like pumpkin pie, and yet, uniquely it’s own. Give it a try!

Ingredients:

  • 2 lbs sweet potatoes, baked and mashed

  • 1 cups granulated sugar

  • 1 cup brown sugar

  • 1 small can (5 ounces, about 1/2 cup plus 2 tablespoons) evaporated milk

  • 1 teaspoon vanilla

  • 4 eggs, beaten

  • 2 tablespoons pumpkin pie spice

  • 1/2 cup of butter (4oz)

  • 2 large pie shells, unbaked

Instructions:

  1. Mix warm mashed sweet potatoes, sugar, butter, and evaporated milk until well blended.

  2. Add vanilla, eggs, and pumpkin pie spice; mix well.

  3. Pour into the prepared pie shells.

  4. Bake at 350 degrees for about one hour, until set.

Share with friends and family!

Cream Cheese Pumpkin Dip

Need something that screams “Autumn!” to take to the PTA meeting, work luncheon, or other gathering? Didn’t have time to make your famous pumpkin loaf with cream cheese frosting? I gotchu!

This tasty cream cheese pumpkin dip takes just a few ingredients and a couple of minutes to whip up. It's creamy, tangy, pumpkiny deliciousness that every pumpkin spice enthusiast will love.

It's best served with the small. crisp ginger snaps that come in the bag, or the very thin Anna’s brand Swedish ginger thins… but neither could be found on local grocer shelves, so it's pictured with larger soft ginger cookies instead; just as yummy but unless cut into pieces might encourage double-dipping, a thing I know we’d all like to avoid! Apple wedges would also be an option.

Here’s how to make your own. Go ahead, take a dip!

Ingredients:

  • 8 oz cream cheese (1 pkg) room temperature

  • 1 cup canned pumpkin puree

  • 3/4 cups powdered sugar

  • 2 Tablespoons brown sugar

  • 1 1/2 teaspoons pumpkin pie spice

  • sprinkle of cinnamon

Directions:

In a medium sized bowl, mix all ingredients, except sprinkle of cinnamon, until well blended. You may use an electric mixer or immersion stick blender to make a smoother dip.

Transfer to serving bowl, sprinkle with a little cinnamon, and serve with your favorite fall cookie, cracker, or even crisp apple wedges!


Korean Soy-Pickled Cabbage

Korean Pickled Cabbage (with soy sauce & vinegar)

Pickled cabbage can add a kick to salads and a tang and crunch to a variety of dishes. It’s a fantastic side with rice to sesame or ginger chicken, or any teriyaki, and loved in our household as a simple and convenient snack.

Even though my friend, and house-helper Kimmy makes several batches weekly (so we always have some on hand in the refrigerator) it never lasts as long as she thinks it will!

There are countless variations on the basic recipe out there, but this is one she (and I) make often, and it’s so simple anyone can do it!

(Feel free to use your favorite cabbage, add a shredded carrot, or a few tablespoons of sugar to the brine for a little sweetness. Omit the pepper flakes if spice isn’t your thing!)

Ingredients:

  • 2 small heads of cabbage (any kind you want), shredded

  • 2 large white onions, thinly sliced

  • 1 whole head of garlic peeled and minced

  • 1 tablespoon pepper flakes (for kick)

  • 2 cups soy sauce (low sodium)

  • 1 cup rice (or white )vinegar

  • 4 clean, sterilized quart jars, or equivalent mixture of pints/quarts to equal approximately 1 gallon with clean, tight fitting lids.

Instructions:

  1. In a large bowl combine shredded cabbage (slice thinly or use a mandolin), onion, minced garlic, and red pepper flakes.

  2. Once well combined, divide among your clean, sterilized storage jars.

  3. Bring the soy sauce and vinegar to a boil in a saucepan, stir well, then pour into the jar covering the cabbage mixture making sure the liquid covers all cabbage. Let the jar sit on the counter while cooling to room temperature. You may leave out for a few days, the longer it’s left to “ripen”, the more intense the flavor will become. Refrigerate when ready.

  4. Pickled cabbage will keep in the refrigerator for several weeks and flavors will continue to ripen. Be sure to use a clean utensil when removing single servings from a jar so you do not introduce any bacteria into the mixture.

  5. Eat with rice as a side dish. 

Enjoy!


Cucumber - Onion Salad

Salad was on the table for every family meal my mother ever made. (Or at least something she'd refer to as salad. )

In the summer months, when the garden was "putting on", it would be thick slabs of beefsteak tomatoes on top of a slice of Wonder Bread slathered with Miracle Whip, with a generous dash of salt and pepper...

Or, on the rare occasion there wasn’t a tomato to be carved up, a bowl of cucumber and onion, marinated in a bit of water and vinegar for only the amount of time it took her to pound, dredge, and fry the round steak and boil the potatoes, would suffice. These too, we’d make an open-faced sandwich with - minus the Miracle Whip, plus a little butter - and call it “salad”!

I'm sharing the recipe with you today not because its new, or novel, or difficult, but for all the other reasons; it's old, it’s nostalgic, and it’s easy. It’s also cool and refreshingly delicious on a hot summer evening - like all the evenings have been as of late. Eat it as it was probably meant to be eaten - as a side salad - or try it with bread and butter like my folks always did. Either way, it’s yummy!

Cucumber - Onion Salad

Ingredients:

  • 1 large cucumber, peeled and sliced

  • 2-3 slices of sweet or red onion

  • 1/2 cup white vinegar

  • 1 cup cold water

  • 1 heaping Tablespoon of sugar

  • 1 teaspoon salt

  • 1 teaspoon pepper

Directions:

  1. Peel and slice cucumber, and slice onion - seperating rings. Place in a bowl and add vinegar, water, sugar, salt and pepper.

  2. Mix well.

  3. Refridgerate for at least 45 minutes.

  4. Serve.

Feel free to adjust the vinegar to water ratio, the sugar, and salt and pepper to taste! Enjoy this nostalgic taste of summer!


Lemon Angel Hair Pasta | Maria Martella (Repost)

I originally posted this recipe waaaay back in 2017. I had made a request via social media for you all to send me your favorite recipes, and Maria Martella came through for me!

It had been submitted as a good “winter” recipe, but it looks so refreshing and divine, I’m posting it again, in the middle of summer, because, well, lemon, and yum!

It looks like it could also easily be served cold and might just be the perfect thing to take to your next backyard gathering.

LEMON ANGEL HAIR PASTA
Submitted by Maria Martella

Ingredients:

  • 4 cups Chicken Stock

  • 2 cups Water

  • 1/2 lb Angel Hair Pasta

  • 1-2 T Extra Virgin Olive Oil

  • 3 lemons

  • 1 Head of Garlic (10-12 cloves)

  • 1/2 T crushed hot pepper flakes

  • 2T Oregano (or more to taste)

  • Shredded Parmesan Cheese generous amount

 Directions:

  1. Bring 4 cups of Chicken stock and 2 cups Water to boil in large pot.

  2. Add Angel Hair Pasta (or any thin variety), adjusting amounts of liquid as needed. Cook until al dente. Drain pasta; place liquid aside.

  3. In the meantime, heat EV Olive Oil in saute' pan.

  4. Wash, roll, and juice 3 lemons, and zest the rind lemons, into saute' pan, add crushed hot pepper flakes, minced, grated or whole garlic. and oregano. Saute' for approximately 5 minutes over medium-high heat.

  5. Toss lemon/pepper/garlic mixture in with pasta. Use a little of the liquid to loosen pasta if desired.

  6. Sprinkle liberally with shredded Parmesan cheese.

  7. Serve as a side to chicken, fish, or pork.
     

A note from Maria: This is so quick and easy, you can add, roasted vegetables, chicken or shrimp to make an entire meal. Use vegetable broth for a vegan side. Use mint, parsley, or basil, whatever you have on hand; the secret is in the fresh lemon juice and zest. Its very versatile, warms my soul and brightens it too! 


Rhubarb Compote

It’s rhubarb season!

These prehistoric-looking plants come into their full glory in late spring and if you are lucky (or unlucky) enough to have some in your garden, or your neighbor does, after the first few delicious pies and crumbles you begin to wonder… “What in the world do I do with it all?!”

This is about the time you find yourself offloading onto first grateful friends and then the unsuspecting masses - leaving bundles of the long red stems on porches and car hoods!

If you’re already tiring of sweet desserts here’s a recipe you may appreciate; Rhubarb Compote.

It is especially timely with Father’s Day around the corner as it adds something truly special to a masculine meal of savory pork chops pulled off the new grill he may have spent the day assembling!

The following recipe calls for honey, but it doesn’t make it sweet enough for my family’s liking. Feel free to add sugar or brown sugar to taste and also play with whatever ingredients you have on hand!

Sometimes diced green red or green bell pepper makes a tasty addition, as does a dash or two of soy sauce. It’s finding the right balance of sweet and savory that appeals to YOUR palate… so don’t be afraid to make it your own!

Ingredients:

  • 2 Tablespoons +/- olive oil

• 1/2 small onion, (red or sweet) diced

• 1 clove minced garlic

• 4 large stalks rhubarb, cut into 1/4-inch pieces

• Juice of 1 large orange

• 1 teaspoon grated fresh ginger

• 1/4 cup of honey

• 1 teaspoon salt

Directions:

  1. In a medium saucepan, heat the olive oil over medium-high. Add the onion, sautéing until tender and translucent. Add the garlic and cook for just another minute or two more.

  2. Lower the heat and add the rhubarb pieces, the orange juice, and freshly grated ginger. Combine well, and cook, stirring occasionally until the rhubarb is soft and tender. Do not cook so long as to turn the rhubarb to mush, you want some soft chunks to remain.

  3. Remove from heat. Add the honey and salt.

  4. Give it a taste test. Sweet enough? If not, add more honey or some brown sugar. Needs balance? Add another pinch of salt.

  5. Pull your chops from the grill and top generously with compote. Garnish with a spring of rosemary if you have it for a lovely presentation.

Bon Appetite, and Happy Father’s Day!

Bon Appetite, and Happy Father’s Day!

Teriyaki Salmon Skewers

Serving up a special brunch to Mom this coming Mother’s Day? Wow her with these tasty teriyaki salmon skewers on May 8th!

Super simple, super delicious, super special, after mixing up the teriyaki sauce, these come together quickly and are a complete show-stopper! They are rich in heart-healthy omega-3’s too! Serve with rice and your favorite veggies, or along side a mixed green salad for a full meal deal.

Mom - or any special lady in your life - will be impressed with your culinary skills and the care you took to show her that she deserves to be treated like the queen she is!

Serves 4

Ingredients:

  • 1 tablespoon sesame oil

  • 1 tablespoon minced garlic

  • 1 tablespoon minced ginger

  • 2/3 cup water + 2 tablespoons

  • 2/3 cup soy sauce

  • 1/3 cup sugar

  • 2 tablespoons rice vinegar

  • 2 tablespoons cornstarch

  • 2 lbs boneless, skinless salmon cut into 1-inch cubes

  • 8 - 8” wooden skewers - soaked in water for at least one hour to prevent burning

  • sesame seeds for garnish

Directions:

  1. Heat 1 tablespoon sesame oil in bottom of a small saucepan.

  2. Saute the minced garlic and ginger over med-low heat, about 1 minute.

  3. Turn heat to high, add the 2/3 cup water, soy sauce, sugar and vinegar and bring to a boil.

  4. Reduce heat to low, stirring until the sugar has completely dissolved.

  5. Mix the cornstarch with 2T water to dissolve, then whisk into sauce to thicken.

  6. Simmer for a few minutes.

  7. Divide sauce into 2 bowls, one for basting, the other for serving.

  1. Toss salmon chunks with half of the basting sauce then thread onto skewers using similar portions for each skewer (about 1/4 of a pound each).

  2. Arrange with space between each on baking tray and baste with more sauce.

  3. Place under broiler for 3-4 minutes, turning once, and basting before placing back under the broiler to finish cooking, another 3-4 minutes.

  4. Remove from broiler and sprinkle with sesame seeds before serving 2 skewers per person.

I know Mom is going to love this splendid and celebratory meal, and I hope it helps to make her day - and yours - a very special one.

I wish my own mama were here to spoil, but I’m sure she’ll be enjoying the equivalent of a Mother’s Day grand banquet in heaven. What a special gift we were given when we were given mothers! And equally, what a special gift it is to BE a mom.

Just one more way we’ve been blessed in this life full of blessings we live!

Helen's Chocolate Eggnog Pie

Several years ago a listener named Helen submitted a Chocolate Eggnog Pie recipe that became VERY popular. I shared the recipe on air one night during the holiday season and ever since then, I get requests for it year after year... 

Well, I forgot to share it this year, so I’m doing it now because as long as temps are low, the opportunity to get out and about is limited, and my sweet-tooth is activated, I think it’s a good time to eat pie!

Helen’s Chocolate Eggnog Pie

Ingredients:

CRUST:

  • 1 1/4 cups graham cracker crumbs

  • 1/4 cup sugar

  • 1/4 cup margarine or butter, melted

FILLING:

  • 2 cups eggnog

  • 6 oz (1 cup) chocolate chips

  • 1 tbsp unflavored gelatin

  • 1/4 cup milk

  • 1 cup heavy cream, whipped

Instructions:

  1. Combine crust ingredients. Press over bottom and upsides of an 8" pie dish or cake pan; set aside.

  2. Bring eggnog almost to simmering over low heat, stirring constantly.

  3. Add chocolate chips; stir until melted.

  4. Soften gelatin in milk; stir into eggnog mixture until thoroughly dissolved. Cool.

  5. Fold in whipped cream when mixture begins to thicken.

  6. Pour over graham cracker crust.

  7. Cover and refrigerate until set.

  8. To serve, cut into squares and garnish with additional whipped cream, if desired.

I’ve given this recipe to so many listeners over the years and they all rave about it. It’s one of those tried and true dishes sure to please!


Soup's On! Pozole

Cold weather is soup weather!

Whether you’re coming in dripping wet or shaking off snowflakes (Where I’m from it’s usually the first, but occasionally we DO get some of the other stuff!) a comforting bowl of steaming soup makes all the discomfort Old Man Winter can dish out quickly disappear!

A favorite that can be thrown together quickly is traditional Mexican pozole (posole) - a rich, brothy soup made with pork (or chicken), hominy, and red or green chiles. 

There are countless variations on the theme, and that’s one of the best things about it. As long as you have a big can of hominy in the pantry (Since discovering this soup many years ago, I always do!), some left-over meat, and chicken broth, you can modify and make-do! Here’s a few links to recipes on the web: Posole Rojo, Authentic Mexican Pozole, and Chicken Pozole Verde.

The bowl pictured above used well-seasoned pulled pork that was left over from taco’s the night before.

It was made by sautéing some onion in butter, then adding a 32oz box of chicken broth, 25oz can of white hominy, half a pound of pulled pork, a 4oz can of diced green chiles, and half a cup of salsa. Bring to a boil, then reduce and simmer 15 minutes before ladling into serving bowls.

Garnish (load it on!) with shredded cabbage, diced green onion, cilantro, and a generous squeeze of lime juice. Add radish and avocado if you have it!

Grilled corn tortilla’s (or tortilla chips) make a great addition too.

Years ago my sister called and said, “Do you remember being served hominy when we were growing up?” My answer was no - but my mouth did, and it wasn’t a pleasant memory! We laughed, because that was her recollection too.

Our grandfather grew a lot of corn in his abundant garden, and we both remember him making hominy by soaking dried corn kernels in a concoction of lye… and while we don’t actually remember it being served to us, we DO remember the result had a very unpleasant texture.

All this to say that canned hominy in your pozole is nothing like my childhood memories! Instead, it is hearty, slightly chewy, and quite delicious!

So, throw a big pot of pozole together sometime soon, make it as mild or a spicy as you please, and you’ll soon experience comfort as ancient as the Aztecs!

SCRUMPTIOUS | DECEMBER BOOK CLUB


Scrumptious

Oh December, delightful, decadent, delicious December!

So many things to do! So many things to make! So many things to eat!!! But if you (like me) have grown a little tired of the same-old, same-old, I’ve got a treat for you; a SCRUMPTIOUS treat!

My book club pick for the month of December is a big, beautiful cookbook, “Scrumptious”, by Christy Denny.

Christy has years of experience as a recipe writer for both Betty Crocker and General Mills, and writes the very popular blog, “The Girl Who Ate Everything”. (Woman after my own heart!) Her love of eating is life-long, and as one of 10 siblings, a wife, and mother of 5, cooking took it’s natural place in her life.

Scrumptious, is her second cookbook and it’s filled with over 100 recipes that are extremely family friendly! They are tasty, and thankfully, not overly-complicated. She heard her followers when they said they needed recipes to make their lives EASIER, and filled this cookbook with all the answers to the question of what to make for dinner, breakfast, and sweet treats. There are pages and pages of gorgeous photos, which are a feast for the eyes before even making it to the belly!

I’m especially happy with the big selection of One-Pan recipes, because, as a mom to too-many-to-count I’m usually looking to feed a big crew, fast! The ability to do this deliciously (and make a pretty presentation to boot) has me nearly breaking my arm patting myself on the back so enthusiastically! Scrumptious even has a whole low-carb/Keto-friendly chapter that Christy’s husband was heavily involved in making, that’s given me some great ideas when a few members of my big extended crew comes to visit.

This cookbook will make an EXCELLENT Christmas gift for anyone who, well, EATS. Young adults living on their own for the first time, couples, young families, established families, grandparents… Truly, it’s chock-full of fresh, fabulous ideas than anyone and everyone will find useful. And the results are absolutely scrumptious!

Get your copy HERE!

Christy Denney and her family.

Pumpkin Cheesecake

Mmmmm. I haven’t made my annual skating in Central Park trip to New York now for a few years. I miss seeing all my East Coast friends, I miss the city that never sleeps, Broadway performances, window displays, and boy, oh boy, do I miss Junior’s sandwiches and cheesecakes!!!

This little number showed up on a holiday table recently and alllllmost scratched my cheesecake itch. (The flavor was there, just not the jostling crowds, noises, and endless energy found in the Junior’s dining room!)

It’s your basic graham cracker crust cheesecake recipe, all dressed up in fall finery with the addition of 15oz of pumpkin and her spicy companions we just can’t seem to live without.

Wow your family and your guests, or simply indulge yourself with this decadent little treat.

Ingredients:

Crust:

  • 1 1/2 cups graham cracker crumbs

  • 6 Tbsp unsalted butter, melted

  • 1 Tbsp sugar

  • 1 tsp cinnamon

Filling:

  • 3 (8oz) packages cream cheese, softened

  • 1 1/2 cups packed light brown sugar

  • 15oz canned pumpkin

  • 4 large eggs

  • 1/4 cup sour cream

  • 2 tsp pumpkin pie spice

  • 1/4 tsp salt

  • 1 Tbsp vanilla extract

Directions:

Preheat Oven to 350˚F.

Crust:

1. Use a food processor to pulse graham crackers to create fine crumbs .

2. In a medium bowl, mix together graham cracker crumbs, melted butter, sugar, and cinnamon. Dump into a 9” springform cheesecake pan and use a cup, glass, or large spoon to press the mixture down covering the bottom of your cake pan and pushing 1/3-1/2 of the way up the sides.

3. Bake at 350˚F for 8-10 minutes. Allow to cool before adding cheesecake filling.

Filling:

  1. In a medium bowl, beat the cream cheese and brown sugar on smooth (no lumps, bumps, or chunks!).

  2. In a separate bowl, whisk together pumpkin, eggs, sour cream, pumpkin pie spice, salt and vanilla extract. Add this well-combined mixture to the cheesecake filling and continue mixing on low speed just until uniform in color and consistency.

  3. Pour filling into pre-baked crust, place in oven on middle rack, and bake at 350˚F for 1 hour. Turn off heat, prop the oven door open slightly, and allow to cool for 1 hour. *

  4. Remove from the oven and allow to cool a bit longer, until the cheesecake reaches room temperature. Then cover and refrigerated at least 4 hours or overnight.

  5. Just before serving, remove from its springform pan (run a knife along the sides, then release the spring and remove the rim.)

  6. Serve with whipped cream and a sprinkling of cinnamon or pumpkin spice mix.

    *Note - If you are comfortable doing so, use the water-bath method to bake. Cheesecakes love moist environments and this will help to prevent the top from cracking and the center from falling. (If you’re NOT all that comfortable with water-baths, skip it!)

Carrot Slaw

Putting dinner on the table during the darker months of the year always seems to be a rushed endeavor.

In the summer months when the sun is high well into the evening, and everyone is outside playing, I can move about the kitchen freely and holler for my family to come in when I’m ready for them. But now, it’s dark so soon after the kids get home from school that they are inside (often at the kitchen table doing their homework,) when it’s time to prepare the evening meal. The older ones often have things they need to hurry off to as soon as dinner is over and the younger ones need baths and bedtime routines. Can anyone relate?

I’ve got a few hacks to get a balanced meal on the table in a jiffy, and one of them is my mom’s carrot slaw.

Ingredients:

  • 3 large carrots, peeled and grated (about 3 cups)

  • 1 teaspoon apple cider vinegar

  • 1/2 cup raisins or dried cranberries (craisins)

  • 1/2 cup mayonnaise

  • 1 teaspoon salt

  • 1 Tablespoon sugar

  • (optional) chopped walnuts, pecans, or sunflower seeds

Directions:

  1. Peel and grate carrots,

  2. Place in large bowl and toss with vinegar.

  3. Add remaining ingredients and mix well.

  4. Serve immediately or refrigerate.

This comes together in a jiffy with ingredients most of us have on hand. It’s colorful and textural, a few things kids always seem to like, and it’s tasty!

Toss it together for a perfect pairing to roast beef or a roasted chicken, pork chops or round steak. (My folks used to tell me eating carrots would help me see in the dark… maybe that will help entice a little that is hesitant to try new foods.)

Enjoy!

Pumpkin Spice - Ooh So Nice!

IMG_2689.jpeg

The season of pumpkin spice EVERYTHING is upon us!

It’s a season I love, not just for it’s spice blend, but that certainly makes it all the sweeter! The fall harvest is in, and there are a pile of sugar pumpkins begging to be make into treats: pies, loaves, muffins, bars, cookies, and so much more! And what do they all call for? Pumpkin spice!

If you buy the mixture from your grocery store it can be pretty spendy. So I like to mix up a big batch from the mix of individual spices I alread have in my pantry, its far more economical and oh so handy to have it at the ready whenever I have a hankering.

Divided into smaller portions, it also makes a great gift for friends and neighbors, perhaps accompanying a batch pumpkin treats!

Here’s what you’ll need to mix up a batch (of about 10 Tablespoons):

Ingredients:

  • 6 Tbsp. ground cinnamon

  • 4 tsp. ground ginger

  • 4 tsp. ground nutmeg

  • 3 tsp.ground allspice

  • 3 tsp. ground cloves

Directions:

  1. Mix to blend thoroughly

  2. Store in airtight container(s)

Screen Shot 2021-10-03 at 4.22.27 PM.png
Delilah Logo.png


Back-to-School Blackberry Scones

Screen Shot 2021-08-31 at 1.07.25 PM.png

For most of the country, school is going to be back in session - IN PERSON - at least as we begin this new school year. I don’t know about yours, but MY kids are ecstatic!

Gone are the moans and groans I’ve grown used to over the nearly 40 years I’ve been at this motherhood thing, and in their place is such joy and enthusiasm over in-classroom learning I’ve never seen before! It’s got me excited too! (Yes, I DO realize the learning aspect has little to do with the anticipatory glee - it’s all about seeing friends again!!)

If you still have some plump juicy blackberries hanging around begging to be picked before the falls rains set in (Oh please, oh please, we NEED the fall rains!) all you need is a cup of them to mix up a batch of these scones and make your kids first school morning even sweeter than they could have imagined! If you go the extra step and add the lemon glaze, you’ll be so glad you did! It adds a touch of sweetness and the citrus is a nice crisp contrast to the soft warm sconce.

There are two main points to remember when it comes to making scones - one, it’s ALL ABOUT THE BUTTER. The colder, the better! And, don’t over-work the dough; give it a light touch, pat gently into place before cutting into wedges.

Give ‘em a try!

Blackberry Scones with Lemon Glaze

Ingredients:

Screen Shot 2021-08-31 at 1.04.53 PM.png
  • 3 cups all-purpose flour

  • 2/3 cup sugar

  • 2 teaspoons baking powder

  • 1/2 teaspoon baking soda

  • 1 teaspoon salt

  • 1/2 cup butter, cold and cut into cubes or you can use frozen butter and grate it in.

  • 1 egg, beaten

  • 1 1/4 cups heavy cream

  • 1 cup blackberries

For the glaze:

  • 1 cup powdered sugar

  • zest and juice of 1/2 lemon (about 1 Tablespoon of each)

  • splash of cream

Directions:

  1. Preheat oven to 375 degrees F.

  2. Whisk the dry ingredients together in a large bowl: flour, sugar, baking powder, baking soda, and salt.

  3. Next, add the cold butter. A pastry cutter works great if you’ve used cold butter cut into cubes. If you’ve grated in frozen butter, just toss it to coat well. (All butter should be no larger that pea-sized.)

  4. In another bowl, whisk egg and cream together. Combine with dry mixture, and mix with a fork, just enough until dough comes together.

  5. Add the berries to the dough, gently turning into the dough, trying not to squish too much juice out of the berry.

  6. Turn out the dough onto a lightly floured surface and pat into a round shape about 1” thick. Using a sharp knife dredged in flour, cut the round into about 8 wedges of the same size.

  7. Transfer to a a parchment-lined baking sheet and bake for 25-30 minutes, until golden brown on top.

  8. Serve warm or continue with the next step to add a lemon glaze.

  9. While the scones are baking, make the glaze. Mix 1 cup powdered sugar with the zest and the juice of 1/2 a lemon. Add a splash of cream if glaze is not thin enough. (Conversely, add more powdered sugar if you want a thicker glaze.)

  10. Brush warm scones with half the glaze, wait until they have cooled a little bit (10-15 minutes) and brush again. Serve.

Delilah Logo.png
Screen Shot 2021-08-31 at 1.08.12 PM.png

Oodles and Oodles of Zoodles!

Screen Shot 2021-07-15 at 10.21.27 AM.png

Zucchini growers know this truth, there are always waaaaaay too many zukes.

Most of us end up resorting to a sort of “ding dong ditch” with our over-abundant harvest - we hang bags of them on neighbors doorknobs and fence posts, place them on car hoods, and we put them in mailboxes; anywhere we know you’ll find them and hopefully EAT them! They are gladly given “gifts” from the garden (and relief from the constant worry of “what do we DO with them all????”)

Fellow produce producers, I’m here to help. When you’ve baked your last zucchini loaf, broiled your last zucchini spear, fried your last zucchini medalian, zoodles is the answer to all your, “what do I do with them now?!” zucchini questions.

There are many different “zoodle” makers out there and prices vary, but most are under $20 and come with a variety of attachments that can be used with other veggies too. Find them at any store that sells kitchen goods (Walmart, Bed Bath & Beyond, Target, Fred Meyer’s, etc.) I love mine, and the kids get a kick out of turning the little crank handle and watching it spit out long twisting threads of zucchini noodles.

We quick fry them in hot oil and either eat them as a side dish, or sometimes I’ll add shrimp, chicken, or pork and it becomes a meal-in-one. It’s got none of the carbs traditional noodles have, and loads more nutrients and fiber, so I feel pretty good about eating them along side a thick slice of homemade sourdough bread. (How’s that for rationalizing bad behavior?)

The best part is, we can go through pounds and pounds of our prolific little problem and save our bewildered neighbors the consternation of what THEY are going to do with the dozens of donations they’re finding on their doorstep daily!

Here’s a quick recipe if you’d like to try it out:

Ingredients:

  • Oodles of zoodles

  • Enough oil to coat the bottom of a fry pan - I’ve been using avocado oil, but you can use olive, coconut, or sesame oil - whichever you prefer.

  • Your favorite seasonings; salt, pepper, garlic, or any ethnic blend. (I like to pair Tex-Mex with shrimp, Italian for chicken, and Asian with pork.)

Directions:

  1. Heat oil in a fry pan large enough to hold your portion of zoodles * Note - the zoodles will reduce in size by about 1/2, you may want to work in batches for a large serving.

  2. Gently drop zoodles in hot oil, so that you hear a definite “sizzle”, allow to brown/caramelize before turning - approximately 2-3 minutes.

  3. Season with your favorite mixture. It can be as simple as salt and pepper, or you may decide to spice things up a bit with garlic, cayenne pepper, or an Italian, Mexican, or Asian blend.

  4. Turn gently once or twice, until zoodles have become translucent and are cooked through - less than 5 minutes.

  5. Serve as a side or add grilled shrimp, chicken, or pork for a satisfying all-in-one main.

Your zoodles, your way. Oodles of ‘em! I hope you enjoy!

Delilah Logo.png


Fresh Corn, Tomato, & Cucumber Salad

IMG_1383.jpeg

This colorful salad recently appeared at a family gathering.

Amongst delicious, but not the healthiest choices, (yes, I’m talking to you, bratwurst, Doritos, and potato salad!) it was a fresh, welcome addition to the early summer banquet table.

It’s easy to mix together, and you can adapt it to whatever you’ve got in the fridge.

Use the olive oil and vinegar you’ve got around. Regular, extra-virgin, rice, white wine, red wine, whatever. Try the recipe’s “secret ingredient” of Montreal Steak Seasoning (a dry mixture of salt, pepper, paprika, garlic, and who knows what) or substitute your favorite seasoning blend. Add avocado, rinsed and drained black beans, scallions if you don’t have red onion, mozzarella cheese, or feta crumbles… Add sunflower or roasted pumpkin seeds just before serving if that tickles your fancy. Your salad, your way.

Here’s the recipe for the one pictured!

Ingredients:

Facetune_16-06-2021-15-52-06.JPG
  • 1/4 cup olive oil 

  • 3 tablespoons rice vinegar

  • 3 generous tablespoons McCormick’s Montreal Steak Seasoning (or salt and freshly ground black pepper to taste)

  • 2 cans of whole kernel corn, drained, or 6 ears fresh corn cooked, cooled, and cut from cob (about 4 cups)

  • 2 cups grape or cherry tomatoes, halved

  • 2 large cucumbers, peeled, and diced

  • 1 large red bell pepper, seeds removed, diced

  • 1/2 large red onion, diced


Directions:

  1. Whisk together the oil, vinegar, and seasonings in a small bowl.

  2. Combine corn, tomatoes, cucumber, bell pepper, and red onion in a large bowl.

  3. Pour the vinaigrette over the veggies and toss to coat.

  4. Let stand for about 10-15 minutes then give a taste test and adjust seasonings if needed, adding salt, pepper, garlic or others (Italian blend) to your likings.

  5. Serve.

Fresh, light, and healthfully delicious. Go ahead and indulge in the other picnic favorites, but leave a little room on that flimsy paper plate for some of this goodness!

Perfect for your Father’s Day, 4th of July, or any summer gathering.

Delilah Logo.png


Dandelion Jelly (Sunshine in a Jar!)

Screen Shot 2021-05-04 at 8.31.45 PM.png

A few weeks ago I shared a post about dandelions to my Facebook page - It garnered over one thousand comments! Many of them were about dandelion jelly. I was intrigued.

I looked up a few recipes and sought the professional services of one of the top dandelion pickers in the country, (my almost three-year-old granddaughter, Rosalie,) to gather the necessary ingredients. Dandelion heads, lots of them.

Rosalie acquired her picking skills very early on and knew, by some deep intuition, that stems were absolutely unnecessary to the task, because she’s never bothered with them. It’s the big beautiful yellow bloom that we’re after, and wow, did she deliver!

If you have no interest what-so-ever in dandelion jelly, you’ll still delight in the photographs my daughter Shaylah took of her pretty little dandy plucker. They make my heart melt.

But if you ARE interested in how to make dandelion jelly, or as i like to call it, Sunshine in a Jar, read on:

IMG_4229.jpeg

Ingredients:

  • 1 Large Bowl of Dandelion Heads

  • 4 cups Boiling Water

  • 4 cups Granulated Sugar

  • 2 Tablespoons Lemon Juice

  • 1 packet Fruit Pectin

  • Steril Jelly Jars, Lids & Rings

  • Water-Bath Canner (and all supplies necessary to making jams and jellies: funnel, ladle, jar lifter, etc.)


Instructions:

  1. Pick a good sized bowl of clean, fresh, dandelion heads - no stems needed. (Make sure these are from an area free of herbicides, pesticides, animal droppings, and auto exhaust.)

  2. Next, cut or pinch off the bottom of the flower - the green bit that holds the petals together - until you have two heaping cups of dandelion petals.

  3. Place in a jar and pour 4 cups of boiling water over the petals.

  4. Let cool then put a lid on the jar and place in refrigerator over night.

  5. The following day, strain the dandelion tea from the petals, squeezing out all the liquid possible. Place the liquid in a stock pot on the stove, and dispose of the petals.

  6. Add the lemon juice and packet of fruit pectin to the tea and bring to a boil.

  7. Next, add the 4 cups of sugar to the mixture and bring to a boil again, boiling 1-2 minutes.

  8. Using a funnel. ladle the hot mixture into clean, sterile canning jars, place clean, sterile lids and rings on them, and tighten to just finger tight.

  9. Place in a water bath canner and process 10 minutes.

  10. Remove from water bath and place on kitchen towel. letting rest and set for the next 24 hours.

Keep and enjoy some for yourself and distribute the rest as springtime gifts to family and friends.

Everyone will love a little bit of sunshine in a jar!

It tastes a lot like honey with a hint of citrus, and is great on toast, english muffins, or scones!

And it’s sooooo much fun to make with little ones!

Delilah Logo.png

Special thanks to Rosalie for her pro picking skills, to Shaylah for the beautiful photographs, and to baby Alice, for cooperating long enough for her mama and big sister to complete the job!

Raised In The Kitchen | May Book Club

IMG_0734.jpeg

I looooove cooking for my large crazy crew!

Seems like I’m always in the kitchen with kids underfoot, over foot, beside me, betwixt me, on stools, and perched on a counter. I wouldn’t have it any other way. Cooking and eating is more than simple nourishment, it’s a time of togetherness; bonding, talking, laughing, and loving.

That’s what popular cooking blogger and author, Carrian Cheney, and I have in common! But the similarities end there, because I am anything BUT organized and thoughtful about my processes. She, however, is! And it’s our good luck that she has the ability to break things down into easily understandable steps, write it out, and share it with all of us. On her blog, and in her new book, Raised In The Kitchen, my May Book Club pick.

Carrian knows that cooking together as a family is the secret to not only raising children well prepared for adulthood but also to mixing ingredients beyond just the dough for cookies--love, unity, and combined hearts. She is well aware that family and memories are made one recipe at a time.

IMG_0831.jpeg

Raised In The Kitchen is a step-by-step guide that covers food prep to clean-up. It includes ingredient lists and easy-to-follow recipes as well as “dollops of heartwarming family stories, insights, and kid-friendly food activities to keep everyone from the tired and overwhelmed mom to the littlest of picky eaters focused on deliciousness in the kitchen.”

It’s got a whopping 75 recipes from basics (like fried eggs & baked potatoes) to beyond (like steak fajitas and chocolate cake,) with a natural progression as cooking skills are developed. Recipes include tips and tricks in the kitchen to build capabilities and confidence.

Raised in the Kitchen is a cookbook for parents and kids about much more than learning to love to cook. It's about bringing families together and then one day sending those little hands off to their own kitchens, where they will teach their own children the recipes, laughter, and love that shaped their lives.”

Screen Shot 2021-04-28 at 2.11.58 PM.png

Tips on Salt * Breads * Breakfast
Meat 101 * Side Dishes * Knife Safety 101
Main Dishes * Family Bakeoffs * Desserts

Raised In The Kitchen deserves a place in your cookbook library and will become thumb-worn with use as you and your children or grandchildren bond, and grow, and eat your way through every page!

Get Your Copy of Raised In The Kitchen!

Delilah Logo.png


Snowballs

Facetune_31-12-2020-17-24-05.jpg

These lovely powdered sugar-coated little morsels were a staple at every organized event I attended whilst growing up.

Called by various monikers, Mexican Wedding Cakes, Russian Tea Cakes, Polvorones, Viennese Sugar Balls… light crumbly butter cookies, that use no eggs or granulated sugar, were served at wedding and baby showers, receptions, Girl Scout meetings, Mother’s Tea… always present, always appreciated, always delicious!

And yet, they’re one of those things, like Divinity candy, I always counted on someone else to make. As time went on, I saw less and less of them on the treat table until these pecan pleasantries completely disappeared from my radar - and then my sis made a pile of them this year!

Oh what memories came flooding back! My best friends wedding shower that took place way too soon following our high school graduation, my Rainbow Girls days and the army of women that baked and fussed over us, and my grandmother’s nut mill (4 spring-mounted blades - pour the nuts into the jar, screw on the lid, and pump pump pump the spring top to chop, chop, chop the nuts inside!)

You may have snow in your neck of the woods, but in the Pacific Northwest ours is more of the liquid variety, so my sister packing Snowballs (and a snowman - cuz that’s how she rolls!) might be the only accumulation of white stuff around here. Sadly, they melted off the plate faster than anything I’ve ever witnessed out-of-doors!

Here’s the memory-laden recipe, make up a batch for a tasty January treat.

Ingredients:

IMG_9625.jpg
  • 1 cup butter, softened

  • 1/2 cup powdered sugar

  • 1/4 teaspoon salt

  • 1 teaspoon vanilla extract

  • 2 1/4 cups all-purpose flour

  • 1 cup chopped pecans

  • 1 cup powdered sugar for dusting


Directions:

  1. Preheat oven to 350 degrees F

  2. Chop pecans (a mini food processor comes in very handy) into very small pieces - (resembling crushed graham cracker.)

  3. in small bowl, combine flour, chopped pecans, and salt, mix until combined.

  4. in large bowl, cream the softened butter, with 1/2 cup powdered sugar and vanilla. Add the flour and pecan mixture to the butter mixture a little at a time. dough will be dry and crumbly.

  5. Pinch dough together to form balls about 1 Tablespoon in diameter, and place on ungreased cookie sheet.

  6. Bake at 350 degrees for about 12-15 minutes. Do not overbake!

  7. Roll in powdered sugar while warm, and once again when fully cooled.

  8. Store in airtight container up to 1 week, or lob a few towards friends and neighbors in a mock snowball fight!


Live Life Deliciously | November Book Club

Facetune_25-10-2020-15-30-16.JPG


Buy Live Life Deliciously

It’s fall, the tastiest time of year, and I’ve got a treat for all you foodies, holiday meal providers, and everyone who finds themselves in the position of putting dinner on the table every night!

Live Life Deliciously by Tara Teaspoon, is a large, sturdy, hardback cookbook that will stand up to the demands of new idea seekers, and the realities of a kitchen scene full of ingredients that often stray from their tidy confinements.

Subtitled,, “Recipes For Busy Weekdays & Leisurely Weekends”, I’d add to that “and great ideas for the holidays!”

It lets you in on some kitchen secrets for success, like an updated list of pantry staples, as well as kitchen essentials from pots & pans to parchment paper, and the convenience of mise en place. Novel appetizers and starters will have your family - and in ensuing years, your party guests - eagerly awaiting what’s next to come.

Pork Tenderloin with Adobo Lime Glaze

Pork Tenderloin with Adobo Lime Glaze

Some pages that are of keen interest to me, and I can’t wait to give a whirl, are the Roasted Cauliflower and Smoky Romesco veggie side, the Pork Tenderloin with Adobo Lime Glaze (Mmmmm), and the simplistic beauty of the Milling-Spice Christmas Tree Cake with Cream Cheese Frosting. Salads, dressings, and breakfast goodies are included too!

Give yourself the gift of Live Life Deliciously, and pick up copies for all your friends and family members who enjoy making new dishes or those who come home and stare into a fridge despairingly in the evenings.

It’s the season of abundance and Live Life Deliciously is FULL of all the good stuff needed to feed your family and your spirit. It’s been a long time since I’ve come across a cookbook I wanted to rave about, and this is it!

Order Live Life Deliciously

Delilah Logo.png