Food

Rhubarb Compote

It’s rhubarb season!

These prehistoric-looking plants come into their full glory in late spring and if you are lucky (or unlucky) enough to have some in your garden, or your neighbor does, after the first few delicious pies and crumbles you begin to wonder… “What in the world do I do with it all?!”

This is about the time you find yourself offloading onto first grateful friends and then the unsuspecting masses - leaving bundles of the long red stems on porches and car hoods!

If you’re already tiring of sweet desserts here’s a recipe you may appreciate; Rhubarb Compote.

It is especially timely with Father’s Day around the corner as it adds something truly special to a masculine meal of savory pork chops pulled off the new grill he may have spent the day assembling!

The following recipe calls for honey, but it doesn’t make it sweet enough for my family’s liking. Feel free to add sugar or brown sugar to taste and also play with whatever ingredients you have on hand!

Sometimes diced green red or green bell pepper makes a tasty addition, as does a dash or two of soy sauce. It’s finding the right balance of sweet and savory that appeals to YOUR palate… so don’t be afraid to make it your own!

Ingredients:

  • 2 Tablespoons +/- olive oil

• 1/2 small onion, (red or sweet) diced

• 1 clove minced garlic

• 4 large stalks rhubarb, cut into 1/4-inch pieces

• Juice of 1 large orange

• 1 teaspoon grated fresh ginger

• 1/4 cup of honey

• 1 teaspoon salt

Directions:

  1. In a medium saucepan, heat the olive oil over medium-high. Add the onion, sautéing until tender and translucent. Add the garlic and cook for just another minute or two more.

  2. Lower the heat and add the rhubarb pieces, the orange juice, and freshly grated ginger. Combine well, and cook, stirring occasionally until the rhubarb is soft and tender. Do not cook so long as to turn the rhubarb to mush, you want some soft chunks to remain.

  3. Remove from heat. Add the honey and salt.

  4. Give it a taste test. Sweet enough? If not, add more honey or some brown sugar. Needs balance? Add another pinch of salt.

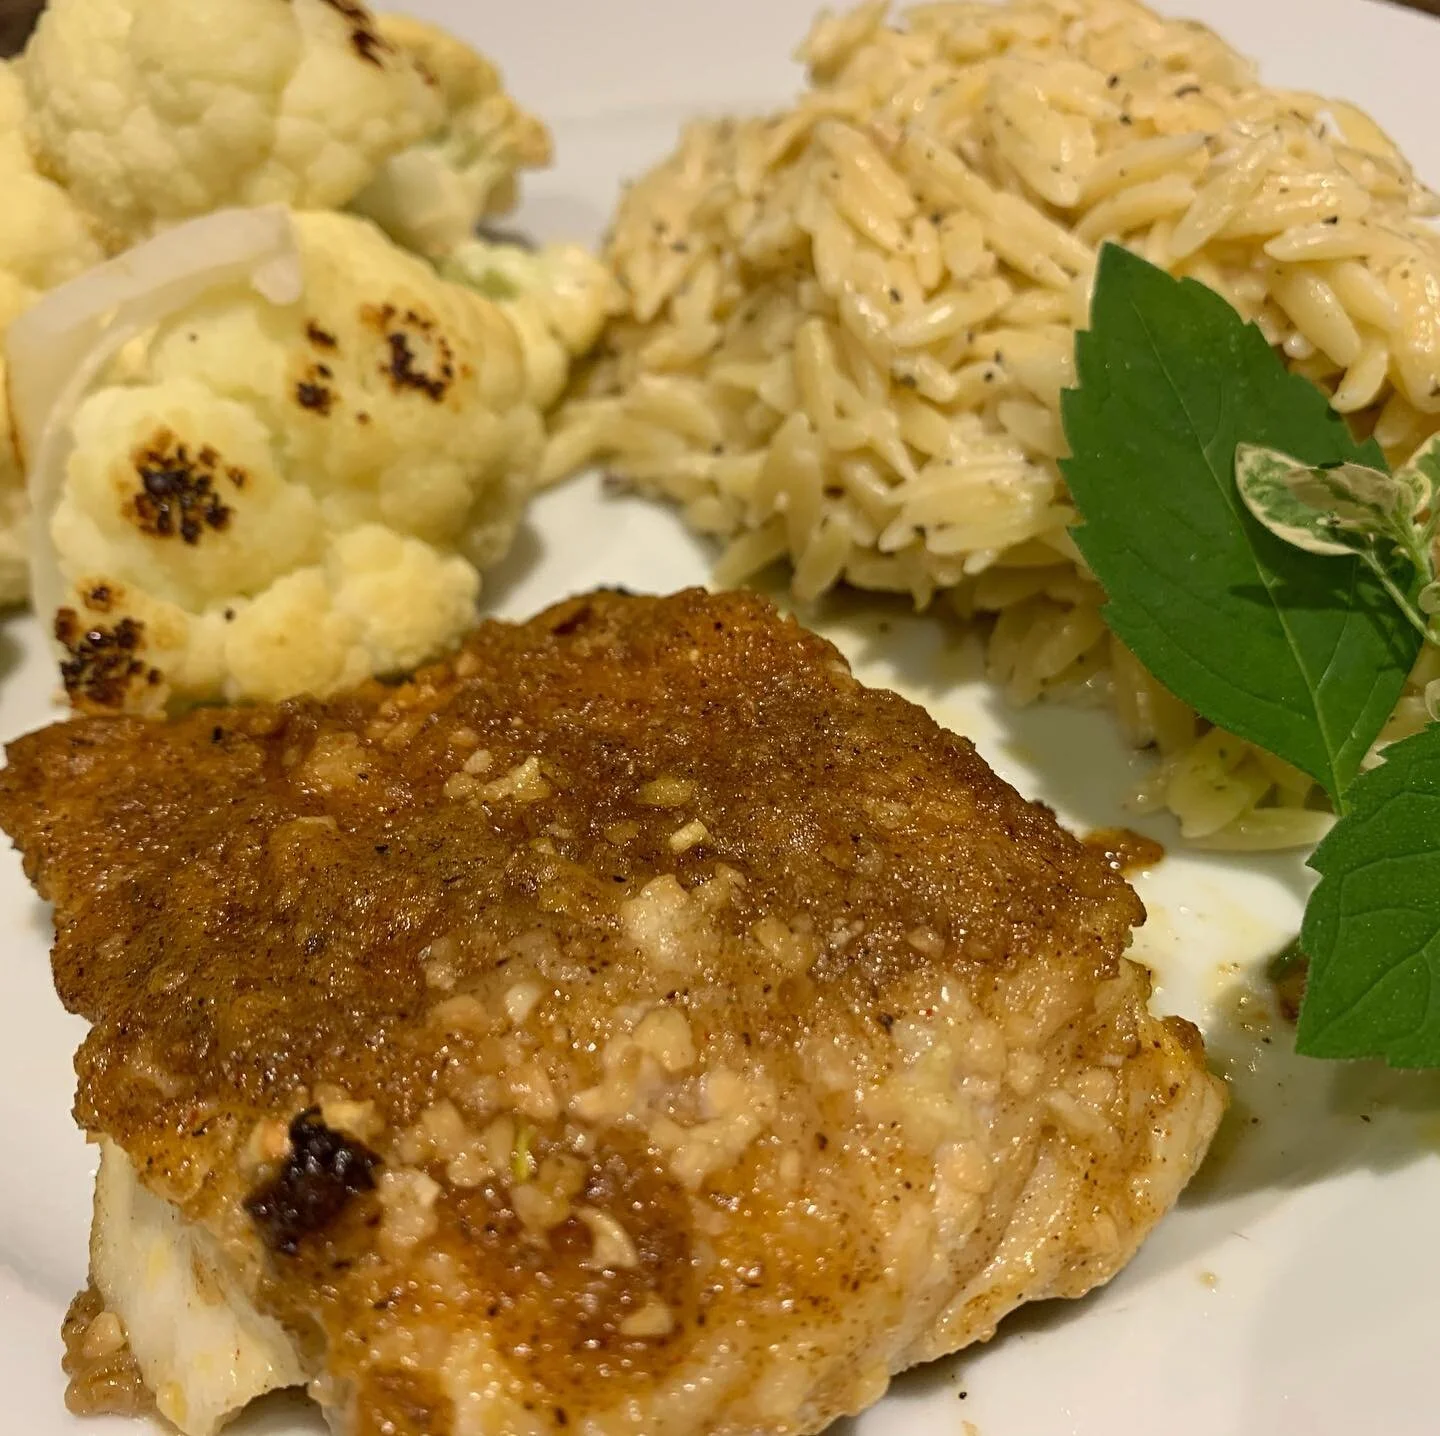
  5. Pull your chops from the grill and top generously with compote. Garnish with a spring of rosemary if you have it for a lovely presentation.

Bon Appetite, and Happy Father’s Day!

Bon Appetite, and Happy Father’s Day!

Teriyaki Salmon Skewers

Serving up a special brunch to Mom this coming Mother’s Day? Wow her with these tasty teriyaki salmon skewers on May 8th!

Super simple, super delicious, super special, after mixing up the teriyaki sauce, these come together quickly and are a complete show-stopper! They are rich in heart-healthy omega-3’s too! Serve with rice and your favorite veggies, or along side a mixed green salad for a full meal deal.

Mom - or any special lady in your life - will be impressed with your culinary skills and the care you took to show her that she deserves to be treated like the queen she is!

Serves 4

Ingredients:

  • 1 tablespoon sesame oil

  • 1 tablespoon minced garlic

  • 1 tablespoon minced ginger

  • 2/3 cup water + 2 tablespoons

  • 2/3 cup soy sauce

  • 1/3 cup sugar

  • 2 tablespoons rice vinegar

  • 2 tablespoons cornstarch

  • 2 lbs boneless, skinless salmon cut into 1-inch cubes

  • 8 - 8” wooden skewers - soaked in water for at least one hour to prevent burning

  • sesame seeds for garnish

Directions:

  1. Heat 1 tablespoon sesame oil in bottom of a small saucepan.

  2. Saute the minced garlic and ginger over med-low heat, about 1 minute.

  3. Turn heat to high, add the 2/3 cup water, soy sauce, sugar and vinegar and bring to a boil.

  4. Reduce heat to low, stirring until the sugar has completely dissolved.

  5. Mix the cornstarch with 2T water to dissolve, then whisk into sauce to thicken.

  6. Simmer for a few minutes.

  7. Divide sauce into 2 bowls, one for basting, the other for serving.

  1. Toss salmon chunks with half of the basting sauce then thread onto skewers using similar portions for each skewer (about 1/4 of a pound each).

  2. Arrange with space between each on baking tray and baste with more sauce.

  3. Place under broiler for 3-4 minutes, turning once, and basting before placing back under the broiler to finish cooking, another 3-4 minutes.

  4. Remove from broiler and sprinkle with sesame seeds before serving 2 skewers per person.

I know Mom is going to love this splendid and celebratory meal, and I hope it helps to make her day - and yours - a very special one.

I wish my own mama were here to spoil, but I’m sure she’ll be enjoying the equivalent of a Mother’s Day grand banquet in heaven. What a special gift we were given when we were given mothers! And equally, what a special gift it is to BE a mom.

Just one more way we’ve been blessed in this life full of blessings we live!

Helen's Chocolate Eggnog Pie

Several years ago a listener named Helen submitted a Chocolate Eggnog Pie recipe that became VERY popular. I shared the recipe on air one night during the holiday season and ever since then, I get requests for it year after year... 

Well, I forgot to share it this year, so I’m doing it now because as long as temps are low, the opportunity to get out and about is limited, and my sweet-tooth is activated, I think it’s a good time to eat pie!

Helen’s Chocolate Eggnog Pie

Ingredients:

CRUST:

  • 1 1/4 cups graham cracker crumbs

  • 1/4 cup sugar

  • 1/4 cup margarine or butter, melted

FILLING:

  • 2 cups eggnog

  • 6 oz (1 cup) chocolate chips

  • 1 tbsp unflavored gelatin

  • 1/4 cup milk

  • 1 cup heavy cream, whipped

Instructions:

  1. Combine crust ingredients. Press over bottom and upsides of an 8" pie dish or cake pan; set aside.

  2. Bring eggnog almost to simmering over low heat, stirring constantly.

  3. Add chocolate chips; stir until melted.

  4. Soften gelatin in milk; stir into eggnog mixture until thoroughly dissolved. Cool.

  5. Fold in whipped cream when mixture begins to thicken.

  6. Pour over graham cracker crust.

  7. Cover and refrigerate until set.

  8. To serve, cut into squares and garnish with additional whipped cream, if desired.

I’ve given this recipe to so many listeners over the years and they all rave about it. It’s one of those tried and true dishes sure to please!


Soup's On! Pozole

Cold weather is soup weather!

Whether you’re coming in dripping wet or shaking off snowflakes (Where I’m from it’s usually the first, but occasionally we DO get some of the other stuff!) a comforting bowl of steaming soup makes all the discomfort Old Man Winter can dish out quickly disappear!

A favorite that can be thrown together quickly is traditional Mexican pozole (posole) - a rich, brothy soup made with pork (or chicken), hominy, and red or green chiles. 

There are countless variations on the theme, and that’s one of the best things about it. As long as you have a big can of hominy in the pantry (Since discovering this soup many years ago, I always do!), some left-over meat, and chicken broth, you can modify and make-do! Here’s a few links to recipes on the web: Posole Rojo, Authentic Mexican Pozole, and Chicken Pozole Verde.

The bowl pictured above used well-seasoned pulled pork that was left over from taco’s the night before.

It was made by sautéing some onion in butter, then adding a 32oz box of chicken broth, 25oz can of white hominy, half a pound of pulled pork, a 4oz can of diced green chiles, and half a cup of salsa. Bring to a boil, then reduce and simmer 15 minutes before ladling into serving bowls.

Garnish (load it on!) with shredded cabbage, diced green onion, cilantro, and a generous squeeze of lime juice. Add radish and avocado if you have it!

Grilled corn tortilla’s (or tortilla chips) make a great addition too.

Years ago my sister called and said, “Do you remember being served hominy when we were growing up?” My answer was no - but my mouth did, and it wasn’t a pleasant memory! We laughed, because that was her recollection too.

Our grandfather grew a lot of corn in his abundant garden, and we both remember him making hominy by soaking dried corn kernels in a concoction of lye… and while we don’t actually remember it being served to us, we DO remember the result had a very unpleasant texture.

All this to say that canned hominy in your pozole is nothing like my childhood memories! Instead, it is hearty, slightly chewy, and quite delicious!

So, throw a big pot of pozole together sometime soon, make it as mild or a spicy as you please, and you’ll soon experience comfort as ancient as the Aztecs!

SCRUMPTIOUS | DECEMBER BOOK CLUB


Scrumptious

Oh December, delightful, decadent, delicious December!

So many things to do! So many things to make! So many things to eat!!! But if you (like me) have grown a little tired of the same-old, same-old, I’ve got a treat for you; a SCRUMPTIOUS treat!

My book club pick for the month of December is a big, beautiful cookbook, “Scrumptious”, by Christy Denny.

Christy has years of experience as a recipe writer for both Betty Crocker and General Mills, and writes the very popular blog, “The Girl Who Ate Everything”. (Woman after my own heart!) Her love of eating is life-long, and as one of 10 siblings, a wife, and mother of 5, cooking took it’s natural place in her life.

Scrumptious, is her second cookbook and it’s filled with over 100 recipes that are extremely family friendly! They are tasty, and thankfully, not overly-complicated. She heard her followers when they said they needed recipes to make their lives EASIER, and filled this cookbook with all the answers to the question of what to make for dinner, breakfast, and sweet treats. There are pages and pages of gorgeous photos, which are a feast for the eyes before even making it to the belly!

I’m especially happy with the big selection of One-Pan recipes, because, as a mom to too-many-to-count I’m usually looking to feed a big crew, fast! The ability to do this deliciously (and make a pretty presentation to boot) has me nearly breaking my arm patting myself on the back so enthusiastically! Scrumptious even has a whole low-carb/Keto-friendly chapter that Christy’s husband was heavily involved in making, that’s given me some great ideas when a few members of my big extended crew comes to visit.

This cookbook will make an EXCELLENT Christmas gift for anyone who, well, EATS. Young adults living on their own for the first time, couples, young families, established families, grandparents… Truly, it’s chock-full of fresh, fabulous ideas than anyone and everyone will find useful. And the results are absolutely scrumptious!

Get your copy HERE!

Christy Denney and her family.

Pumpkin Cheesecake

Mmmmm. I haven’t made my annual skating in Central Park trip to New York now for a few years. I miss seeing all my East Coast friends, I miss the city that never sleeps, Broadway performances, window displays, and boy, oh boy, do I miss Junior’s sandwiches and cheesecakes!!!

This little number showed up on a holiday table recently and alllllmost scratched my cheesecake itch. (The flavor was there, just not the jostling crowds, noises, and endless energy found in the Junior’s dining room!)

It’s your basic graham cracker crust cheesecake recipe, all dressed up in fall finery with the addition of 15oz of pumpkin and her spicy companions we just can’t seem to live without.

Wow your family and your guests, or simply indulge yourself with this decadent little treat.

Ingredients:

Crust:

  • 1 1/2 cups graham cracker crumbs

  • 6 Tbsp unsalted butter, melted

  • 1 Tbsp sugar

  • 1 tsp cinnamon

Filling:

  • 3 (8oz) packages cream cheese, softened

  • 1 1/2 cups packed light brown sugar

  • 15oz canned pumpkin

  • 4 large eggs

  • 1/4 cup sour cream

  • 2 tsp pumpkin pie spice

  • 1/4 tsp salt

  • 1 Tbsp vanilla extract

Directions:

Preheat Oven to 350˚F.

Crust:

1. Use a food processor to pulse graham crackers to create fine crumbs .

2. In a medium bowl, mix together graham cracker crumbs, melted butter, sugar, and cinnamon. Dump into a 9” springform cheesecake pan and use a cup, glass, or large spoon to press the mixture down covering the bottom of your cake pan and pushing 1/3-1/2 of the way up the sides.

3. Bake at 350˚F for 8-10 minutes. Allow to cool before adding cheesecake filling.

Filling:

  1. In a medium bowl, beat the cream cheese and brown sugar on smooth (no lumps, bumps, or chunks!).

  2. In a separate bowl, whisk together pumpkin, eggs, sour cream, pumpkin pie spice, salt and vanilla extract. Add this well-combined mixture to the cheesecake filling and continue mixing on low speed just until uniform in color and consistency.

  3. Pour filling into pre-baked crust, place in oven on middle rack, and bake at 350˚F for 1 hour. Turn off heat, prop the oven door open slightly, and allow to cool for 1 hour. *

  4. Remove from the oven and allow to cool a bit longer, until the cheesecake reaches room temperature. Then cover and refrigerated at least 4 hours or overnight.

  5. Just before serving, remove from its springform pan (run a knife along the sides, then release the spring and remove the rim.)

  6. Serve with whipped cream and a sprinkling of cinnamon or pumpkin spice mix.

    *Note - If you are comfortable doing so, use the water-bath method to bake. Cheesecakes love moist environments and this will help to prevent the top from cracking and the center from falling. (If you’re NOT all that comfortable with water-baths, skip it!)

Carrot Slaw

Putting dinner on the table during the darker months of the year always seems to be a rushed endeavor.

In the summer months when the sun is high well into the evening, and everyone is outside playing, I can move about the kitchen freely and holler for my family to come in when I’m ready for them. But now, it’s dark so soon after the kids get home from school that they are inside (often at the kitchen table doing their homework,) when it’s time to prepare the evening meal. The older ones often have things they need to hurry off to as soon as dinner is over and the younger ones need baths and bedtime routines. Can anyone relate?

I’ve got a few hacks to get a balanced meal on the table in a jiffy, and one of them is my mom’s carrot slaw.

Ingredients:

  • 3 large carrots, peeled and grated (about 3 cups)

  • 1 teaspoon apple cider vinegar

  • 1/2 cup raisins or dried cranberries (craisins)

  • 1/2 cup mayonnaise

  • 1 teaspoon salt

  • 1 Tablespoon sugar

  • (optional) chopped walnuts, pecans, or sunflower seeds

Directions:

  1. Peel and grate carrots,

  2. Place in large bowl and toss with vinegar.

  3. Add remaining ingredients and mix well.

  4. Serve immediately or refrigerate.

This comes together in a jiffy with ingredients most of us have on hand. It’s colorful and textural, a few things kids always seem to like, and it’s tasty!

Toss it together for a perfect pairing to roast beef or a roasted chicken, pork chops or round steak. (My folks used to tell me eating carrots would help me see in the dark… maybe that will help entice a little that is hesitant to try new foods.)

Enjoy!

Pumpkin Spice - Ooh So Nice!

IMG_2689.jpeg

The season of pumpkin spice EVERYTHING is upon us!

It’s a season I love, not just for it’s spice blend, but that certainly makes it all the sweeter! The fall harvest is in, and there are a pile of sugar pumpkins begging to be make into treats: pies, loaves, muffins, bars, cookies, and so much more! And what do they all call for? Pumpkin spice!

If you buy the mixture from your grocery store it can be pretty spendy. So I like to mix up a big batch from the mix of individual spices I alread have in my pantry, its far more economical and oh so handy to have it at the ready whenever I have a hankering.

Divided into smaller portions, it also makes a great gift for friends and neighbors, perhaps accompanying a batch pumpkin treats!

Here’s what you’ll need to mix up a batch (of about 10 Tablespoons):

Ingredients:

  • 6 Tbsp. ground cinnamon

  • 4 tsp. ground ginger

  • 4 tsp. ground nutmeg

  • 3 tsp.ground allspice

  • 3 tsp. ground cloves

Directions:

  1. Mix to blend thoroughly

  2. Store in airtight container(s)

Screen Shot 2021-10-03 at 4.22.27 PM.png
Delilah Logo.png


Back-to-School Blackberry Scones

Screen Shot 2021-08-31 at 1.07.25 PM.png

For most of the country, school is going to be back in session - IN PERSON - at least as we begin this new school year. I don’t know about yours, but MY kids are ecstatic!

Gone are the moans and groans I’ve grown used to over the nearly 40 years I’ve been at this motherhood thing, and in their place is such joy and enthusiasm over in-classroom learning I’ve never seen before! It’s got me excited too! (Yes, I DO realize the learning aspect has little to do with the anticipatory glee - it’s all about seeing friends again!!)

If you still have some plump juicy blackberries hanging around begging to be picked before the falls rains set in (Oh please, oh please, we NEED the fall rains!) all you need is a cup of them to mix up a batch of these scones and make your kids first school morning even sweeter than they could have imagined! If you go the extra step and add the lemon glaze, you’ll be so glad you did! It adds a touch of sweetness and the citrus is a nice crisp contrast to the soft warm sconce.

There are two main points to remember when it comes to making scones - one, it’s ALL ABOUT THE BUTTER. The colder, the better! And, don’t over-work the dough; give it a light touch, pat gently into place before cutting into wedges.

Give ‘em a try!

Blackberry Scones with Lemon Glaze

Ingredients:

Screen Shot 2021-08-31 at 1.04.53 PM.png
  • 3 cups all-purpose flour

  • 2/3 cup sugar

  • 2 teaspoons baking powder

  • 1/2 teaspoon baking soda

  • 1 teaspoon salt

  • 1/2 cup butter, cold and cut into cubes or you can use frozen butter and grate it in.

  • 1 egg, beaten

  • 1 1/4 cups heavy cream

  • 1 cup blackberries

For the glaze:

  • 1 cup powdered sugar

  • zest and juice of 1/2 lemon (about 1 Tablespoon of each)

  • splash of cream

Directions:

  1. Preheat oven to 375 degrees F.

  2. Whisk the dry ingredients together in a large bowl: flour, sugar, baking powder, baking soda, and salt.

  3. Next, add the cold butter. A pastry cutter works great if you’ve used cold butter cut into cubes. If you’ve grated in frozen butter, just toss it to coat well. (All butter should be no larger that pea-sized.)

  4. In another bowl, whisk egg and cream together. Combine with dry mixture, and mix with a fork, just enough until dough comes together.

  5. Add the berries to the dough, gently turning into the dough, trying not to squish too much juice out of the berry.

  6. Turn out the dough onto a lightly floured surface and pat into a round shape about 1” thick. Using a sharp knife dredged in flour, cut the round into about 8 wedges of the same size.

  7. Transfer to a a parchment-lined baking sheet and bake for 25-30 minutes, until golden brown on top.

  8. Serve warm or continue with the next step to add a lemon glaze.

  9. While the scones are baking, make the glaze. Mix 1 cup powdered sugar with the zest and the juice of 1/2 a lemon. Add a splash of cream if glaze is not thin enough. (Conversely, add more powdered sugar if you want a thicker glaze.)

  10. Brush warm scones with half the glaze, wait until they have cooled a little bit (10-15 minutes) and brush again. Serve.

Delilah Logo.png
Screen Shot 2021-08-31 at 1.08.12 PM.png

Oodles and Oodles of Zoodles!

Screen Shot 2021-07-15 at 10.21.27 AM.png

Zucchini growers know this truth, there are always waaaaaay too many zukes.

Most of us end up resorting to a sort of “ding dong ditch” with our over-abundant harvest - we hang bags of them on neighbors doorknobs and fence posts, place them on car hoods, and we put them in mailboxes; anywhere we know you’ll find them and hopefully EAT them! They are gladly given “gifts” from the garden (and relief from the constant worry of “what do we DO with them all????”)

Fellow produce producers, I’m here to help. When you’ve baked your last zucchini loaf, broiled your last zucchini spear, fried your last zucchini medalian, zoodles is the answer to all your, “what do I do with them now?!” zucchini questions.

There are many different “zoodle” makers out there and prices vary, but most are under $20 and come with a variety of attachments that can be used with other veggies too. Find them at any store that sells kitchen goods (Walmart, Bed Bath & Beyond, Target, Fred Meyer’s, etc.) I love mine, and the kids get a kick out of turning the little crank handle and watching it spit out long twisting threads of zucchini noodles.

We quick fry them in hot oil and either eat them as a side dish, or sometimes I’ll add shrimp, chicken, or pork and it becomes a meal-in-one. It’s got none of the carbs traditional noodles have, and loads more nutrients and fiber, so I feel pretty good about eating them along side a thick slice of homemade sourdough bread. (How’s that for rationalizing bad behavior?)

The best part is, we can go through pounds and pounds of our prolific little problem and save our bewildered neighbors the consternation of what THEY are going to do with the dozens of donations they’re finding on their doorstep daily!

Here’s a quick recipe if you’d like to try it out:

Ingredients:

  • Oodles of zoodles

  • Enough oil to coat the bottom of a fry pan - I’ve been using avocado oil, but you can use olive, coconut, or sesame oil - whichever you prefer.

  • Your favorite seasonings; salt, pepper, garlic, or any ethnic blend. (I like to pair Tex-Mex with shrimp, Italian for chicken, and Asian with pork.)

Directions:

  1. Heat oil in a fry pan large enough to hold your portion of zoodles * Note - the zoodles will reduce in size by about 1/2, you may want to work in batches for a large serving.

  2. Gently drop zoodles in hot oil, so that you hear a definite “sizzle”, allow to brown/caramelize before turning - approximately 2-3 minutes.

  3. Season with your favorite mixture. It can be as simple as salt and pepper, or you may decide to spice things up a bit with garlic, cayenne pepper, or an Italian, Mexican, or Asian blend.

  4. Turn gently once or twice, until zoodles have become translucent and are cooked through - less than 5 minutes.

  5. Serve as a side or add grilled shrimp, chicken, or pork for a satisfying all-in-one main.

Your zoodles, your way. Oodles of ‘em! I hope you enjoy!

Delilah Logo.png


Fresh Corn, Tomato, & Cucumber Salad

IMG_1383.jpeg

This colorful salad recently appeared at a family gathering.

Amongst delicious, but not the healthiest choices, (yes, I’m talking to you, bratwurst, Doritos, and potato salad!) it was a fresh, welcome addition to the early summer banquet table.

It’s easy to mix together, and you can adapt it to whatever you’ve got in the fridge.

Use the olive oil and vinegar you’ve got around. Regular, extra-virgin, rice, white wine, red wine, whatever. Try the recipe’s “secret ingredient” of Montreal Steak Seasoning (a dry mixture of salt, pepper, paprika, garlic, and who knows what) or substitute your favorite seasoning blend. Add avocado, rinsed and drained black beans, scallions if you don’t have red onion, mozzarella cheese, or feta crumbles… Add sunflower or roasted pumpkin seeds just before serving if that tickles your fancy. Your salad, your way.

Here’s the recipe for the one pictured!

Ingredients:

Facetune_16-06-2021-15-52-06.JPG
  • 1/4 cup olive oil 

  • 3 tablespoons rice vinegar

  • 3 generous tablespoons McCormick’s Montreal Steak Seasoning (or salt and freshly ground black pepper to taste)

  • 2 cans of whole kernel corn, drained, or 6 ears fresh corn cooked, cooled, and cut from cob (about 4 cups)

  • 2 cups grape or cherry tomatoes, halved

  • 2 large cucumbers, peeled, and diced

  • 1 large red bell pepper, seeds removed, diced

  • 1/2 large red onion, diced


Directions:

  1. Whisk together the oil, vinegar, and seasonings in a small bowl.

  2. Combine corn, tomatoes, cucumber, bell pepper, and red onion in a large bowl.

  3. Pour the vinaigrette over the veggies and toss to coat.

  4. Let stand for about 10-15 minutes then give a taste test and adjust seasonings if needed, adding salt, pepper, garlic or others (Italian blend) to your likings.

  5. Serve.

Fresh, light, and healthfully delicious. Go ahead and indulge in the other picnic favorites, but leave a little room on that flimsy paper plate for some of this goodness!

Perfect for your Father’s Day, 4th of July, or any summer gathering.

Delilah Logo.png


Dandelion Jelly (Sunshine in a Jar!)

Screen Shot 2021-05-04 at 8.31.45 PM.png

A few weeks ago I shared a post about dandelions to my Facebook page - It garnered over one thousand comments! Many of them were about dandelion jelly. I was intrigued.

I looked up a few recipes and sought the professional services of one of the top dandelion pickers in the country, (my almost three-year-old granddaughter, Rosalie,) to gather the necessary ingredients. Dandelion heads, lots of them.

Rosalie acquired her picking skills very early on and knew, by some deep intuition, that stems were absolutely unnecessary to the task, because she’s never bothered with them. It’s the big beautiful yellow bloom that we’re after, and wow, did she deliver!

If you have no interest what-so-ever in dandelion jelly, you’ll still delight in the photographs my daughter Shaylah took of her pretty little dandy plucker. They make my heart melt.

But if you ARE interested in how to make dandelion jelly, or as i like to call it, Sunshine in a Jar, read on:

IMG_4229.jpeg

Ingredients:

  • 1 Large Bowl of Dandelion Heads

  • 4 cups Boiling Water

  • 4 cups Granulated Sugar

  • 2 Tablespoons Lemon Juice

  • 1 packet Fruit Pectin

  • Steril Jelly Jars, Lids & Rings

  • Water-Bath Canner (and all supplies necessary to making jams and jellies: funnel, ladle, jar lifter, etc.)


Instructions:

  1. Pick a good sized bowl of clean, fresh, dandelion heads - no stems needed. (Make sure these are from an area free of herbicides, pesticides, animal droppings, and auto exhaust.)

  2. Next, cut or pinch off the bottom of the flower - the green bit that holds the petals together - until you have two heaping cups of dandelion petals.

  3. Place in a jar and pour 4 cups of boiling water over the petals.

  4. Let cool then put a lid on the jar and place in refrigerator over night.

  5. The following day, strain the dandelion tea from the petals, squeezing out all the liquid possible. Place the liquid in a stock pot on the stove, and dispose of the petals.

  6. Add the lemon juice and packet of fruit pectin to the tea and bring to a boil.

  7. Next, add the 4 cups of sugar to the mixture and bring to a boil again, boiling 1-2 minutes.

  8. Using a funnel. ladle the hot mixture into clean, sterile canning jars, place clean, sterile lids and rings on them, and tighten to just finger tight.

  9. Place in a water bath canner and process 10 minutes.

  10. Remove from water bath and place on kitchen towel. letting rest and set for the next 24 hours.

Keep and enjoy some for yourself and distribute the rest as springtime gifts to family and friends.

Everyone will love a little bit of sunshine in a jar!

It tastes a lot like honey with a hint of citrus, and is great on toast, english muffins, or scones!

And it’s sooooo much fun to make with little ones!

Delilah Logo.png

Special thanks to Rosalie for her pro picking skills, to Shaylah for the beautiful photographs, and to baby Alice, for cooperating long enough for her mama and big sister to complete the job!

Raised In The Kitchen | May Book Club

IMG_0734.jpeg

I looooove cooking for my large crazy crew!

Seems like I’m always in the kitchen with kids underfoot, over foot, beside me, betwixt me, on stools, and perched on a counter. I wouldn’t have it any other way. Cooking and eating is more than simple nourishment, it’s a time of togetherness; bonding, talking, laughing, and loving.

That’s what popular cooking blogger and author, Carrian Cheney, and I have in common! But the similarities end there, because I am anything BUT organized and thoughtful about my processes. She, however, is! And it’s our good luck that she has the ability to break things down into easily understandable steps, write it out, and share it with all of us. On her blog, and in her new book, Raised In The Kitchen, my May Book Club pick.

Carrian knows that cooking together as a family is the secret to not only raising children well prepared for adulthood but also to mixing ingredients beyond just the dough for cookies--love, unity, and combined hearts. She is well aware that family and memories are made one recipe at a time.

IMG_0831.jpeg

Raised In The Kitchen is a step-by-step guide that covers food prep to clean-up. It includes ingredient lists and easy-to-follow recipes as well as “dollops of heartwarming family stories, insights, and kid-friendly food activities to keep everyone from the tired and overwhelmed mom to the littlest of picky eaters focused on deliciousness in the kitchen.”

It’s got a whopping 75 recipes from basics (like fried eggs & baked potatoes) to beyond (like steak fajitas and chocolate cake,) with a natural progression as cooking skills are developed. Recipes include tips and tricks in the kitchen to build capabilities and confidence.

Raised in the Kitchen is a cookbook for parents and kids about much more than learning to love to cook. It's about bringing families together and then one day sending those little hands off to their own kitchens, where they will teach their own children the recipes, laughter, and love that shaped their lives.”

Screen Shot 2021-04-28 at 2.11.58 PM.png

Tips on Salt * Breads * Breakfast
Meat 101 * Side Dishes * Knife Safety 101
Main Dishes * Family Bakeoffs * Desserts

Raised In The Kitchen deserves a place in your cookbook library and will become thumb-worn with use as you and your children or grandchildren bond, and grow, and eat your way through every page!

Get Your Copy of Raised In The Kitchen!

Delilah Logo.png


Snowballs

Facetune_31-12-2020-17-24-05.jpg

These lovely powdered sugar-coated little morsels were a staple at every organized event I attended whilst growing up.

Called by various monikers, Mexican Wedding Cakes, Russian Tea Cakes, Polvorones, Viennese Sugar Balls… light crumbly butter cookies, that use no eggs or granulated sugar, were served at wedding and baby showers, receptions, Girl Scout meetings, Mother’s Tea… always present, always appreciated, always delicious!

And yet, they’re one of those things, like Divinity candy, I always counted on someone else to make. As time went on, I saw less and less of them on the treat table until these pecan pleasantries completely disappeared from my radar - and then my sis made a pile of them this year!

Oh what memories came flooding back! My best friends wedding shower that took place way too soon following our high school graduation, my Rainbow Girls days and the army of women that baked and fussed over us, and my grandmother’s nut mill (4 spring-mounted blades - pour the nuts into the jar, screw on the lid, and pump pump pump the spring top to chop, chop, chop the nuts inside!)

You may have snow in your neck of the woods, but in the Pacific Northwest ours is more of the liquid variety, so my sister packing Snowballs (and a snowman - cuz that’s how she rolls!) might be the only accumulation of white stuff around here. Sadly, they melted off the plate faster than anything I’ve ever witnessed out-of-doors!

Here’s the memory-laden recipe, make up a batch for a tasty January treat.

Ingredients:

IMG_9625.jpg
  • 1 cup butter, softened

  • 1/2 cup powdered sugar

  • 1/4 teaspoon salt

  • 1 teaspoon vanilla extract

  • 2 1/4 cups all-purpose flour

  • 1 cup chopped pecans

  • 1 cup powdered sugar for dusting


Directions:

  1. Preheat oven to 350 degrees F

  2. Chop pecans (a mini food processor comes in very handy) into very small pieces - (resembling crushed graham cracker.)

  3. in small bowl, combine flour, chopped pecans, and salt, mix until combined.

  4. in large bowl, cream the softened butter, with 1/2 cup powdered sugar and vanilla. Add the flour and pecan mixture to the butter mixture a little at a time. dough will be dry and crumbly.

  5. Pinch dough together to form balls about 1 Tablespoon in diameter, and place on ungreased cookie sheet.

  6. Bake at 350 degrees for about 12-15 minutes. Do not overbake!

  7. Roll in powdered sugar while warm, and once again when fully cooled.

  8. Store in airtight container up to 1 week, or lob a few towards friends and neighbors in a mock snowball fight!


Live Life Deliciously | November Book Club

Facetune_25-10-2020-15-30-16.JPG


Buy Live Life Deliciously

It’s fall, the tastiest time of year, and I’ve got a treat for all you foodies, holiday meal providers, and everyone who finds themselves in the position of putting dinner on the table every night!

Live Life Deliciously by Tara Teaspoon, is a large, sturdy, hardback cookbook that will stand up to the demands of new idea seekers, and the realities of a kitchen scene full of ingredients that often stray from their tidy confinements.

Subtitled,, “Recipes For Busy Weekdays & Leisurely Weekends”, I’d add to that “and great ideas for the holidays!”

It lets you in on some kitchen secrets for success, like an updated list of pantry staples, as well as kitchen essentials from pots & pans to parchment paper, and the convenience of mise en place. Novel appetizers and starters will have your family - and in ensuing years, your party guests - eagerly awaiting what’s next to come.

Pork Tenderloin with Adobo Lime Glaze

Pork Tenderloin with Adobo Lime Glaze

Some pages that are of keen interest to me, and I can’t wait to give a whirl, are the Roasted Cauliflower and Smoky Romesco veggie side, the Pork Tenderloin with Adobo Lime Glaze (Mmmmm), and the simplistic beauty of the Milling-Spice Christmas Tree Cake with Cream Cheese Frosting. Salads, dressings, and breakfast goodies are included too!

Give yourself the gift of Live Life Deliciously, and pick up copies for all your friends and family members who enjoy making new dishes or those who come home and stare into a fridge despairingly in the evenings.

It’s the season of abundance and Live Life Deliciously is FULL of all the good stuff needed to feed your family and your spirit. It’s been a long time since I’ve come across a cookbook I wanted to rave about, and this is it!

Order Live Life Deliciously

Delilah Logo.png


Ozark Chocolate Gravy

thumbnail_Facetune_28-08-2020-20-13-16.jpg

Recently, I found myself reminiscing about my grant-aunt and her chocolate gravy.

Though I was born and raised on the Oregon coast, my mother's family were transplants from the Ozark mountains. And, what they say about taking someone out of the country, but not taking the country out of them, was certainly true in this case.

Farmers turned timber workers, their customs, pronunciations, and foods were still very much reflective of generations of southern living.  While my grandmother for some reason, never cared for (or in her dialect "keered fer”) chocolate gravy, when her sister would visit, one of the first things she'd do is whip up a batch for us kids. 

Super sweet and rich, it's not something you'll want every day, but as the temps begin to dip, this southern comfort food might be very welcome some Sunday morning.

Ingredients:

  • 3 tablespoons all-purpose flour

  • ¼ cup baker’s cocoa powder

  • ¾ cup granulated sugar

  • 2 cups milk

  • 1 tablespoon butter, softened

  • 2 teaspoons vanilla

Directions:

  1. In a medium sized saucepan, whisk together flour, cocoa, and sugar.

  2. Pour milk into the mixture and whisk until well blended and smooth.

  3. Cook over medium heat, until thickened (7-10 minutes); stirring frequently so that it doesn’t scorch.

  4. Remove from heat, add butter and vanilla, stir vigorously until butter is melted.

  5. Serve immediately over flaky biscuits, croissants, toast , or ??? your choice!

I like to put some fresh fruit out with this morning treat to help temper the melt-your-teeth sweet richness of it all! Red rip strawberries, thick orange slices, or peach wedges would all be perfect accompaniments.

Delilah Logo.png


Greek-Style Baked Cod

cod.jpg

My nephew occasionally likes to flex his culinary muscles and serve up something delicious. Because he was evacuated from his Peace Corp volunteer position in Ecuador when the pandemic hit in March, he’s now living with his mom, and she benefits from his kitchen capers.

Recently he delighted her with this Greek-Style Baked Cod. Served alongside some creamy garlic orzo pasta and roasted cauliflower, it was a 5 star meal that left her bragging for the rest of the week. (We tend to do that about our kids, even when the great feat is making microwave popcorn without setting off the smoke alarm - but in this case it was warranted!)

This recipe calls for you to quickly pan-fry the cod pieces to brown, then place the cast-iron skillet (or other oven-proof cookware) into a hot oven to finish the cooking process. The citrus hits the palate first like a delightful little party, and the cod. light and flaky, is simply delicious! Enjoy!

Greek-Style Baked Cod:

Ingredients:

cod 2.jpg
  • 1.5 lb Cod fillet pieces (4–6 pieces)

  • 2-3 teaspoons of minced garlic (5-6 cloves)  

  • 5 tbsp fresh or bottled lime juice

  • 5 tbsp extra virgin olive oil

  • 2 tbsp melted butter

  • 1/3 cup all-purpose flour

  • 1 tsp ground coriander

  • 3/4 tsp sweet paprika 

  • 3/4 tsp ground cumin 

  • 3/4 tsp salt

  • 1/2 tsp black pepper

Instructions:

  1. Preheat oven to 400 degrees F.

  2. Mix lime juice, olive oil, and melted butter in a shallow bowl - set aside.

  3. Mix flour, spices, salt and pepper in another bowl - set aside.

  4. Dip fish in the lime and oil/butter, then dredge in flour mixture. Shake off excess flour. SAVE THE LIME JUICE MIX!!!

  5. Heat 2 tbsp olive oil in a cast iron skillet over medium-high heat. Place fish in hot oil, browning each side, but stopping shy of cooking through. Remove from heat.

  6. Add minced garlic to the lime juice mix and pour over the cod pieces.

  7. Place skillet with cod in preheated oven. Bake about 10 minutes. The fish should flake easily.

  8. Garnish with parsley or cilantro if desired.

  9. Serve immediately with sides of choice!

Delilah Logo.png

Recipe | Sourdough Starter

94093361_260533318327392_7801943565042450432_n.jpg

I am so blessed to have a number of nieces and nephews, now grown into remarkable young men and women, that brighten my life in countless ways. One such niecey, Laurel, is a newly-wed living in Chicago and working from home like so many of us during these times.

Laurel is bright, beautiful, and always takes actions based on intent. Recently she shared her ambitious quarantine activity of creating her own sourdough starter, and the resulting loaf of bread she made with it made my mouth water!

In Laurels own words - here’s how she approached the project:

“Very thrilled with my first sourdough loaf!!

Everyone says baking is a science and an art, which are two things that are not necessarily my specialities (especially science). However, I've spent the last eight days creating a starter from scratch, sticking to a feeding schedule, and being amazed at its growth and change.

Many blogs said it would take between 5-14 days for my starter to be ready. Given my past experience with baking, I had prepared for the long haul and unsure if it would even work. When my starter was ready on day 6/7, I was shocked!

And through the 30 hour process of baking this loaf, I was filled with hopes, expectations, fears, and curiosity at each step.

I know this season of life is crazy. But it too is filled with hopes, expectations, fears, frustrations, and more. My situation is so different than yours, but I hope that even though none of us know how long this will take, I pray that it hits the short end of the range, just like my starter did. And if it doesn't, I pray you can still see change, growth, progress, and find joy in it. And still, if not that--if your starter dies or your bread burns or turns out horrible--I pray that you can begin again.”

93973005_666464630782893_8755413166449491968_n.jpg

Remember how bright and beautiful I said she was??? Yep! Now you know what I’m talking about! If you don’t have a friend like I do that will share a bit of their starter with you, here’s what you need to do to create your own!

94259240_680939579361076_6743495041546715136_n.jpg

Sourdough Starter Recipe

Ingredients:

To begin the starter -

  • 1 cup whole wheat flour

  • 1/2 cup cool water

To “feed” the starter:

  • scant 1 cup Unbleached All-Purpose Flour

  • 1/2 cup room-temperature water

Instructions:

94128214_267457794650751_4311055251353370624_n.jpg
  1. Day 1: Combine the whole wheat flour with the cool water in a glass, crockery, stainless steel, or food-grade plastic container; a quart jar works perfectly!

  2. Mix everything thoroughly - If you put a lid on tightly and shake vigorously, this works too. Make sure there's no dry flour anywhere. Cover the container loosely and let the mixture sit at warm room temperature (about 70°F) for a full 24 hours.

  3. Day 2:  First things first, discard half of your mixture whether you see any activity or not (something is happening, trust me.)

  4. Now add a scant 1 cup Unbleached All-Purpose Flour, and 1/2 cup water.

  5. Mix well, cover loosely and let it set at room temperature for another 24 hours.

  6. Day 3: By now you’ll probably see fermentation happening - bubbling, expansion, etc. Now your “baby” is big enough to need twice-daily feedings.

  7. First, stir the starter thoroughly, then discard all but a generous 1/2 cup.

  8. Next, add another scant 1 cup Unbleached All-Purpose Flour, and 1/2 cup water to the starter. Mix starter, flour, and water, cover loosely, and let the mixture rest at room temperature until the next feeding (at least 8 hours/ideally 12 before repeating.)

  9. Day 4: Stir, then again measure out your generous 1/2 cup of starter that you will keep, discarding the rest.

  10. Feed, wait 8-12 hours and repeat the measuring, discarding, feeding step two more times.

  11. Day 5:  At the end of this day, your starter should be at least twice the size it was in the beginning, there should be lots and lots of bubbles, and it should smell fresh and tangy.

    If this isn’t what you’re seeing, repeat the measuring, discarding, feeding steps every 12 hours for 2-3 more days.

  12. Measure, discard, and feed one last time, then let rest for 6-8 hours.

  13. Follow the directions on your recipes of choice, using the amount of starter necessary.

    (It shouldn’t be more than about 1 cup.)

  14. Find a crock or jar use for storing your 1/2 cup of starter long-term. The top should be secure enough to prevent spilling, but loose enough to allow air flow (to keep the cultures alive.) Store in the refrigerator.

  15. Feed it once a week or more often if you are using frequently.

I hope your experiment goes splendidly and you are baking and making with your sourdough starter soon! What will you make?


Hot Cross Buns

thumbnail_image0.jpg

Easter Sunday is April 12, and not even the coronavirus can stop the holiest of holy days from arriving and blessing our lives! It will definitely be celebrated differently this year, no church services or community egg hunts, but perhaps the season will be even more meaningful, as we have been given (forced!) time to pause and to praise.

We will worship as a family, have a small egg hunt in the yard, and eat together. Of course there will be deviled eggs, and this year, thanks to a little inspiration from my niece, Charisa, we’ll all enjoy a traditional hot cross bun, with the non-traditional twist of chocolate chips instead of raisins or currants (which I would prefer, but my children will definitely like these better!)

These orange flavored spiced buns, loaded with treats, and marked with the sign of the cross will be a welcome addition to your Easter meal, whomever you’re enjoying it with, even if it’s just you! Enjoy!

INGREDIENTS:

For the dough:

Screen Shot 2020-03-31 at 11.30.14 AM.png
  • 4 cups all-purpose flour

  • 2 and 1/4 teaspoons fast-acting yeast

  • 1/2 cup sugar

  • 1 teaspoon ground cinnamon

  • 3/4 cup chocolate chips

  • 1 cup milk, warmed

  • 1/4 cup unsalted butter, melted

  • 1 large egg

  • 1/4 cup orange juice

  • Zest of 1 large orange

For the crosses:

  • 1/2 cup all-purpose flour

  • 1 tablespoon sugar

  • 1/4 cup water

For the glaze:

  • 1/4 cup sugar

  • 1/4 cup orange juice

DIRECTIONS:

  1. In a large bowl, whisk together the flour, yeast, sugar, and spice. Stir in the chocolate chips.

  2. Make a well in the center of the mixture, and add the milk, butter, egg, orange juice, and orange zest. Mix well, then bring everything together with your hands to form a sticky dough.

  3. Transfer the dough to a lightly floured surface, and knead for about 5 minutes until smooth and elastic. Place the dough into a lightly greased bowl.

  4. Cover with plastic wrap and leave to rise in a warm place for 1 hour, or until doubled in size.

  5. Divide the dough into 12 balls. Place them in a greased 9×13-inch baking pan, cover with plastic wrap, and leave to rise in a warm place for another hour, or until they are touching and doubled in size. (Coating the plastic wrap on the side touching the buns with cooking spray will help prevent sticking.)

  6. For the crosses, whisk together the flour and sugar. Stir in the water until smooth. Place into a piping bag (use a zip-lock baggie with the corner snipped away) and pipe crosses over the buns.

  7. Bake for 18 – 20 minutes, or until risen and golden brown.

  8. For the glaze, gently heat the sugar and orange juice in the microwave until the sugar has dissolved. Brush the glaze over the hot buns, and serve warm.

Delilah Logo.png

Rustic Mixed Berry Tart

IMG_6952.jpeg

It’s almost “Pi Day!” 3.14 happens on Saturday this year, and there’s no better day for making or eating pie than a weekend!

I’ve got a freezer full of berries from last year’s farm bounty. Blueberries, Marion Berries, Raspberries, and Gooseberries… Sometimes the purest in me likes a straight-up blackberry pie, or nostalgia reminds me of how my Grandpa Mac loved his gooseberry pie and I’ll feel the need to put one together, but for “Pi Day” this year, I’ll toss together a couple-three bags of whatever I grab from the freezer and make this rustic mixed berry tart.

I love the term “rustic” because it means I don’t even have to pretend I can make a pretty pie crust. I can’t, and moreover, I don’t want to! I leave that up to my talented baker friends who have time and passion I can’t muster for something that’s just going to be devoured by my tribe in minutes.

This is pretty in it’s own way however, and the sprinkling of raw sugar gives it a certain appeal that lattice work doesn’t hold… So grab some berries from your freezer (or the nearest frozen grocery aisle) and get to baking. Happy Pi Day!

Ingredients:

For the dough:

  • 6-3/4 oz. (1-1/2 cups) unbleached all-purpose flour

  • 2 tsp. granulated sugar

  • 1/2 tsp. table salt

  • 5-1/2 oz. (11 Tbs.) unsalted butter, cold, and cut into 1/2-inch cubes

  • 1 large egg yolk

  • 3 Tbs. whole milk

IMG_6954.jpeg

For the filling:

  • 4 - 5 cups mixed berries, your choice!

  • 1/4 cup granulated sugar

  • 1 tsp. finely grated lemon zest

  • 1 Tbs. all-purpose flour

  • 1/8 tsp. kosher salt

  • 1 large egg, beaten

  • 1 Tbs. raw sugar for sprinkling

Instructions:

Make the dough:

  • Place a large piece of parchment paper onto a somewhat heavy, rimmed baking sheet; set aside.

  • Combine the flour, sugar, and salt in a stand mixer with a paddle attachment, then add the butter and mix on low until mixture resembles coarse crumbs - about 2 minutes. (If mixing by hand, use a pastry cutter or two forks).

  • In a small bowl, mix the egg yolk and milk thoroughly, then add to flour mixture and beat, on low, until the dough begins to come together.

  • Turn the dough out onto pastry mat, and knead gently until it has a slightly elastic consistency.

  • Create a ball of dough, place onto a sheet of plastic wrap, press it into thick flat disc, wrap it, and place in refrigerator to rest for 20 minutes.

  • Remove from the refrigerator and allow to warm slightly if too cool to handle. Place some flour onto the pastry mat, and roll into a 13-15 inch round.

  • Transfer rolled dough onto the parchment-lined baking sheet.

Fill the tart:

  • Pre-Heat oven to 350°.

  • Toss the berry mixture with the flour, sugar, lemon zest, and salt n a large bowl. Add a little more sugar if using very tart berries.

  • Dump the berry mix in the center of the rolled dough, and leave about a 2-3 inch border. Fold the border over the top of the fruit in a somewhat rustic manner, to prevent berries from spilling out during baking.

  • Brush the dough evenly with the beaten egg and sprinkle sugar over the top of dough and fruit.

  • Bake until golden brown - about 55 minutes - expect some juices to leak onto the baking sheet.

  • Allow to cool on baking sheet or transfer to cooling rack. Slide onto a serving platter before slicing and serving. Vanilla ice cream or whipped cream is a delicious addition!