Food

Ozark Chocolate Gravy

thumbnail_Facetune_28-08-2020-20-13-16.jpg

Recently, I found myself reminiscing about my grant-aunt and her chocolate gravy.

Though I was born and raised on the Oregon coast, my mother's family were transplants from the Ozark mountains. And, what they say about taking someone out of the country, but not taking the country out of them, was certainly true in this case.

Farmers turned timber workers, their customs, pronunciations, and foods were still very much reflective of generations of southern living.  While my grandmother for some reason, never cared for (or in her dialect "keered fer”) chocolate gravy, when her sister would visit, one of the first things she'd do is whip up a batch for us kids. 

Super sweet and rich, it's not something you'll want every day, but as the temps begin to dip, this southern comfort food might be very welcome some Sunday morning.

Ingredients:

  • 3 tablespoons all-purpose flour

  • ¼ cup baker’s cocoa powder

  • ¾ cup granulated sugar

  • 2 cups milk

  • 1 tablespoon butter, softened

  • 2 teaspoons vanilla

Directions:

  1. In a medium sized saucepan, whisk together flour, cocoa, and sugar.

  2. Pour milk into the mixture and whisk until well blended and smooth.

  3. Cook over medium heat, until thickened (7-10 minutes); stirring frequently so that it doesn’t scorch.

  4. Remove from heat, add butter and vanilla, stir vigorously until butter is melted.

  5. Serve immediately over flaky biscuits, croissants, toast , or ??? your choice!

I like to put some fresh fruit out with this morning treat to help temper the melt-your-teeth sweet richness of it all! Red rip strawberries, thick orange slices, or peach wedges would all be perfect accompaniments.

Delilah Logo.png


Greek-Style Baked Cod

cod.jpg

My nephew occasionally likes to flex his culinary muscles and serve up something delicious. Because he was evacuated from his Peace Corp volunteer position in Ecuador when the pandemic hit in March, he’s now living with his mom, and she benefits from his kitchen capers.

Recently he delighted her with this Greek-Style Baked Cod. Served alongside some creamy garlic orzo pasta and roasted cauliflower, it was a 5 star meal that left her bragging for the rest of the week. (We tend to do that about our kids, even when the great feat is making microwave popcorn without setting off the smoke alarm - but in this case it was warranted!)

This recipe calls for you to quickly pan-fry the cod pieces to brown, then place the cast-iron skillet (or other oven-proof cookware) into a hot oven to finish the cooking process. The citrus hits the palate first like a delightful little party, and the cod. light and flaky, is simply delicious! Enjoy!

Greek-Style Baked Cod:

Ingredients:

cod 2.jpg
  • 1.5 lb Cod fillet pieces (4–6 pieces)

  • 2-3 teaspoons of minced garlic (5-6 cloves)  

  • 5 tbsp fresh or bottled lime juice

  • 5 tbsp extra virgin olive oil

  • 2 tbsp melted butter

  • 1/3 cup all-purpose flour

  • 1 tsp ground coriander

  • 3/4 tsp sweet paprika 

  • 3/4 tsp ground cumin 

  • 3/4 tsp salt

  • 1/2 tsp black pepper

Instructions:

  1. Preheat oven to 400 degrees F.

  2. Mix lime juice, olive oil, and melted butter in a shallow bowl - set aside.

  3. Mix flour, spices, salt and pepper in another bowl - set aside.

  4. Dip fish in the lime and oil/butter, then dredge in flour mixture. Shake off excess flour. SAVE THE LIME JUICE MIX!!!

  5. Heat 2 tbsp olive oil in a cast iron skillet over medium-high heat. Place fish in hot oil, browning each side, but stopping shy of cooking through. Remove from heat.

  6. Add minced garlic to the lime juice mix and pour over the cod pieces.

  7. Place skillet with cod in preheated oven. Bake about 10 minutes. The fish should flake easily.

  8. Garnish with parsley or cilantro if desired.

  9. Serve immediately with sides of choice!

Delilah Logo.png

Recipe | Sourdough Starter

94093361_260533318327392_7801943565042450432_n.jpg

I am so blessed to have a number of nieces and nephews, now grown into remarkable young men and women, that brighten my life in countless ways. One such niecey, Laurel, is a newly-wed living in Chicago and working from home like so many of us during these times.

Laurel is bright, beautiful, and always takes actions based on intent. Recently she shared her ambitious quarantine activity of creating her own sourdough starter, and the resulting loaf of bread she made with it made my mouth water!

In Laurels own words - here’s how she approached the project:

“Very thrilled with my first sourdough loaf!!

Everyone says baking is a science and an art, which are two things that are not necessarily my specialities (especially science). However, I've spent the last eight days creating a starter from scratch, sticking to a feeding schedule, and being amazed at its growth and change.

Many blogs said it would take between 5-14 days for my starter to be ready. Given my past experience with baking, I had prepared for the long haul and unsure if it would even work. When my starter was ready on day 6/7, I was shocked!

And through the 30 hour process of baking this loaf, I was filled with hopes, expectations, fears, and curiosity at each step.

I know this season of life is crazy. But it too is filled with hopes, expectations, fears, frustrations, and more. My situation is so different than yours, but I hope that even though none of us know how long this will take, I pray that it hits the short end of the range, just like my starter did. And if it doesn't, I pray you can still see change, growth, progress, and find joy in it. And still, if not that--if your starter dies or your bread burns or turns out horrible--I pray that you can begin again.”

93973005_666464630782893_8755413166449491968_n.jpg

Remember how bright and beautiful I said she was??? Yep! Now you know what I’m talking about! If you don’t have a friend like I do that will share a bit of their starter with you, here’s what you need to do to create your own!

94259240_680939579361076_6743495041546715136_n.jpg

Sourdough Starter Recipe

Ingredients:

To begin the starter -

  • 1 cup whole wheat flour

  • 1/2 cup cool water

To “feed” the starter:

  • scant 1 cup Unbleached All-Purpose Flour

  • 1/2 cup room-temperature water

Instructions:

94128214_267457794650751_4311055251353370624_n.jpg
  1. Day 1: Combine the whole wheat flour with the cool water in a glass, crockery, stainless steel, or food-grade plastic container; a quart jar works perfectly!

  2. Mix everything thoroughly - If you put a lid on tightly and shake vigorously, this works too. Make sure there's no dry flour anywhere. Cover the container loosely and let the mixture sit at warm room temperature (about 70°F) for a full 24 hours.

  3. Day 2:  First things first, discard half of your mixture whether you see any activity or not (something is happening, trust me.)

  4. Now add a scant 1 cup Unbleached All-Purpose Flour, and 1/2 cup water.

  5. Mix well, cover loosely and let it set at room temperature for another 24 hours.

  6. Day 3: By now you’ll probably see fermentation happening - bubbling, expansion, etc. Now your “baby” is big enough to need twice-daily feedings.

  7. First, stir the starter thoroughly, then discard all but a generous 1/2 cup.

  8. Next, add another scant 1 cup Unbleached All-Purpose Flour, and 1/2 cup water to the starter. Mix starter, flour, and water, cover loosely, and let the mixture rest at room temperature until the next feeding (at least 8 hours/ideally 12 before repeating.)

  9. Day 4: Stir, then again measure out your generous 1/2 cup of starter that you will keep, discarding the rest.

  10. Feed, wait 8-12 hours and repeat the measuring, discarding, feeding step two more times.

  11. Day 5:  At the end of this day, your starter should be at least twice the size it was in the beginning, there should be lots and lots of bubbles, and it should smell fresh and tangy.

    If this isn’t what you’re seeing, repeat the measuring, discarding, feeding steps every 12 hours for 2-3 more days.

  12. Measure, discard, and feed one last time, then let rest for 6-8 hours.

  13. Follow the directions on your recipes of choice, using the amount of starter necessary.

    (It shouldn’t be more than about 1 cup.)

  14. Find a crock or jar use for storing your 1/2 cup of starter long-term. The top should be secure enough to prevent spilling, but loose enough to allow air flow (to keep the cultures alive.) Store in the refrigerator.

  15. Feed it once a week or more often if you are using frequently.

I hope your experiment goes splendidly and you are baking and making with your sourdough starter soon! What will you make?


Hot Cross Buns

thumbnail_image0.jpg

Easter Sunday is April 12, and not even the coronavirus can stop the holiest of holy days from arriving and blessing our lives! It will definitely be celebrated differently this year, no church services or community egg hunts, but perhaps the season will be even more meaningful, as we have been given (forced!) time to pause and to praise.

We will worship as a family, have a small egg hunt in the yard, and eat together. Of course there will be deviled eggs, and this year, thanks to a little inspiration from my niece, Charisa, we’ll all enjoy a traditional hot cross bun, with the non-traditional twist of chocolate chips instead of raisins or currants (which I would prefer, but my children will definitely like these better!)

These orange flavored spiced buns, loaded with treats, and marked with the sign of the cross will be a welcome addition to your Easter meal, whomever you’re enjoying it with, even if it’s just you! Enjoy!

INGREDIENTS:

For the dough:

Screen Shot 2020-03-31 at 11.30.14 AM.png
  • 4 cups all-purpose flour

  • 2 and 1/4 teaspoons fast-acting yeast

  • 1/2 cup sugar

  • 1 teaspoon ground cinnamon

  • 3/4 cup chocolate chips

  • 1 cup milk, warmed

  • 1/4 cup unsalted butter, melted

  • 1 large egg

  • 1/4 cup orange juice

  • Zest of 1 large orange

For the crosses:

  • 1/2 cup all-purpose flour

  • 1 tablespoon sugar

  • 1/4 cup water

For the glaze:

  • 1/4 cup sugar

  • 1/4 cup orange juice

DIRECTIONS:

  1. In a large bowl, whisk together the flour, yeast, sugar, and spice. Stir in the chocolate chips.

  2. Make a well in the center of the mixture, and add the milk, butter, egg, orange juice, and orange zest. Mix well, then bring everything together with your hands to form a sticky dough.

  3. Transfer the dough to a lightly floured surface, and knead for about 5 minutes until smooth and elastic. Place the dough into a lightly greased bowl.

  4. Cover with plastic wrap and leave to rise in a warm place for 1 hour, or until doubled in size.

  5. Divide the dough into 12 balls. Place them in a greased 9×13-inch baking pan, cover with plastic wrap, and leave to rise in a warm place for another hour, or until they are touching and doubled in size. (Coating the plastic wrap on the side touching the buns with cooking spray will help prevent sticking.)

  6. For the crosses, whisk together the flour and sugar. Stir in the water until smooth. Place into a piping bag (use a zip-lock baggie with the corner snipped away) and pipe crosses over the buns.

  7. Bake for 18 – 20 minutes, or until risen and golden brown.

  8. For the glaze, gently heat the sugar and orange juice in the microwave until the sugar has dissolved. Brush the glaze over the hot buns, and serve warm.

Delilah Logo.png

Rustic Mixed Berry Tart

IMG_6952.jpeg

It’s almost “Pi Day!” 3.14 happens on Saturday this year, and there’s no better day for making or eating pie than a weekend!

I’ve got a freezer full of berries from last year’s farm bounty. Blueberries, Marion Berries, Raspberries, and Gooseberries… Sometimes the purest in me likes a straight-up blackberry pie, or nostalgia reminds me of how my Grandpa Mac loved his gooseberry pie and I’ll feel the need to put one together, but for “Pi Day” this year, I’ll toss together a couple-three bags of whatever I grab from the freezer and make this rustic mixed berry tart.

I love the term “rustic” because it means I don’t even have to pretend I can make a pretty pie crust. I can’t, and moreover, I don’t want to! I leave that up to my talented baker friends who have time and passion I can’t muster for something that’s just going to be devoured by my tribe in minutes.

This is pretty in it’s own way however, and the sprinkling of raw sugar gives it a certain appeal that lattice work doesn’t hold… So grab some berries from your freezer (or the nearest frozen grocery aisle) and get to baking. Happy Pi Day!

Ingredients:

For the dough:

  • 6-3/4 oz. (1-1/2 cups) unbleached all-purpose flour

  • 2 tsp. granulated sugar

  • 1/2 tsp. table salt

  • 5-1/2 oz. (11 Tbs.) unsalted butter, cold, and cut into 1/2-inch cubes

  • 1 large egg yolk

  • 3 Tbs. whole milk

IMG_6954.jpeg

For the filling:

  • 4 - 5 cups mixed berries, your choice!

  • 1/4 cup granulated sugar

  • 1 tsp. finely grated lemon zest

  • 1 Tbs. all-purpose flour

  • 1/8 tsp. kosher salt

  • 1 large egg, beaten

  • 1 Tbs. raw sugar for sprinkling

Instructions:

Make the dough:

  • Place a large piece of parchment paper onto a somewhat heavy, rimmed baking sheet; set aside.

  • Combine the flour, sugar, and salt in a stand mixer with a paddle attachment, then add the butter and mix on low until mixture resembles coarse crumbs - about 2 minutes. (If mixing by hand, use a pastry cutter or two forks).

  • In a small bowl, mix the egg yolk and milk thoroughly, then add to flour mixture and beat, on low, until the dough begins to come together.

  • Turn the dough out onto pastry mat, and knead gently until it has a slightly elastic consistency.

  • Create a ball of dough, place onto a sheet of plastic wrap, press it into thick flat disc, wrap it, and place in refrigerator to rest for 20 minutes.

  • Remove from the refrigerator and allow to warm slightly if too cool to handle. Place some flour onto the pastry mat, and roll into a 13-15 inch round.

  • Transfer rolled dough onto the parchment-lined baking sheet.

Fill the tart:

  • Pre-Heat oven to 350°.

  • Toss the berry mixture with the flour, sugar, lemon zest, and salt n a large bowl. Add a little more sugar if using very tart berries.

  • Dump the berry mix in the center of the rolled dough, and leave about a 2-3 inch border. Fold the border over the top of the fruit in a somewhat rustic manner, to prevent berries from spilling out during baking.

  • Brush the dough evenly with the beaten egg and sprinkle sugar over the top of dough and fruit.

  • Bake until golden brown - about 55 minutes - expect some juices to leak onto the baking sheet.

  • Allow to cool on baking sheet or transfer to cooling rack. Slide onto a serving platter before slicing and serving. Vanilla ice cream or whipped cream is a delicious addition!

Tasty Lentil Coconut Curry

IMG_6838.jpeg

Whole grains and legumes are packed with fiber and nutrients. I love cooking with them and serving them up to my family, but sometimes I get stuck in a rut. Does this sound like you?

That’s why I was excited when a friend brought over this super yummy lentil coconut curry dish for us to try. It was packed full of fresh ingredients, flavor, and fiber, and it was oh-so filling!

It would be a perfect dish to try on a “Meatless Monday,” if you’re into that. I really enjoyed the leftovers as they seemed to be even more flavorful after all the spices and ingredients had a chance to hang out together over-night in my fridge.

Give this a try and let me know what you think!

ps - I added a “Supercheat” if you are more like me than we sometimes want to admit, and find yourself long on intention, but short on time or patience… scroll to the bottom for my suggestion.

Lentil Coconut Curry

Ingredients:

IMG_6833.jpeg
  • 3 tablespoons coconut oil

  • 1 full head of garlic, chopped

  • 1 16-ounce can of diced tomatoes

  • 2 tablespoons freshly grated ginger

  • 1 tablespoon turmeric powder

  • 1 tablespoon ground cumin

  • 1 teaspoon cayenne pepper

  • 2 teaspoons sea salt

  • 1 cup dried lentils

  •  3 cups of water

  • 1 13-ounce can of coconut milk 

  • 1 cup chopped fresh cilantro

Instructions:

IMG_6834.jpeg
  1. Using a large pot or skillet, saute’ chopped garlic in coconut oil over medium-high heat until softened and a bit browned. 2-3 minutes

  2. Add diced tomatoes, grated ginger, cumin, turmeric, and sea salt. Cook for 5 minutes, stirring the mixture so that it heats evenly and does not stick to bottom of pot.

  3. Add the water, dry lentils, and the cayenne pepper to the pot and bring it to a boil. Reduce the heat to low, cover, and let it simmer for about 30 minutes or until the lentils are cooked and have softened. Stir a few times so nothing sticks to the bottom of the pot.

  4. Once mixture has thickened, and the lentils are soft, add the coconut milk and bring the pot back to simmer for a few minutes.

  5. Stir in chopped fresh cilantro before serving over basmati or jasmine rice.

Supercheat:
Use a can of diced tomatoes, a can (or two) of lentils, a couple large dollops of curry paste, a can of coconut milk, and finish off with fresh cilantro. No, it won’t be as good, but it will still be yummy, warm, and filling!

Recipe | Cake Batter Protein Bites

IMG_0260.JPG

Love is in the air…

Valentine’s Day might have been conceived as a marketing ploy by the holiday card companies but it is one of my favorite days of the year. And while my motto is to Love Someone all year long, it is nice that there’s a whole 24 hours dedicated to spending quality time with your sweetheart (or whomever it is you love & adore).

Baking an entire cake from scratch on a weekday is a find aspiration, but sometimes just isn’t in the cards (heart-shaped ones or not!) because of our busy lives. So often, we’re then tempted to grab something from the nearest grocery or convenience mart that comes in a box and is guaranteed to be full of processed coloring and added sugars.

So, if you are anything like me and are trying to stay healthy-ish as we embark upon a new decade, but still want to enjoy a sweet TREAT this Valentine’s Day…do I have a sweetheart of a deal for you with these delicious little protein bites!

CAKE BATTER PROTEIN BITES

NO BAKING REQUIRED!
Serving Size: 18-20

Ingredients:

IMG_0261.JPG
  • 3 cups Coconut Flakes

  • 3 cups Organic Coconut Oil, melted

  • 3/4 cup Almond Flour

  • 6 Tablespoons Maple Syrup

  • 3/4 cup Vanilla Protein Powder

  • 1 teaspoon Sea Salt

  • Sprinkles (optional)

Directions:

  1. Place all ingredients in a large mixing bowl.

  2. Mix with hand mixer or by using your hands until all ingredients are well-combined.

  3. Scoop out heaping spoonfulls of mixture and roll between hands to form small balls.

  4. Place on a baking sheet lined with parchment paper

  5. Refrigerate until firm - at least 30 minutes - transfer to bowl or sealed Tupperware and store in refrigerator until ready to eat - up to one week.

*For a softer “bite” remove portions from refrigerator and allow to come to room temperature before eating.

Bon Appetit!

Delilah Logo.png


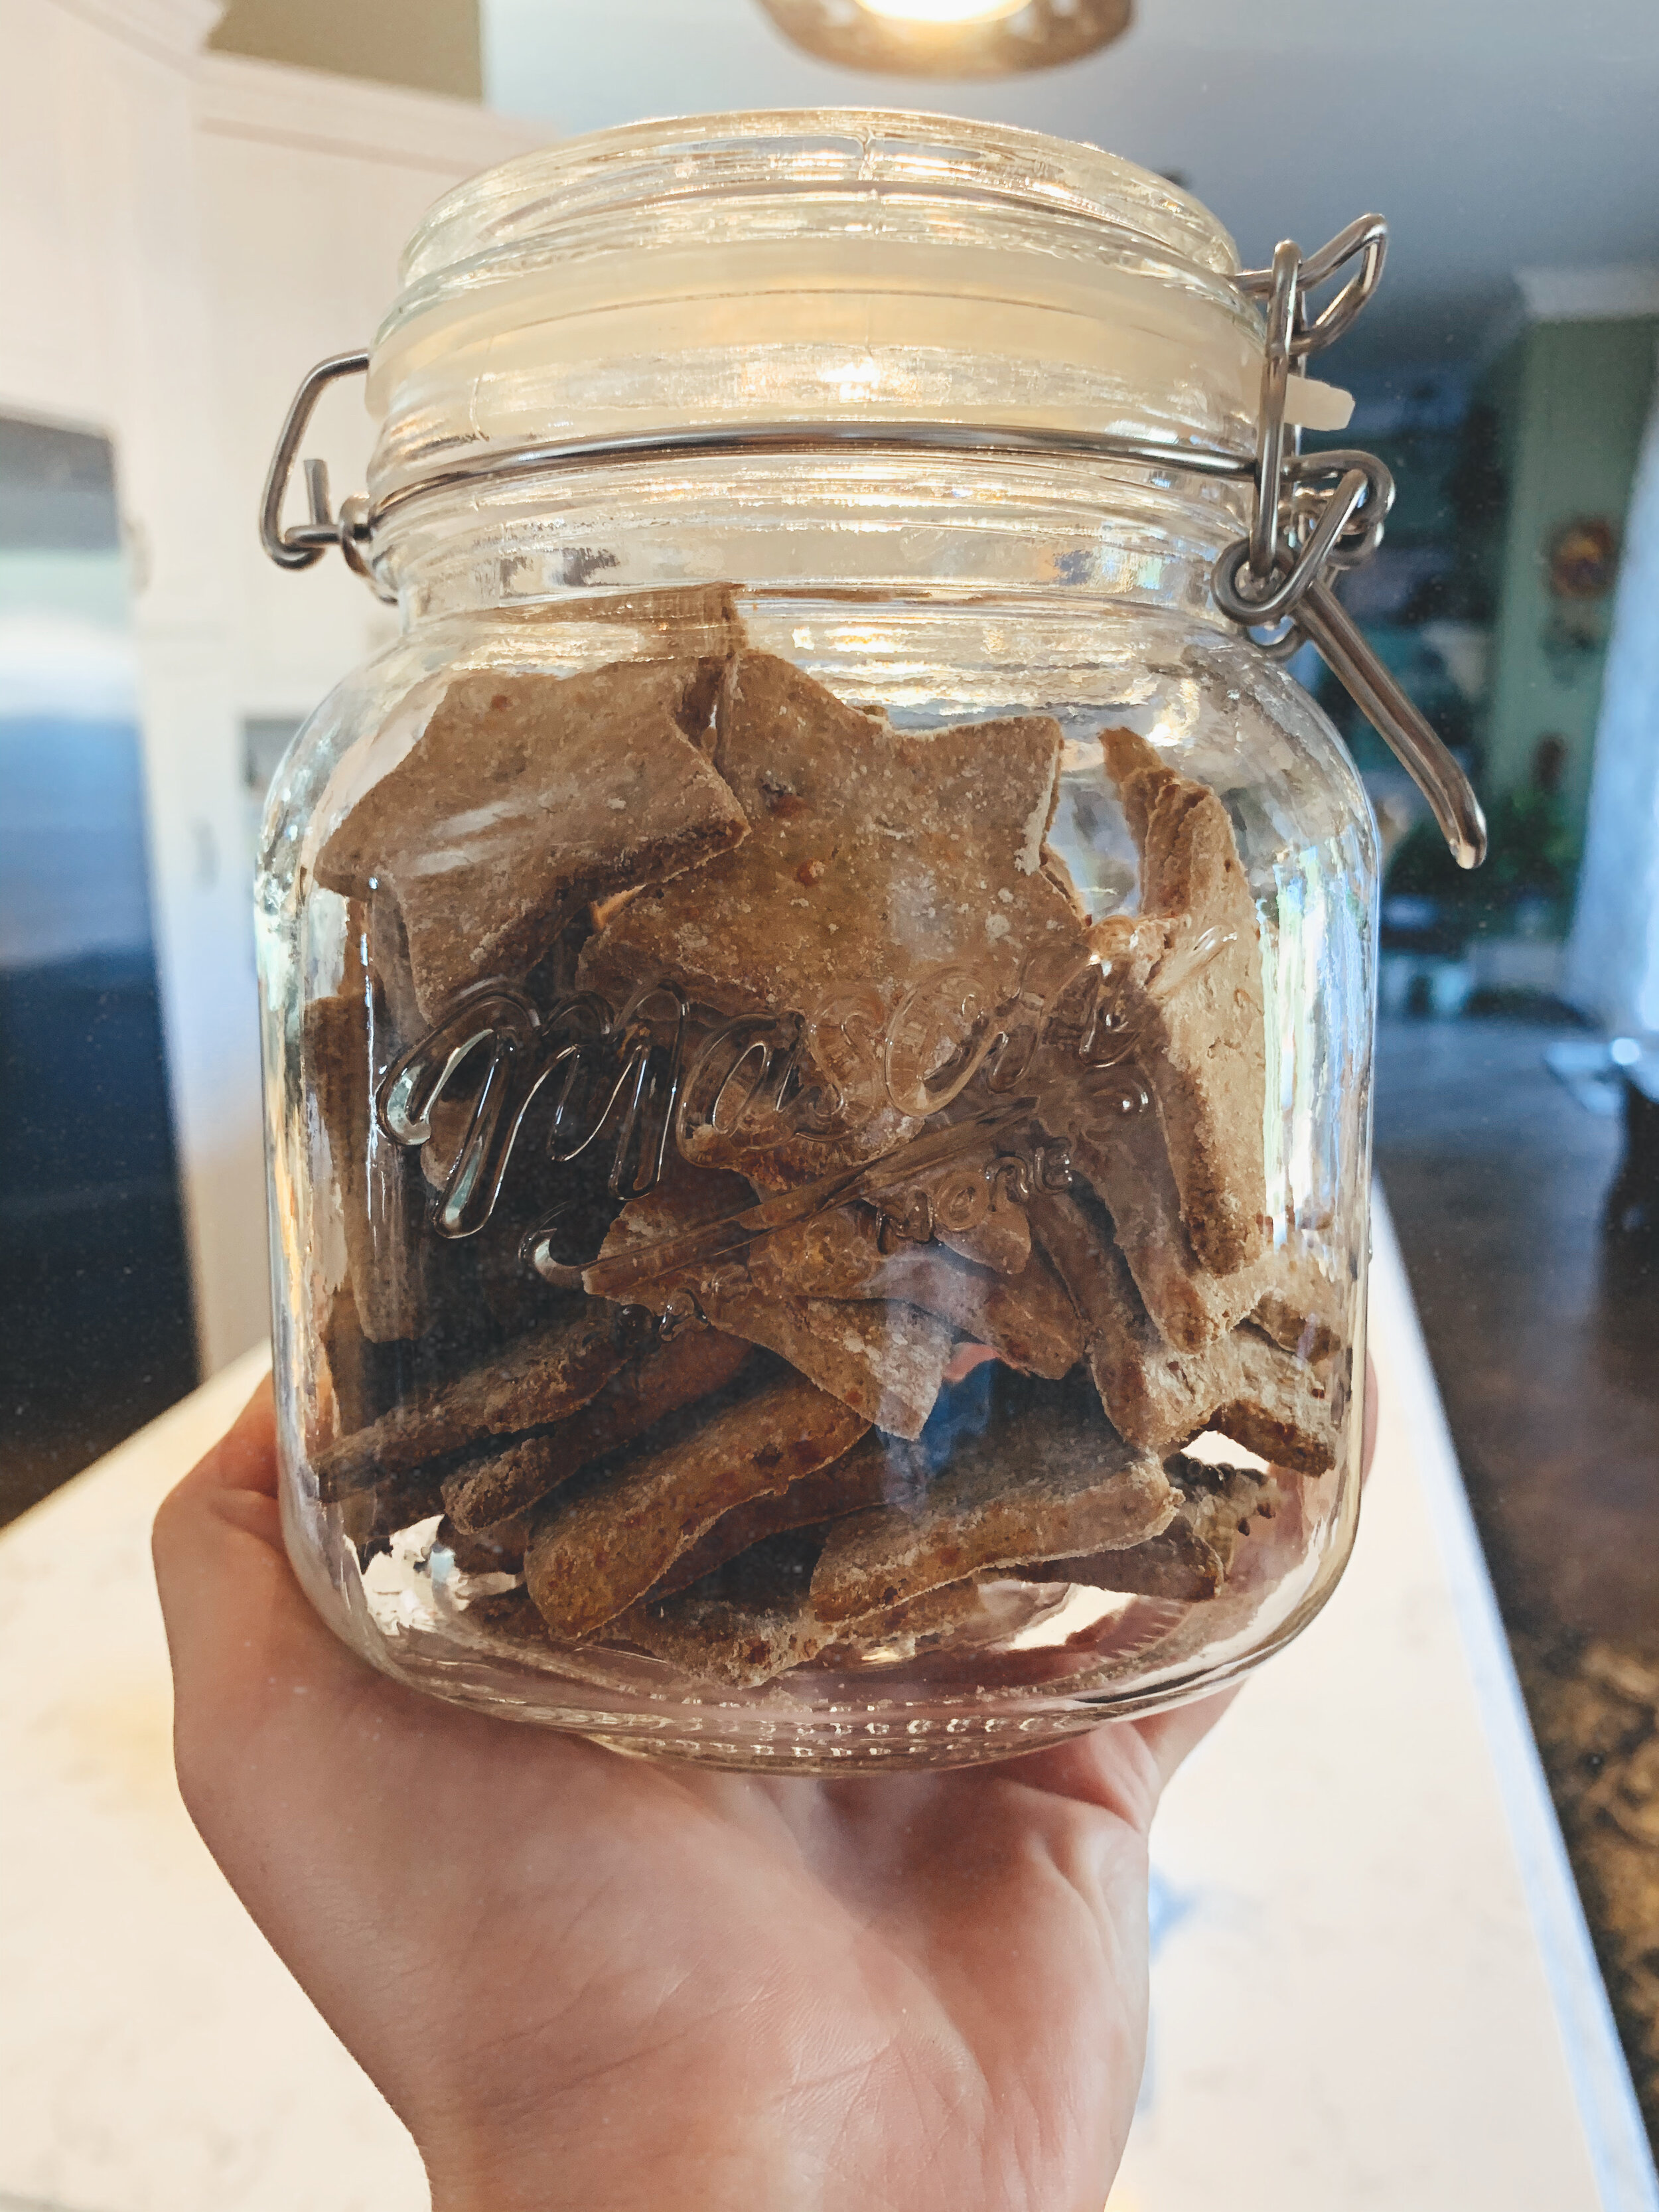
Bacon & Cheddar Doggie Biscuits

IMG_8088 2.JPG

In the midst of all this holiday cooking and gathering around our friends and family, let’s not forget about our furry friends!

When it comes to doggies biscuits, I tend to stick to simple and whole food recipes to ensure my pals are getting tasty and nutritious treats!

And when one of my lovely friends sent me photos of the treats she just made her pups I HAD to share them, (with permission of course!) Luckily, she loves to document her recipes through photos and agreed to send them my way! She also confirmed that they were DEVOURED, because they were so yummy!

Here’s the recipe and instructions so you have something to share with your four-legged “fur babies.” No pets of your own? Your friends and neighbors will be touched if you were to gift some to theirs!

IMG_8092.JPG

Ingredients:

  • Oat Flour - 3 Cups

  • Bacon (cooked and crumbled) - 8 Strips

  • Shredded Cheddar Cheese - 2 Cups

  • Eggs - 4


Directions:

  1. Preheat oven to 350 degrees Fahrenheit

  2. Add oat flour, bacon, and cheese to a food processor and combine until the ingredients reach a crumble like texture.

  3. Then add your eggs

  4. Mix

  5. Sprinkle flour out onto flat surface and roll the dough out until it is about 1/4 inch thick. Using the cookie cutter of your choice (I used little stars) begin to cut dough into desired shape.

  6. Transfer treats onto a baking sheet lined with parchment paper

  7. Bake for 20 minutes

  8. Let cool and then store in your favorite container!

Depending on the size of your cookie cutter this recipe can make 3-4 dozen treats!

IMG_8090.jpg

“I hope your fur babies enjoy these yummy treats as much as mine did!”
- Angelina


Turmeric Roasted Cauliflower

thumbnail_Facetune.jpg

Want a tasty and healthful side-dish for one of the many holiday meals you’ll be hosting or contributing to? I’ve got just the thing! This delicious - and super easy - Turmeric Roasted Cauliflower!

While I LOVE my green-bean casseroles as much as the next person, I know that more than a small helping each season would be considered an over-indulgence. This dish, whose star players are making headlines ‘round the globe for their nutritious, high-fiber and inflammatory properties, has no such guilt attached. I can (and did!) go back for seconds (or thirds) and feel GOOD about myself for doing so.

Roasting the cauliflower in a HOT oven, crisps and browns the edges and gives it a little bit of a sweet taste, which plays off the earthy turmeric spice in a lovely way. The garlic and sweet red pepper adds depth that would be missing if it were just roasted on its own.

If you want to add even more texture to the palate, and create a heartier side, top it with some roasted pumpkin seeds. (sunflower seeds or even slivered almonds wold work too!)

This photo was taken at a family Thanksgiving gathering, where even my grandkids dug in - No better endorsement than that!

Ingredients:

Screen+Shot+2019-12-02+at+10.46.09+PM.jpg
  • 1 large head cauliflower, cut into 1 florets

  • 1 sweet red bell pepper, cut into 1” pieces

  • large head of garlic, peeled and minced

  • 1 Tablespoon turmeric powder

  • 1/2 teaspoon white pepper

  • 1/2 teaspoon paprika

  • kosher salt

  • olive oil

  • roasted pumpkin seeds, sunflower seeds, or

Instructions:

  1. Preheat oven to 450 degrees F. 

  2. Trim the leaves and remove the core of the cauliflower, then cut into florets about 1-1/2”. Place them in a large mixing bowl. 

  3. Add the bell pepper and minced garlic

  4. Drizzle a liberal amount (1/8 - 1/4 cup) of olive oil over the vegetable mixture and turn several times to coat.

  5. In a small bowl, combine turmeric, white pepper, paprika, and good dash or two of kosher salt. Mix. Shake over cauliflower, pepper and garlic, toss together until evenly coated with oil and spices.

  6. Spread in an even layer onto a large baking sheet.

  7. Roast in a hot oven for 20-30 minutes. The cauliflower should be tender but not overly soft, and nicely browned and crisp in several places.

  8. For an added crunch and heartiness, sprinkle with roasted pumpkin or sunflower seeds, or slivered almonds.

  9. Serve hot.

My 12 Stockings of Christmas 2019!

mobile.jpg

Sleigh bells in the air… Beauty everywhere… Yuletide by the fireside…
And joyful memories there… Christmas time is HERE!

And so is my 12 Stockings of Christmas Sweepstakes !!! Yes, it’s that time again, when I pull my 12 giant stockings out of storage, shake out the moth balls, and start stuffing them with incredible products and prizes I’ve gathered the year-through!

Remember how this works? From November 29th through December 19th, you should be listening to my evening radio program (go HERE to find out where to listen!) because on specific days, I’ll mention an item or product I’ve fallen in love with and want to share with you!

When you hear the on-air mention, you’ll either text the keyword to 48484 or you’ll go to my ENTRY PAGE and enter to win one of the 12 stuffed stocking’s up for grabs! There will be 12 days of entry opportunities and I’ll give away 12 packages!

Enter as often as you wish! Text 48484, or,
go to my 12 Stockings of Christmas ENTRY PAGE!

To make it super easy on you, I’m even giving you a comprehensive list of the items and the day each will be featured on my radio show, check out all these amazing items!

Screen Shot 2019-11-19 at 10.10.41 PM.png

November 29th
BALSAM HILL - $100 Gift Voucher
Keyword: HILL or STOCKING

12 Stockings Entry Page

12 Stockings of Christmas- Delilah balsam hill website, blog and newsletter picture.jpg

Balsam Hill has been the leading retailer of highly realistic artificial Christmas trees and my GO TO holiday décor for over a decade, and do I LOVE their products! They’re one of my favorite 12 Stockings participants and I’m bringing them back to the sweepstakes this year!

You will find their beautiful décor all over the Hallmark Channel sets, as well as all over my radio production studios; signature Christmas trees, elegant ornament sets, flickering flameless candles, fantastic fall displays, and a gorgeous spring floral line. My studio always looks amazing with Balsam Hill décor!

Balsam Hill have been consistent supporters of my foundation, Point Hope, and I’m so very grateful. For beautiful holiday décor and gifts, you owe it to yourself to visit Balsamhill.com. Shopping for the perfect Christmas and seasonal décor is just a click away! 

BALSAM HILL

Screen Shot 2019-11-19 at 10.10.41 PM.png

December 2nd
LITTLE PASSPORTS - 12-MONTH MEMBERSHIP
Keyword: LITTLE
 or STOCKING

12 Stockings Entry Page

LP_Iheart_630.jpg

If you have an adventurous child with a curious mind, they'll love Little Passports; a fun, award-winning monthly subscription service for kids. I got one for Delilah Jr., and she loved it, so I decided to add it to my 12 Stockings of Christmas Sweepstakes.

Every month a new kit is delivered to your door, addressed to your child - they LOVE getting their own package in the mail! It’s filled with hands-on projects and souvenirs -- all designed to spark your child's curiosity in geography, natural sciences, different cultures, and the world around them. Solve a real-world mystery with DNA, build a 3D model of Big Ben, and explore many more fun and immersive activities! 

Little Passports is the perfect holiday gift for that curious kid on your list! Find special holiday offers and order today.

 LITTLE PASSPORTS

December 3rd
for KING & COUNTRY - Burn the Ships & Christmas | Live from Phoenix, CD’s
Keyword: KING or STOCKING

12 Stockings Entry Page

thumbnail_for king and county.jpg

Maybe you’ve heard for KING & COUNTRY played on my radio program? You’ve told me how much you love their music and how breathtaking they are to experience in concert. Lucky you, because I’m adding autographed copies of their updated Christmas album, Christmas | Live from Phoenix, to my 12 Stockings of Christmas Sweepstakes.

for KING & COUNTRY have been on tour all year long to sold out arenas, and recently performed their cross-over hit, God Only Knows at the CMA’s with Ms. Dolly Parton! This live album is truly a wonderful Christmas gift.

Their music is both uplifting and spiritual, singing about the reason for the season. They have the MOST amazing version of The Little Drummer Boy and I am so excited to share them with you. This music will touch your heart and put joy into your holiday season. Check out their music and tour schedule at the link below.

for KING & COUNTRY

December 4th
PEACHSKINSHEETS - One Sheet Set
Keyword: PEACH or STOCKING

12 Stockings Entry Page

I discovered this soft-as-silk product last year and gifted them to just about everyone I know. Want the PERFECT holiday gift? Give them The Original PeachSkinSheets®. I wanted to share them with you and add them to my 12 Stocking of Christmas Sweepstakes. They are wonderful and keep you comfortable all night long. They won't change body chemistry of course, but they will help keep hot sleeper’s cooler, drier, and more comfortable during the night (Heaven sent for women in a certain stage of life!) They start as low as $65 for a complete sheet set, even king size!   

Made from a breathable, athletic grade, performance SMART fabric that wicks away moisture and dries super-fast. PeachskinSheets are ultra-soft, pill-resistant bed sheets that also have a luxurious 1,500 Thread Count level. I just love mine; they come in every color you can imagine. Purchase with confidence under the 30-day, risk-free, money-back guarantee! You don’t have to leave home and you just might even want to order a pair for yourself.  Put the give of luxury under the tree this Christmas.  

PEACHSKINSHEETS

Screen Shot 2019-11-19 at 10.10.41 PM.png

December 6th
PENTATONIX - The Best of Pentatonix Christmas CD
Keyword: BESTOF or STOCKING

12 Stockings Entry Page

thumbnail_12 stockings ptx-best-of-xmas album cover delilah.com, blog and newsletter.jpg

I’m welcoming back one of my all-time FAVORITE groups to my 12 Stockings of Christmas, the Grammy® Award-winning and multi-platinum selling Pentatonix. Their new holiday-themed best-of album, The Best Of Pentatonix Christmas features four new songs in addition to 15 of the quintet's biggest and best-selling hits from their amazing Christmas catalogue. It also includes a special version of Do You Hear What I Hear with the magic of Whitney Houston. Other guests include Jazmine Sullivan, Tori Kelly, Kelly Clarkson, Maren Morris and Jennifer Hudson. Alongside the album, Pentatonix also revealed the stunning music video for the Beach Boy’s standard, God Only Knows, a must watch!

This holiday season, Pentatonix will be on tour with 16 new dates, kicking off with two shows in New York City on November 30th, and December 1st. If they’re coming to your town, I promise it is a show not to be missed. For more information and to purchase tickets for any of Pentatonix shows go HERE.

You’ll want to get a few copies of The Best of Pentatonix Christmas to share with family and friends.

BEST OF PENTATONIX CHRISTMAS

December 9th
PEDIPOCKET - Plush throw with foot pocket
Keyword: PEDI, PETI, or STOCKING

12 Stockings Entry Page

PediPocket.png

Ho! Ho! Ho! It’s not your average throw! I am talking about the PEDIPOCKET THROW. Finally, a throw blanket that does it all! PediPocket is a six foot length of plush fleece with a deep foot pocket that is conically shaped to mirror your body's natural form and keep your feet cozy all year round. It’s just the thing for cuddling on the couch or traveling (as a passenger!), and the perfect accessory for every dorm room.

Machine washable and dryer friendly, they’re super easy to care for and a wonderful, affordable Christmas gift for everyone on your list because they come in three different sizes! You’ll find all kinds of prints and colors on their web site. Keep your family warm and cozy this holiday season and all year round, and don’t forget to order one for yourself!

PEDIPOCKET THROW

December 10th
ALEX and ALI JEWLREY
Keyword: ALEX, ALIX or STOCKING

12 Stockings Entry Page

thumbnail_alex and ani.jpg

I’m welcoming a fun new sponsor to my 12 Stockings of Christmas Sweepstakes this year, Alex and Ani . If you’ve never been to their website, STOP everything you’re doing and click HERE to see all the wonderful gift ideas they have this holiday season. My daughters and I love their jewelry because they have something for everyone.

Alex and Ani are a jewelry company with a unique mission; founded in 2004, they’re a humanitarian company that designs meaningful, eco-conscious jewelry. Their vision is to connect the wearers to a greater purpose. In just six years, the company has donated more than $46 million to non-profits worldwide.

Their symbolic designs include charm bangle bracelets, earrings, necklaces, and an abundance of all things shiny and bright as well as deeply meaningful. Disney, The Wizard of Oz, and Harry Potter are also represented in their collection, making Alex and Ani jewelry perfect for stuffing every stocking. Give someone a gift with special meaning this Christmas.

ALEX and ALI

Screen Shot 2019-11-19 at 10.10.41 PM.png

December 11th
GRAVITY BLANKET - You personal Gravity Blanket
Keyword: BLANKET or STOCKING

12 Stockings Entry Page

thumbnail_picture for gravity blanket .jpg

Let me introduce you to something I’ve just discovered, the Gravity Blanket. Are you hosting relatives, cooking over-the-top meals, spending hours shopping for gifts, and feeling that holiday stress? You need a Gravity Blanket! It’s a weighted blanket that’s designed to help improve sleep and decrease stress and anxiety.

I gave one to my daughter, Shaylah - baby Rosalie’s mama - and she loves it. A Gravity Blanket is the best gift you can give someone who deserves some rest and relaxation this holiday season and all year through.

Buy yours today and use the promo code ‘DELILAH’ for 15% savings. 

GRAVITY BLANKETS

December 12th 
KACEY MUSGRAVE:
A Very Kacey Christmas, autographed CD
Keyword: CHRISTMAS or STOCKING

12 Stockings Entry Page

thumbnail_12 stockings kacey musgrave album cover for delilah.com, blog and facebook.jpg

I love welcoming new artists to my 12 Stockings, especially artists with as much style and uniqueness as Kacey Musgraves and her A Very Kacey Christmas CD! It’s a mixture of many musical styles including, jazz, blues, country and a bit of 40’s and 50’s nostalgia. Kacey says she was, ”inspired by the iconic Bing Crosby and the wonderful Andrews Sisters,” aren’t we lucky?!

The album features Kacey originals, including, Present Without a Bow, and some old Christmas favorites like the silly I Want A Hippopotamus for Christmas, as well as the melodious Have Yourself a Merry Little Christmas. Kacey brings her Grammy award winning versatile style to A Very Kacey Christmas filled with songs everyone on your Christmas list will LOVE.

Get an inside peek by watching the video of What Are You Doing New Year's Eve? . Everyone should have a little Kacey under the tree their Christmas this year!

A VERY KACEY CHRISTMAS

December 16th
SALONTECH SPINSTYLE
Keyword: PERFECT or STOCKING

12 Stockings Entry Page

picture of spinstyle.jpg

I fell in love with the Spinstyle  a few years ago and it’s still my favorite styling tool! SalonTech’s patented Technology Curl Dial works like an extra set of hands to pick up, separate, and guide hair around the barrel, creating fast, easy, and tangle free curls with one hand. (Make sure the hair isn’t tangled before beginning!) Create tight bouncy curls to loose, voluptuous, beachy waves at the touch of a button, in half the time of a regular curling iron!

I do my hair in the morning and I am set until late in the evening! I have one for home and one for travel and all my daughters have one too.  It’s the perfect holiday gift for the stylista on your list.  My listeners will receive an exclusive, special offer when ordering; just be sure and use promo code PERFECT.   . 

SPINSTYLE

December 17th
MY BOOK: ONE HEART AT A TIME, autographed copy
Keyword: HEART or STOCKING

12 Stockings Entry Page

Screen Shot 2019-11-20 at 11.02.56 AM.png

If you’ve tuned in to the show lately, you know I’ve written a book, One Heart At A Time. It was a true labor of love, and became even more so after the loss of my beloved son, Zachariah. The world is facing some trying times and many feel disconnected and lonelier than ever before. How do we change it? One. Heart. At. A. Time.

I’ve included an autographed copy in each of my 12 Stockings this year with the hope that you will enjoy it and it will inspire you to reach out and help me change the world. All we need is love and a heart that is willing to serve.

ONE HEART AT A TIME

December 19th
ALMOND ROCA
Keyword: ROCA, ROKA or STOCKING

12 Stockings Entry Page

My 12 Stockings of Christmas just aren’t complete until I’ve added my favorite candy, Almond ROCA. This delicious treat brings back the fondest childhood memories of Christmas’ past, and I love giving, and getting into, those pink tins all year long!

thumbnail_almond roca picture for blog and newsletter.jpg

Brown and Haley make every batch of ROCA with rich creamy butter, California almonds, and the best quality chocolate! Choose from Almond, Cashew, Dark Chocolate, Sea Salt Caramel, Peppermint, and Mocha ROCA. SO YUMMY!! They have something for EVERYONE (Even nut-free options for those with allergies like my daughter!)

This holiday season, whether looking for gifts for your office party, your child’s favorite teacher, or sweet treat for yourself, remember, every stocking should be filled with Almond ROCA on Christmas morning. Visit them online or find them at local retailers. 

ALMOND ROCA


Good luck everyone!

Delilah Logo.png


Be A Star - With Star Fruit!

thumbnail_IMG_4632-1.jpg

Be the star of the show this holiday season with Star Fruit!

Here’s a tip for dressing up your holiday dishes; Star Fruit!

starfuit1.png

You've seen it in on your grocery aisles, maybe even purchased it to satisfy your kid's’ curiosity, but if you lead your holiday meals with this bright gold star, you'll be considered a true wiseman!

Carambola, or Star Fruit, is native to Indonesia but is now cultivated in many tropical areas. It's about 2-6" long and when ripe it's a deep yellow color. Most of the fruits have 5 ridges, giving it a classic star shape, but some can have more or less. The skin is thin and waxy and may be eaten, just like that of an apple or plum.

Starfruit 2.png

There's no special preparation to eating - just wash, then slice it up as thick or thin as you desire, and remove the seeds.

Use it on your salads - like the spinach, red onion, pomegranate, and star fruit example here. Or in your traditional fruit salad. On your cheese platters, to dress your ham alongside the pineapple, and in your jello-treats.

It's mild flavor, both sweet and a tart, make it a complementary companion to just about every thing on your holiday buffet!*


So go ahead, be the star of the show with star fruit!

* Star fruit should not be consumed by people with kidney disease or on dialysis and can interact with prescription medications much like grapefruit. Do your research if you have any questions!

Tomato Basil Bisque

Screen Shot 2019-10-23 at 2.05.14 PM.png

Fall marks the beginning of soup season in my house (for just about everyone else I know too!) and I’m always looking for new recipes to try.

This week, our studio engineer, Jessica, brought a delicious looking bowl of soup into work with her for lunch… It smelled so good as she was reheating it, I had to know what was in it! (I also might have begged a taste…)

Turns out, not only is Jess super bright when it comes to audio engineering… she’s a great cook too! This is a yummy example of a simple, but absolutely fabulous tomato basil bisque that she makes often through the chilly months. I had her forward the recipe to me so I could share it with all of you.

Jessica roasts her own Roma tomatoes, because it’s a fairly easy process. But if you want to whip (blend?) this together quickly, you can pick up a few cans of fire-roasted tomatoes in your grocery aisle.

Jessica’s Tomato Basil Bisque

Ingredients:

  • 1/2 onion - chopped

  • 1/4 cup plus 2-3 tbsp olive oil

  • 4 garlic cloves - minced

  • 20-22 Roma tomatoes, roasted (or 2 cans fire roasted tomatoes)

  • 1/2 package (4oz) cream cheese

  • 2 cups chopped fresh basil leaves

  • 1 cup of half ‘n half


Directions:

  1. Roast tomatoes with olive oil ahead of time using method described below soup instructions.

  2. Cover bottom of stock pot with 1-2 tablespoons olive oil. Place over medium heat.

  3. Add chopped onion and cook until translucent. Add minced garlic and cook about 5 minutes, stirring constantly until garlic begins to brown.

  4. Add the roasted tomatoes*, basil, and cream cheese at this time, and bring to a low boil. If it is looking dry, add about 1/4 cup of water so that the mixture does not scorch.

  5. When the cream cheese has fully melded with the other ingredients remove from heat and allow to cool slightly.

  6. Using an immersion blender, blend in the pot until the mixture is smooth and creamy. Bring up heat once again, and add half ‘n half (or reduced fat milk.) Let sit for about five minutes stirring occasionally then serve.

  7. Garnish with a dollop of sour cream and a fresh basil leaf.

* To roast tomatoes: Cut off stem, slice tomatoes in half lengthwise. Arrange cut side down on baking tray and drizzle with olive oil. Place under broiler for about 15 minutes; remove tomatoes once charred spots start appearing. Let cool, chop coarsely, retaining as much of the juice as possible.

Thanks for sharing your recipe with us, Jessica!

Delilah Logo.png


"Waffle" Cake - Fun to Make!

thumbnail_IMG_4001.jpg

Recently, Producer Leisa ordered a “waffle cake” from a local maker for a special celebration in her home and showed off photos of this special creation. All of us in the studio were intrigued. What in the world is a waffle cake?!

Turns out, it’s exactly what it sounds like; waffles made from cake batter, stacked and iced, to make a cake! A new food trend we could definitely all get behind. Who doesn’t love waffles? Who wouldn’t want a reason to eat them mid-day or in the evening, smothered in icing?!

So we did a little research (i.e. we “Googled it”) and discovered that you can put almost any kind of batter in a waffle iron… think waffle, banana bread, chocolate cake… yep, it all works! Why did it take so long to think this up?

Leisa had ordered a strawberry cake with raspberry icing, it came gorgeously decorated with natural flowers and dusted with powdered sugar. The studio folks decided to take matters into their own hands this week and celebrate fall - any excuse for cake, especially if it’s a waffle cake!

They decided on carrot cake with cream cheese icing. Here’s the result recipe and the directions. It turned out OH SO GOOD and OH SO PRETTY!

Carrot Waffle Cake with Cream Cheese Icing:

Ingredients:

For the Carrot Cake:

thumbnail_IMG_3983.jpg
  • 2 cups all-purpose flour

  • 2 teaspoons baking powder

  • 1 teaspoon baking soda

  • 1 1/2 teaspoons ground cinnamon

  • 1/2 teaspoon ground ginger

  • 1/4 teaspoon ground nutmeg

  • 1/2 teaspoon salt

  • 3/4 cup or vegetable oil

  • 4 large eggs room temperature

  • 1 and 1/2 cups light brown sugar

  • 1/2 cup granulated sugar

  • 1/2 cup unsweetened applesauce

  • 1 teaspoon pure vanilla extract

  • 3 cups grated carrots, lightly packed

For the Cream Cheese Icing:

  • 1 (8-ounce) package brick style cream cheese, softened to room temperature

  • ½ cup unsalted butter, softened to room temperature

  • 2 cups powdered sugar

  • 1 teaspoon pure vanilla extract

Instructions:

For the Carrot Cake:

  • In a large mixing bowl, whisk together the flour, baking powder, baking soda, cinnamon, ginger, nutmeg, and salt until well combined. Set aside.

  • In a separate large mixing bowl, whisk together the oil, eggs, brown sugar, granulated sugar, applesauce, and vanilla extract until fully combined. Add the grated carrots into the wet ingredients and mix until well combined.

  • Pour the wet ingredients into the dry ingredients and mix with a whisk or rubber spatula until just combined, making sure not to over mix the batter.

  • Coat the two sides of a waffle iron with non-stick cooking spray, and heat. Working one-by-one, pour enough batter into your iron to make a waffle. Cook until done through but not overly browned. Transfer onto a wire rack to cool. Repeat until you have 4-5 waffles to stack.

For the Icing:

  • Place cream cheese in a medium bowl and using a hand or stand mixer, beat until smooth. Add the butter and mix until well combined. Add the vanilla extract and the powdered sugar a little at a time, until fully combined and creamy.

Assembly:

  • Choose your serving plate and place the first waffle in the center. Add a generous amount of icing to the top of the waffle and spread to the edges, place another waffle on top, and spread more icing on it. Repeat until you have the desired number of waffles, and height of cake.

  • Do not ice the top waffle - instead, place a dollop of icing in the center and garnish the stack with flowers (or whatever your creative spirit directs you to do) and sprinkle with powdered sugar!

It was recommended to us that the cake be allowed to absorb the moisture from the icing for at least 24 hours (or longer) before eating. This one was baked on a Friday, then garnished with edible Nasturtium blossoms, and enjoyed on Monday. It was DELICIOUS!!!

What flavor combinations might you try? I’m thinking banana or zucchini bread would also be good with the cream cheese icing, or maybe lemon cake with butter cream? Let me know if you try this and share your ideas of different flavors with me!

Overnight Oats - Just In Time For The New School Year

A5210B02-187E-4A52-B5B4-E3E5565D78FA.jpg

The seasons are changing and that means a new school year is on the horizon.

During the school year, my sweet kiddos will be out of bed before the sun comes up and their bellies need to be nice and full when they head out the door. Rolled oats soak up milk overnight in your refrigerator, giving them a plump, tender texture much like their boiled counterparts, without all the cooking!

It’s been my saving grace on busy mornings and I want to share it with all of you! The best part about it? Well, there are several, but my favorite is that it’s fun, tasty, and full of healthy nutrients to keep kids fueled until lunch time!

This recipe makes 4 - 1/2 cup servings. Increase or decrease as you like, just remember it’s equal parts oatmeal to liquid and 1/4 part Chia seed.


Ingredients:

042C82DD-25AE-4BF6-B872-F0C3D55DBA04.jpg
  • 2 cups Old Fashioned Oats

  • 2 cups Milk (Cows, Almond, Coconut, Cashew, etc.)

  • 1/2 cups Chia seeds for a puddling like texture! - Optional

  • Your favorite oatmeal toppings
    This recipe is very basic, but the topping combos are limitless; use the ones you and your family LOVE. Some of our favorites are:

  • Bananas

  • Berries (strawberries, raspberries, blueberries, blackberries, etc.)

  • Nuts (walnuts, pecans, sliced or chopped almonds, etc.)

  • Peanut Butter (or Almond butter, etc.)

  • Raisins, craisins or currents

  • Chocolate Chips (carob, vanilla, etc.)

  • Honey

Directions:

  1. In a medium sized bowl, add 2 cups oats to 2 cups milk or milk substitute and 1/2 cup Chia seeds (if desired). Combine well. (Chia seeds can also be added to the mix for their nutritional benefit and to create a more “pudding like” consistency.}

  2. Transfer mixture into 4 individual serving-sized glasses or jars. Leave plenty of room at the top for the toppings!

  3. Cover and place in the refrigerator overnight.

The Next Morning… You can be as creative as your cravings! Fruit, nuts, chocolate, you name it! Put out the toppings, hand each child their oats, and let the delicious, creative process take place! In Casa Delilah, we love these combos:

Strawberries, Bananas, & Honey
Mixed Berry
Peanut Butter, Banana & Chocolate Chips
S’mores!: Peanut Butter, Mini-Marshmallows (just a few!) & Chocolate Chips!

My kids love helping me to make this in the evening and are excited to see the transformation from dry boring oats the night before to delicious and creamy oatmeal the next morning. By giving them topping options, everyone gets exactly what they want! It’s fun, nutritious, and a great alternative to sugary cereals, with fiber, protein, healthy fats, and just a touch of yum to satisfy that sweet tooth!

I hope you and your family enjoy this easy and healthful breakfast treat as much as we do!

Delilah Logo.png


Rhubarb Nut Bread

Rhubard Nut Bread.png

I recently posted a photo of myself and one of the GIANT rhubarb leaves from my garden on Facebook. At the time, I ask my visitors for their favorite rhubarb recipes - I’ve got enough for every recipe out there! Many were kind enough to send me their best-loved, tried-and-true, blue-ribbon-winner rhubarb treats.

From fruit leathers to sauces, pies to puddings, and bars to breads, I’ll never have to ask myself “What am I going to do with all this rhubarb?!” again!

Here’s the first of many recipes I’ll share. This one comes from Bonnie - thank you!

Rhubarb Nut Bread

Ingredients:

Screen Shot 2019-06-04 at 3.06.15 PM.png
  • 1-1/2 cup firmly packed brown sugar

  • 2/3 cup veg. oil

  • 1 egg

  • 1 cup buttermilk

  • 1 tsp salt

  • 1 tsp baking soda

  • 1 tsp vanilla extract

  • 2-1/2 cups flour

  • 1-1/2 cups fresh rhubarb stalk, cleaned and diced

  • 1/2 cups chopped walnuts or pecans

  • For Topping:

    • 1/2 cup sugar

    • 1/2 tsp cinnamon

    • 1 Tblspn softened butter

Directions:

  1. In a small mixing bowl, combine dry ingredients: flour, salt and baking soda.

  2. In a large mixing bowl, combine wet ingredients: brown sugar, oil, buttermilk, egg, and vanilla, blend well.

  3. Add dry mixture to large bowl, stir to combine and add diced rhubarb and nuts.

  4. Pour into greased and floured bread baking pans.

  5. Blend the Topping ingredients in a small bowl with a fork, sprinkle over tops of bread batter.

  6. Bake at 325 degrees approximately 50-60 minutes or until toothpick inserted in center comes out clean.

  7. Cool, slice, and enjoy with a cup of tea!!!


Yukgaejang (Korean Beef Stew with Fiddleheads)

gosari2.jpg

Gosari is the Korean term for dried fernbrake - or fiddleheads - the tightly curled new fronds of the common Bracken Fern.

Fiddleheads have been prepared and eaten on several continents for hundreds, or perhaps thousands, of years. But there are some precautions you should take with it.

Within bracken fern lurks a substance called ptalquiloside. It’s a known carcinogen, and therefore, NOT our friend, but because it is 1) water-soluable, and 2) breaks down in warmer temperatures, steps can be taken to greatly reduce the levels of this harmful stuff in your hard-earned harvest.

First, you should soak the fiddleheads in cold water for several hours, changing the water often. Second, at some point in the preparation process you should boil bracken fern in salted water for 30 minutes or longer, making it both tender and safer for consumption.

Screen Shot 2019-04-30 at 11.12.05 AM.png

That said, I encourage you to do your research and decide yourself what your comfort level with this is. I’m told that different fern varieties, such as the Lady Fern, contain less or even no ptalquiloside, so perhaps you could educate yourself and use only those types if there is lingering concern.

Kimmy and I harvest the traditional Bracken Fern, soak it, dehydrate it, store it in air-tight baggies and for months following, boil to reconstitute and then use and enjoy it in dishes like Bibimbap (Rice Topped with Vegetables) and Yukgaejang (Beef Stew with Vegetables.)

I’m going to share her recipe for Yukgaejang with you. We enjoy it so much and I think you will find it an enjoyable way to celebrate your adventurous experience!

Korean Yukgaejang

Ingredients:

  • 2 Tablespoons sesame oil

  • 2 Tablespoons gochugaru (red chili pepper flakes)

  • 1/2 large yellow onion

  • 2 Tablespoons minced garlic

  • 1 cup rehydrated gosari

  • 8-10 cups beef broth 

  • 8 ounces Korean radish,  cut into chunks

  • 3 shiitake mushrooms, sliced (other mushroom varieties may also be used.)

  • 1 teaspoon (or more) gochujang ( chili pepper paste)

  • 1 teaspoon doenjang (fermented soybean paste)

  • 2 tablespoons guk ganjang  (soup soy sauce)

  • 2 bunches scallions, sliced

  • salt and pepper

Directions:

  1. Place dried gosari into a small pot and cover with water. Bring to a boil over medium-high heat and boil for 30 minutes or longer.

  2. Rinse in cold water, drain and cut into 3-4 inch lengths. Set Aside.

  3. Put 2 tablespoons of sesame oil on the bottom of a large stock pot, heat and add the gochugaru chili pepper flakes. Cook over medium-high heat until the oil begins to turn red from the pepper flakes, turn down to medium then add the onion and garlic; saute until the onion is translucent. Do not burn the chili flakes.

  4. Add the gochujang chili pepper paste, and doenjang soybean paste to mixture. (More or less chili paste can be used to create desired level of spice.)

  5. Add beef broth, shredded beef, radish, mushrooms, gosari (fiddleheads,) and guk ganjang soup soy sauce. Stir to combine.

  6. Boil over medium heat, covered, for 20 minutes.

  7. Add scallions and boil for another 10 minutes.

  8. Season with 1 teaspoon salt (or more) and pepper to taste.

  9. Serve with rice.

Dried and packaged gosari is readily available at Korean markets and since you’ll probably be making a trip to one for several of the ingredients, you could elect to skip the harvesting expedition and go right to making and enjoying this dish!

Strawberry "Poke" Cake

Screen Shot 2019-04-22 at 4.29.55 PM.png

I posted this picture of the strawberry poke-cake I made and served on Easter, to my Facebook page… and received many requests for the recipe after doing so. I wish I could take credit for coming up with the idea, but it’s been around for some time and is already pretty well known.

For those who have never been introduced, here’s the basic gist. A light, moist, refreshing desert with fresh strawberries as a bonus! I am always one to improvise based on what I have on hand, or if I think I might like to change things up a bit, and I encourage you to do the same.

Cream cheese frosting is a departure I made from the recipe when it was given to me. I think whipping cream is what’s traditional. Do what you think you’ll like best!

CAKE

Ingredients:

  • 1 box white, yellow (butter,) or even strawberry flavored box cake mix

  • eggs, oil and water as called for on the box

  • 1 (3 oz.) box Strawberry Jello

  • 1 cup boiling water

  • cream cheese frosting

  • sliced strawberries, for garnish

Directions:

  1. Prepare cake batter according to the packaging directions:

  2. Pour into greased 9x13 inch baking pan and bake, again, according to box directions.

  3. Remove from oven. Let cool 30 minutes.

  4. Using the handle of a large wooden spoon, poke holes all over the cake.

  5. In a medium bowl, stir together jello mix and boiling water until jello dissolves completely.

  6. Carefully pour mixture evenly over the top of cake. Cover with plastic wrap and place in fridge to chill for 2 hours or until Jello is firm and set.

  7. Remove from refrigerator and ice with cream cheese frosting (recipe below,) garnish with sliced strawberries.

  8. Serve immediately, or return to refrigerator until served.

CREAM CHEESE FROSTING:

  • 1/2 cup butter, softened

  • 8oz cream cheese

  • 4 cups powdered sugar

  • 2 tsps vanilla extract

Directions:

  1. Combine softened butter and cream cheese in medium bowl: beat on medium speed until well blended.

  2. Add powdered sugar and vanilla. Beat until creamy.

Zucchini Fritters

Screen Shot 2019-04-02 at 4.00.30 PM.png

I recently hosted a cooking demonstration on a big boat in a bigger sea.

It was a cruise ship actually, and I was in the middle of the Caribbean, chatting away to a group of Delilah enthusiasts about my kids, my life, my farm, and my love of cooking!

I shared my Zucchini Fritter recipe with everyone, and then we taste-tested the result! Mmmmm.

Perhaps it was the excitement, the sea air, the energetic participants… but oh my, they were delicious if I do say so myself!

It will soon be zucchini season, so here’s the (easy!) recipe if you feel like giving them a try:

Ingredients:

  • 2-3 medium zucchini, grated

  • 1 small to medium onion, finely diced

  • 1/3 cup all purpose flour

  • 2/3 cup Panko bread crumbs

  • 1/2 cup grated Parmesan cheese

  • 2 large eggs, beaten

  • 3 cloves garlic, minced (or 2 tsp garlic powder)

  • salt, freshly ground black pepper, and paprika to taste (or use about 2 teaspoons of seasoning salt)

  • 4 tblsp olive oil

Directions:

  1. Place grated zucchini and diced onion in middle of a square of cheesecloth, or a clean kitchen towel, and squeeze to drain as much moisture from the vegetables as you can. Set aside.

  2. In a large bowl, combine flour, Panko, Parmesan cheese, garlic, salt, pepper, paprika (or garlic powder and seasoning salt,) then add the zucchini and onion and stir well.  

  3. Add the 2 beaten eggs to the batter just before frying, and mix until evenly combined.

  4. Working in batches, heat 1-2 tablespoons of olive oil in a large skillet over medium-high heat. Gently drop mounds of the zucchini batter into the skillet, about 2 heaping tablespoons at a time; flatten slightly with the back of a spatula.

  5. Fry until cooked through and golden brown; approximately 2-3 minutes per side. Remove to paper towels, then to serving dish.

  6. Serve warm as an appetizer, side, or light lunch/brunch. Use your favorite aioli sauce or plain yogurt for dressing.

Happy Pi Day!

thumbnail_Facetune.jpg

Ok, not exactly A pie, but then again, pie isn’t exactly pi, so let’s dispense with technicalities, and say it’s a wedge, from a circle, which is from whither pi derives. (You’ve caught on by now that no mathematician am I!)

What I offer you here, my pi and pie loving friends, are hand pies. No more mess, or (in my house) arguments over whether someone is dipping inside the un-cut portion of the pie to pull out more filling than they deserve.

These are flakey, buttery, fruit-filled, wedge shaped, hand-held treats of deliciousness!

Ingredients:

BLACKBERRY FILLING:

  • 2 cups of cleaned blackberries, fresh or frozen

  • 1/2 cup of sugar

  • 2 Tablespoons of corn starch

  • 2 teaspoons of lemon juice

  • 1/2 teaspoon of vanilla extract

PASTRY CRUST:

  • 2 cups all-purpose flour

  • 1 Tablespoon sugar

  • 1/2 tablespoon Salt

  • 1 stick cold unsalted butter, cut into small pieces

  • 1 egg lightly beaten with 2 teaspoons of water

LEMON GLAZE

  • 1 cup powdered sugar

  • 3-4 Tablespoons of cream (half and half or milk will do)

  • 3-4 Tablespoons of lemon juice

  • Zest of 1/2 lemon

Directions:

  1. In a medium sized saucepan, combine blackberries, sugar, cornstarch and lemon juice. Cook over low heat, stirring frequently, until well combined and blackberries are hot and releasing juices.

  2. Crush blackberries in the saucepan with a potato masher.

  3. Stirring constantly, bring to a boil by increasing heat to medium-high. Boil and stir for approximately 3 minutes, then remove from heat.

  4. Add vanilla extract, and continue to stir until saucepan has cooled enough that mixture will not burn.

  5. Set aside.

PASTRY CRUST:

  1. Pulse flour, sugar, and salt together in a food processor, or mix well in a large bowl.

  2. Add chopped, cold butter and continue to pulse until coarse crumbs form - or use pastry knife.

  3. Turn dough out onto clean, floured surface and dust with a little more flour.

  4. Kneed, adding a little flour if needed, or scant cold water, until smooth and no longer sticky.

  5. Flatten the dough, then fold, flatten, fold, several times - this creates the desired “flakiness.”

  6. Divide the dough in half, roll into balls. Wrap in plastic wrap and refrigerate for at least 30 minutes.

  7. Turn cooled dough onto a clean, floured surface, and use a rolling pin to roll each ball into an 8” circle.

  8. Place one circle on top the other, then use a pizza cutter to cut into 8 double layer pie wedges.

  9. Working with a top and bottom pastry layer at a time, separate, brush the edges of each with egg/water mixture, place 1-2 heaping tablespoons of filling in the center of the bottom layer, then cover with the matching top layer of pastry.

  10. Crimp the edges with a fork to seal and place on parchment covered backing sheet.

  11. Repeat for all 8 wedges.

  12. Brush tops with remaining egg/water mixture

  13. Back at 400 degrees for approx 20 minutes, until edges begin to turn golden brown.

  14. Cool completely

LEMON GLAZE

  1. In medium bowl, whisk together powdered sugar, cream, lemon juice, and lemon zest.

  2. Drizzle over cooled hand pies.

  3. Let the glaze set (15-30 minutes) before serving.

Notes:

Make filling and dough a day ahead and refrigerate. This breaks the process up, and helps things to move along more quickly the day of assembly and baking (especially if you have little helpers, like I usually do!)

Hi-Octane Breakfast Muffins

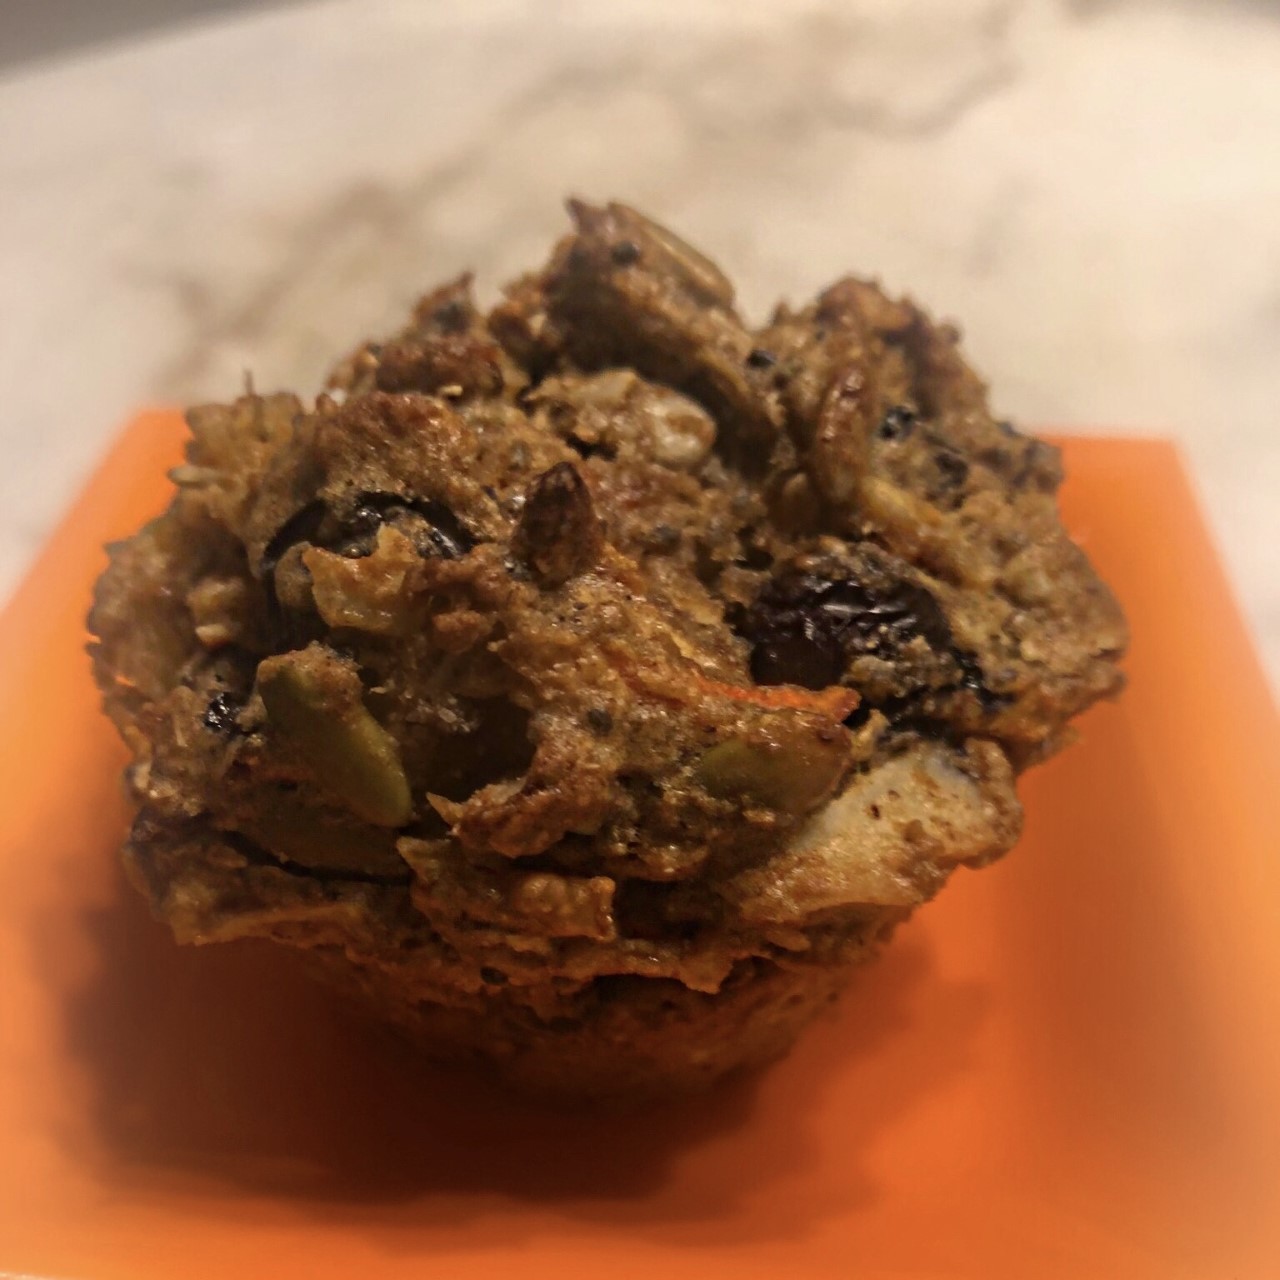
muffin.jpg

This breakfast muffin recipe comes from my friend, Chris, a teacher who needs to fuel up before she starts her day in the classroom. Her hubby, a hard-working construction manager, says they keep him satisfied all morning long. We can all use that kind of fulfillment!

Little muffins packed full of healthful ingredients; seeds, nuts, fruits and veggies, these are truly hi-octane!

There are a LOT of ingredients, so I think it would be a fun recipe to try out with an equally busy friend or neighbor. Shop together and split the cost of the ingredients, then spend a fun afternoon or evening mixing and baking up your healthful breakfast bites for the days (or weeks) ahead.

With so many bodies under my roof, I’d double or triple the recipe, and think about freezing them for those mornings I can’t make breakfast. I say THINK because I know they’d be gone in a flash, even before they got to the freezer!

These are tasty, with the perfect mix of sweet and savory, and the right combo of soft and chewy. Enjoy!!

Ingredients:

thumbnail_Facetune_22-02-2019-10-25-34.jpg
  • 2 cups multi-grain flour

  • 3/4 cup sugar

  • 1 tbsp cinnamon

  • 2 tsp baking powder

  • 1/2 tsp salt

  • 1/2 cup shredded coconut

  • 1 1/2 - 2 cup dried fruit bits

    • ( Choose 3-4 of your favorites and use a half cup of each: raisins, craisins, dried blueberries, cherries, apricots, dates, figs, etc.)

  • 2 cups carrots, grated

  • 3/4 cup low-sugar apple sauce ( or one medium apple, shredded)

  • 1/2 cup sunflower seeds

  • 1/2 cup pumpkin seeds

  • 1/4 cup chia seeds

  • 1/4 cup hemp seeds

  • 3 eggs

  • 2/3 cup coconut oil (vegetable or olive oil also work)

  • 1 tsp vanilla

Directions:

  1. Preheat oven to 350 degrees.

  2. In a large bowl, combine flour, sugar, cinnamon, baking powder and salt. Mix together.

  3. Add all the dried fruit, coconut, seeds, carrots and applesauce. Stir well to combine mixture.

  4. In a separate bowl, whisk the eggs with coconut oil and vanilla extract.

  5. Add the egg and oil combination to the dry mixture in the large bowl and stir to combine well so that all ingredients are evenly mixed.

  6. Spray about 12 standard cupcake tins or about 16 smaller muffin tins with non-stick cooking spray, or use paper liners. Fill to heaping.

  7. Bake at 350 for 30-35 minutes, until tops are browned well.

Have one or two for breakfast and start your day off on the right foot, fully fueled, for what’s to come, with these hi-octane muffins!