Family Friends & Farm

Dandelion Fluff Fairy Garlands

Looking for a fun nature craft to do with the kids this spring?(Or maybe you just want to do it for yourself!)

Give Dandelion Fluff Fairy Garlands a go!

They are made with the seed heads of dandelions, which is something we have in abundance right about now!

Head outside and look for unopened seed heads. You’ll want to pick them when the flower has died and dropped it’s yellow petals, but cypsela has not yet opened to release the seed. Gather up a bunch!

Thread a needle onto a long piece of heavy thread or twine, and push the needle through the base of each seed bud.

Pull the first through to the end of the thread, and repeat until you have a seed bud strung every few inches for the entire length of thread. (If you want to minimize the chance of tangles, work with shorter thread segments and simply tie together to form a longer garland.)

Once you have strung all your seed heads and are happy with the spacing and the length, hang the garland in a window and let the sun and nature do their trick.

Over the next several days, the buds will begin to open and become magical fairy-like little round tuffs of fluff.

Did you know? A dandelion seed is the plant's mature fruit, known as a CYPSELA to botanists, and its parachute-like structure is known as a PAPPUS.


Surprisingly, the seeds heads are NOT as fragile as one might imagine, and the friend that tried this reports that over the several weeks the garland graced her window, not a single pappus was shed.

If you try it, let me know how it turns out!


Spring Craft | "Bunny Bait"

Reprinted from 2023

Here’s a clever little spring craft using wood shims, some glue, paint, and a little faux greenery.

Make yourself a cute bundle of carrots that won’t go bad even if you forget to put them in the root cellar come fall!

Display them on your table - or wherever you think they may work to attract an Easter Bunny delivering baskets full of decorated eggs, chocolate candies, and marshmallow peeps!

Supplies:

  • 1 package of wood shims (12 count)

  • White (school) glue, wood glue, or hot glue

  • Rubber bands

  • Craft paint

  • Faux greenery

  • 3 small nails or tacks

  • Twine or Ribbon


The beauty of this craft is that after you get your shims and greenery, you can use whatever you have on hand to pull the project together. The crafter that shared this with me says she had everything (including the shims) in her craft or home supplies but encourages everyone to put their own spin on things. Pastel, polka dot, or striped carrots? Yes! Make them your own!

Steps:

  1. Begin by gluing four (4) shims together to make a “carrot” shape - wide portion of the shim at one end, narrow portion at the other. If you’re using a liquid glue, bind your carrot together with rubber bands or other binding until it dries. Repeat using all 12 shims to make 3 carrots.

  2. Paint your carrots. Follow your own style sense here. Make ‘em traditional, modern, or whimsical. You’re in charge.

  3. Add some carrot “tops”. One Dollar Tree sprig of greenery was sufficient for the 3 carrots pictured. Maybe you’d like to use dried grasses or other foliage? Again, you’re the boss.
  4. Attached the tops either with hot glue, a short nail, or a long tack - however you can get them to stay in place.

  5. Tie some twine or ribbon at the top if you’d like. (If you don’t want to, you don’t have to!)

  6. Display and wait for Easter morning to see if Peter Cottontail took the bait!

I hope you enjoy this craft. Send me photos of your finished product to D@Delilah.com, I’d love to see what you’ve come up with!

Happy Easter, Happy Spring, Happy, Happy Everything!


New Movie | Someone Like Yo


Oh happy day! Another incredible movie recommendation coming your way...

SOMEONE LIKE YOU, opens in theaters nationwide on April 2, 2024. Based on the popular novel of the same name by #1 New York Times Bestselling author Karen Kingsbury, it is an achingly beautiful redemptive love story. 

After the tragic loss of his best friend, London Quinn, grieving young architect, Dawson Gage, launches an impossible search for her secret twin sister, twins separated as embryos.  

With one set of parents grieving the loss of a daughter, and the other set grieving the truth they never told, only Dawson can show Andi everything she missed about her twin sister.

Now only Dawson can help Andi make her way back home, even though he has fallen desperately in love with her.

For tickets & information go to FathomEvents.Com

Spring is a time for new beginnings; a shared container of popcorn, a hand to hold, and Someone Like You sounds like a perfect way to celebrate the season!


Author Karen Kingsbury was inspired to begin the One Chance Foundation by the memory of her father, Ted C. Kingsbury who said, "Life is not a dress rehearsal. We have one chance to love, one chance to truly live!"

The One Chance Foundation exists to supply grants to families seeking to adopt.

The Kingsbury family is passionate about seeing orphans from all over the world brought home to their forever family.


Now, readers can join Karen in the belief that all of us have one chance to make a difference in the lives of orphans.  God wants us to care for orphans. James 1:27 tells us this. The One Chance Foundation was created with that truth in mind.

You can learn all about the good works of One Chance Foundation,
the many ways one can donate, and to read Karen's personal story HERE.


Craft Project | Rustic Heart Wall Hanging

This heart happy little project was done by a family member, and it’s so pretty I had to share!

She said she can’t take credit for the idea, she saw it done and decided to give it a try herself.

Inspiration tutorial by Shades of Blue Interiors. Link can be found here: Branch Heart Wall Art.

There are a few differences in the the inspiration and her rendition; the original crafter uses fallen sticks, this one is done with driftwood collected from the beach—white string was used on the original and this uses a rustic twine—and of course the color palette is different (pink versus teal).

I’m told that creating the heart shape was in no way easy!

1. First lay it all out. Plan to spent considerable time switching different length sticks in and out until it takes on the desired shape.

2. Then, do it all over again when you tie the twine to each one and suspended it from the long rail.

Pro-tips:

  • Hang the rail first and ties each stick to it while hanging. (Trying to do it on a flat surface is impossible!)

  • Start with the center stick and build out each side.

3. Once you’ve got everything strung up in a heart shape, you may just decide to leave it natural… but if not, then it’s time to paint.

Choose your color palette, here it starts with white, then a light teal, and finally a dark teal. You may decide to use more or less to create an ombre effect.

Laying a ruler across the heart shape helped to know where to start the paint, each new layer was started about an inch down from the previous color.

4. Once painted, hang once again, readjust as necessary, tighten the string/twine, and clip off any excess.

5. Hang where you will enjoy!

I love both, the original and our example here! And I’m sure there are countless other ways to craft something similar using this post as your inspirational jump-off point!

What materials would you use and what color scheme?

Where would you hang this? I think a beachy cabin, a bedroom reading nook, or a bathroom would all be perfect.

Let me know if you give something similar a try!

First comes the materials collection… then arranging and hanging.

It helped to lay a ruler across the heart shape to get a general sense of where to start the ombre painting.

Cinnamon-Applesauce Hearts

Facetune_02-02-2021-22-07-02.JPG

Republished from 2/21

Years ago, my mom delivered a Valentine's package with a deliciously scented heart ornament dangling from the bow.

It was a cinnamon heart, strung with a satin ribbon - and even after the scent had gone, it hung from a kitchen cabinet handle for many more years delighting me with fond memories.

This old recipe, requiring only two ingredients - ground cinnamon and applesauce - might traditionally be used to make Christmas ornaments, but since my mom pressed it into heart shapes, in my mind, it's best suited to Valentine decor.

You won’t believe the incredible cinnamon smell that fills your home while these are baking - and how lovely it will be for days (weeks) to come when you walk into a room where one of them is on display!

Cinnamon can be expensive if purchased in those tiny containers at the grocery, but if you have a big-box store like Costco, WinCo or Cash & Carry nearby, you can pick it up a large container relatively inexpensively. Increase or decrease the recipe depending on how many hearts you want to make, using a 1:1 ratio.

Ingredients:
(makes about a dozen cookie cutter hearts)

Screen Shot 2021-02-02 at 7.57.11 PM.png
  • 1 cup Cinnamon

  • 1 cup Applesauce

  • Thin ribbon or twine

Instructions:

  1. Thoroughly mix the cinnamon and applesauce together in bowl. It should have a thick, paste-like consistency and hold together well - not too dry, not too wet.

  2. Place between two pieces of parchment or waxed paper, and roll out to about a 1/4 inch thickness. It will break if too thin, and will take longer to bake if too thick.

  3. Take the top layer of paper off and use cookie cutters to cut into shape.

  4. Use toothpicks to decorate and a straw to make the hole for hanging.

  5. Move hearts onto a cookie sheet.

  6. Bake at 200 degrees for about two and a half hours, until they feel dry and hard.

  7. Once cooled, thread ribbon or twine through the hole and make a loop.

Dangle from a Valentine’s package, gift a grandparent, teacher, friend, or hang in your home for some Valentine’s love, some winter cheer, and a fantastic cinnamon scent!

And yes, go ahead and use the recipe during other seasons and cut out other shapes - acorns and leaves in the fall, snowmen and snowflakes for your Christmas tree… it’s all fair game!

Delilah Logo.png


Heartstrings | Craft Idea

Republished from 1/22

Do you decorate for Valentine’s Day? My mother always did when I was growing up, and once I had a home of my own, I continued the tradition.

Back when I was young, my mom would bring out the same red tagboard cutouts of bow toting cupids and hearts of various sizes. They were probably purchased at a Payless Drug Store about 1961 and used year after year right up until the last kid was out of the house (who knows, maybe longer!)

I’m guessing about the year of purchase, because it would have been my first birthday. Had I arrived a day earlier, the name you’d hear on the radio wouldn’t be Delilah… it would be Valerie. I think I dodged a bullet there (or maybe Cupid’s arrow!) Yet even though my birth came on the 15th of February, every birthday celebration was a red and white themed extravaganza.

Perhaps we did Valentine’s up a bit bigger than most families, but if so, I’m glad! That’s probably why I don’t necessarily equate the “holiday” with romantic love. It was a time of family celebration, of dinners that included grandparents bringing all their home-made specialties, and little gifts for everyone around the table.

My sibling and I always make a bit of a fuss over Valentine’s Day, treating our kids to heart-shaped foods, chocolates and conversation hearts, and other little gestures. I hope you do the same for your kids, or friends, yourself!. Romantic love is fantastic, but not as shelf-stable as the love of family and community.

Don’t have any tagboard Valentine’s décor? That’s ok. Do what a friend did here, cut out hearts from any sturdy paper (or in this case, thin cardboard) and string it along for a cute garland!

Materials Needed:

  • card stock or card board

  • pencil

  • scissors

  • punch (such as a skewer)

  • twine

Directions:

  1. Use a templet or draw a heart free-hand on sturdy paper or card stock, then cut out to make a templet.

  2. Trace 24 hearts onto card stock of your choice. Use the same color or mix it up and use multiple colors.

  3. Cut out all traced hearts

  4. Now punch a hole near the “valley” of each heart. A shish-ka-bob skewer worked here. (It needs to be big enough to string the twine through.)

  5. Measure out a length of twine about 5 - 6 feet long and cut from roll.

  6. Pinch the twine about 6” in from the end, and push a loop through the hole that has been punched in the heart shape. Pull the loop through until it is large enough to reach the bottom of the heart. Now slip the heart through the loop and pull the string taught again.

  7. Repeat this process stringing the hearts evenly (about every 6”) over the length of your twine.

  8. Admire your handiwork and hang!

Happy Valentine’s Day!

Meringue Cookies

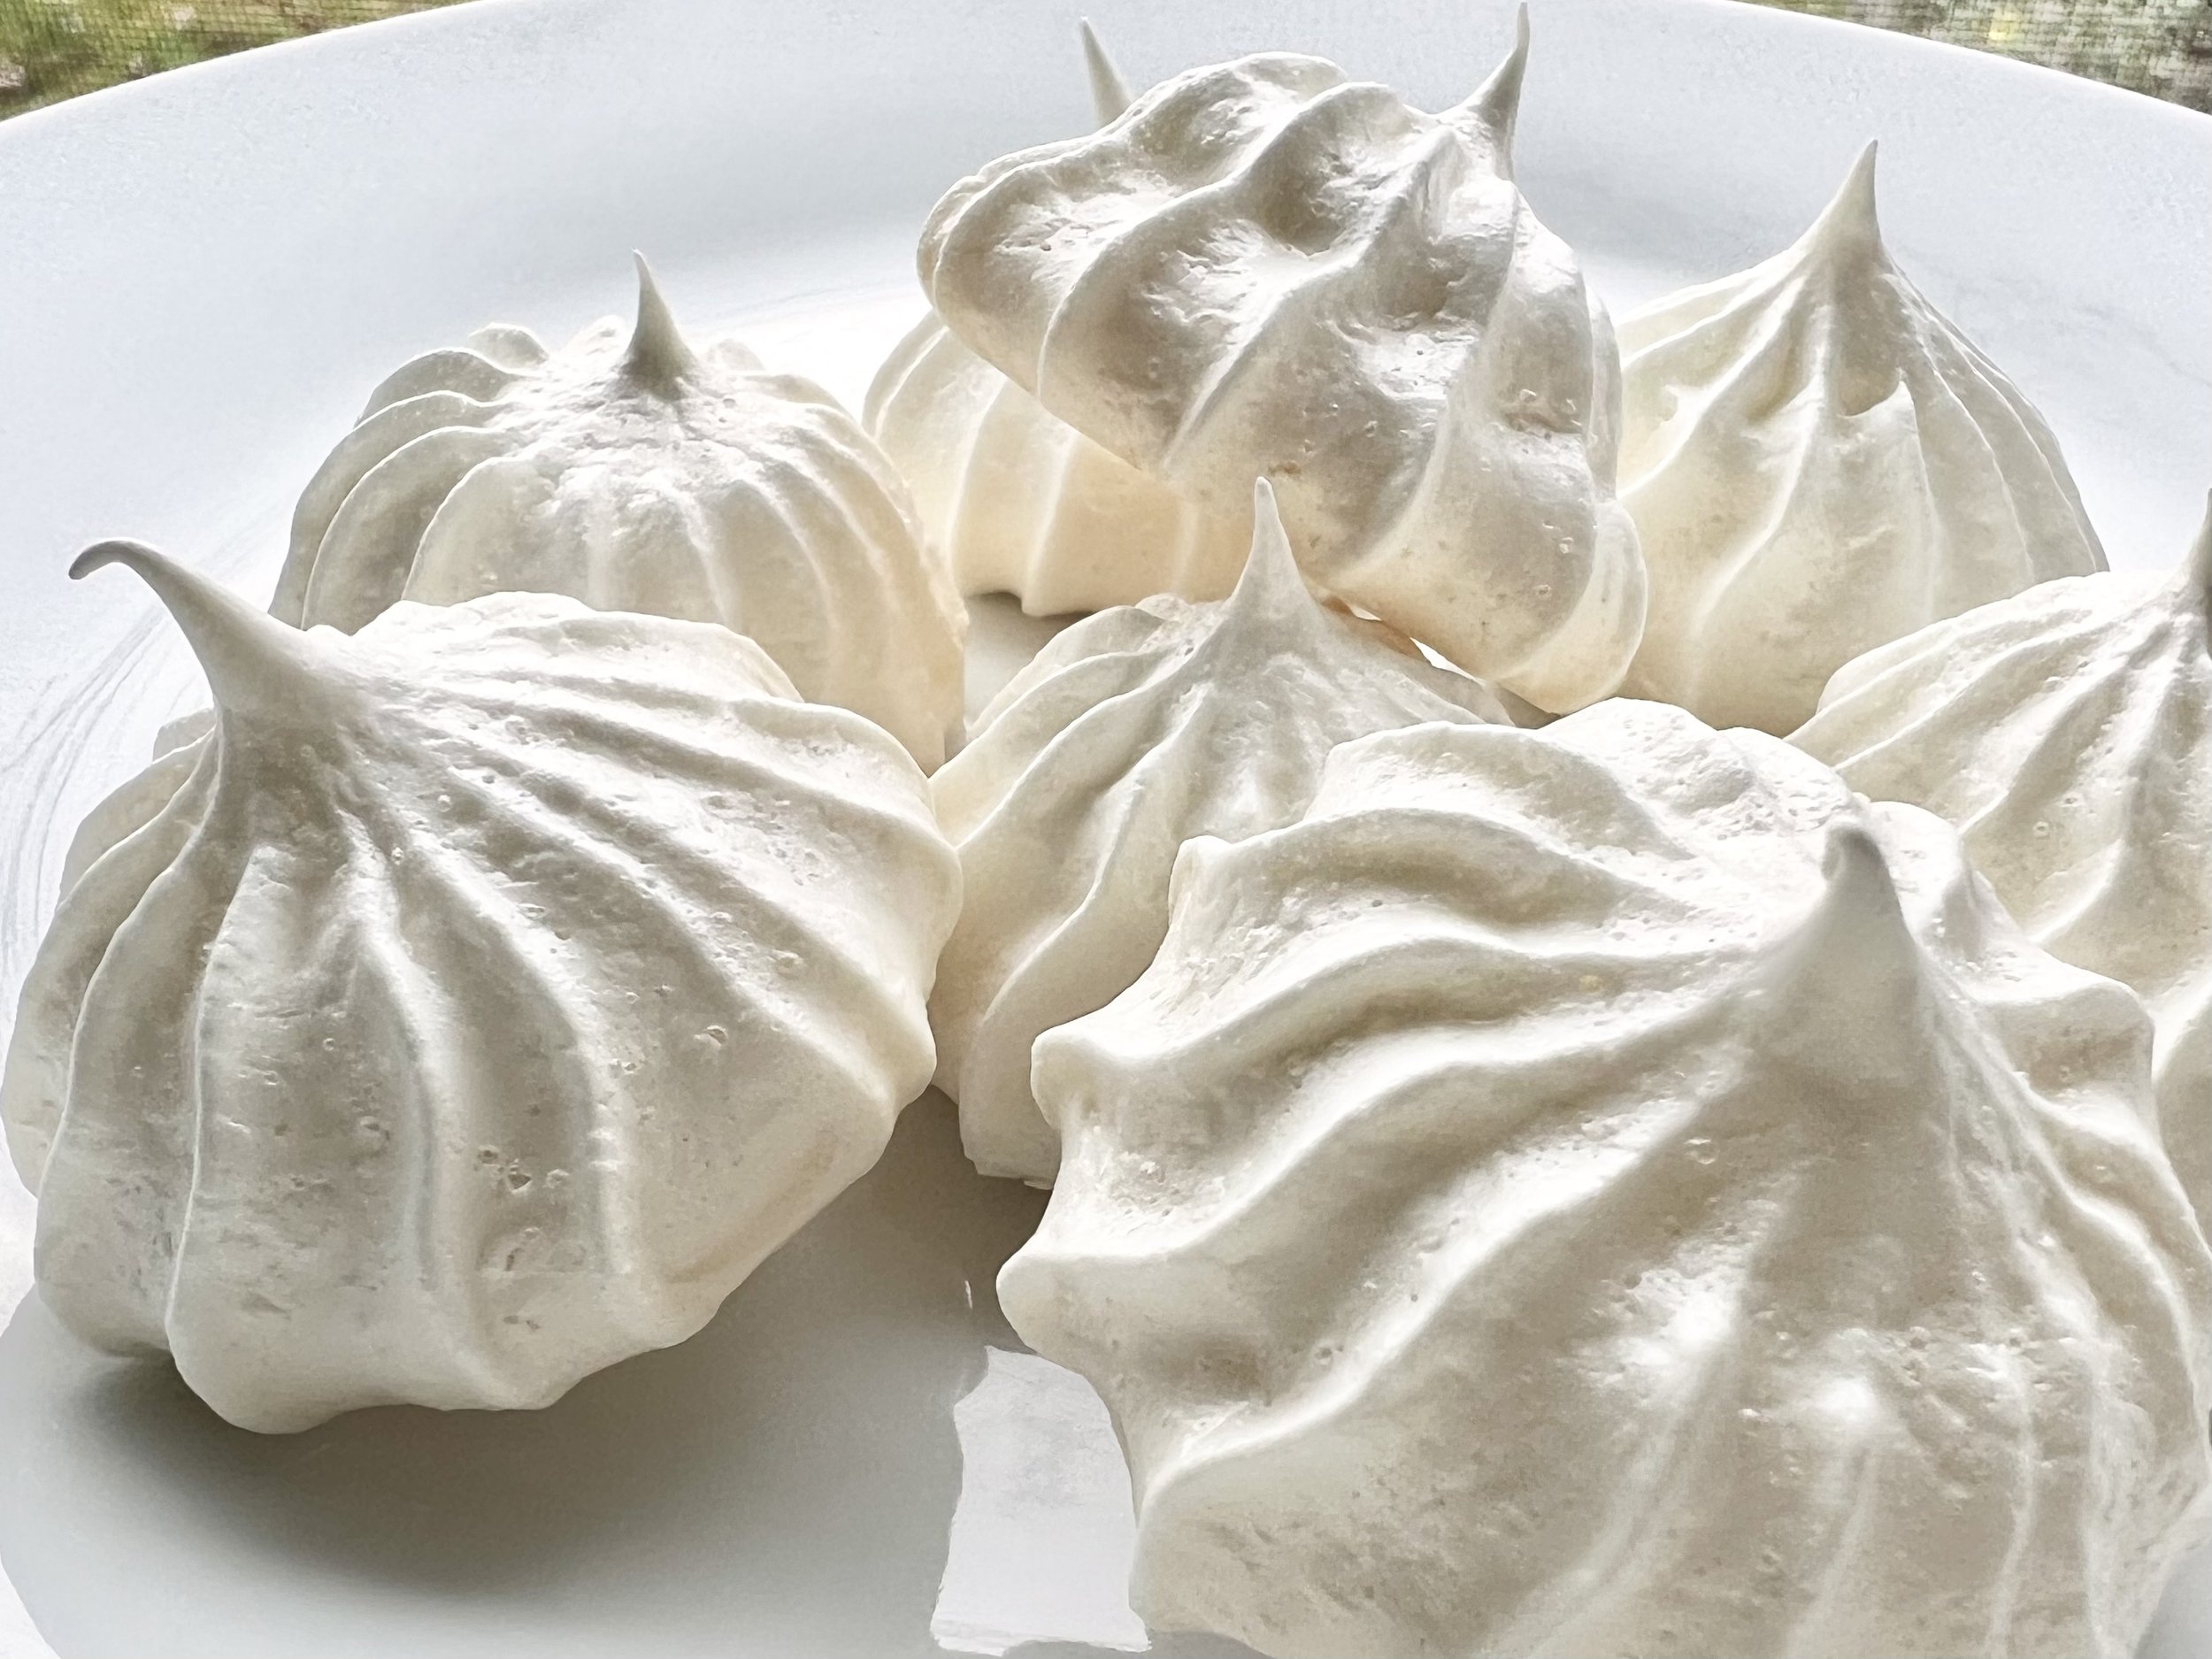
Oh yum! It’s been a minute since I enjoyed these sweet, crisp, lighter-than-air treats, so it’s about time, doncha think?

Meringue cookies were once a staple at fancy little gatherings like wedding and baby showers, recitals and receptions. No wonder, they come together pretty quickly - if you don’t count the hour plus they need to spend in a warm oven - and go down very easily!

They contain no flour or nuts so good for those who are intolerant of gluten and tree nuts - a shame if one has egg allergies though - and (I’ve heard) have only about 25 calories per cookie, so not going to bust anyone’s diet or New Year’s resolution!

There’s a short list of ingredients. The only one you may not have in a reasonably stocked pantry is the cream of tartar, which is important to stablize the egg whites so you get nice peaks. Not a lot of recipes call for it these days, but it’s also used in home-made playdough, so kitchens with kiddos will find another use!

You’ll want to use a metal or glass bowl to whip the egg whites, making sure it is absolutely dry when you begin. Also, separate the yolks from the whites over one bowl then transfer to your mixing bowl, even a bit of egg yolk can wreak havoc on your meringue, and cause it not to set as firmly as needed.

This recipe calls for 4 egg whites, and fluffs up enough to pipe about 72 little clouds of yum.

Ingredients:

  • 4 egg whites - room temp

  • 1/2 teaspoon of Cream of Tartar

  • 1/2 teaspoon salt

  • 1 teaspoon vanilla (use clear for white meringues)

  • 1 cup granulated sugar

Directions:

  1. Preheat oven to 225 degrees F

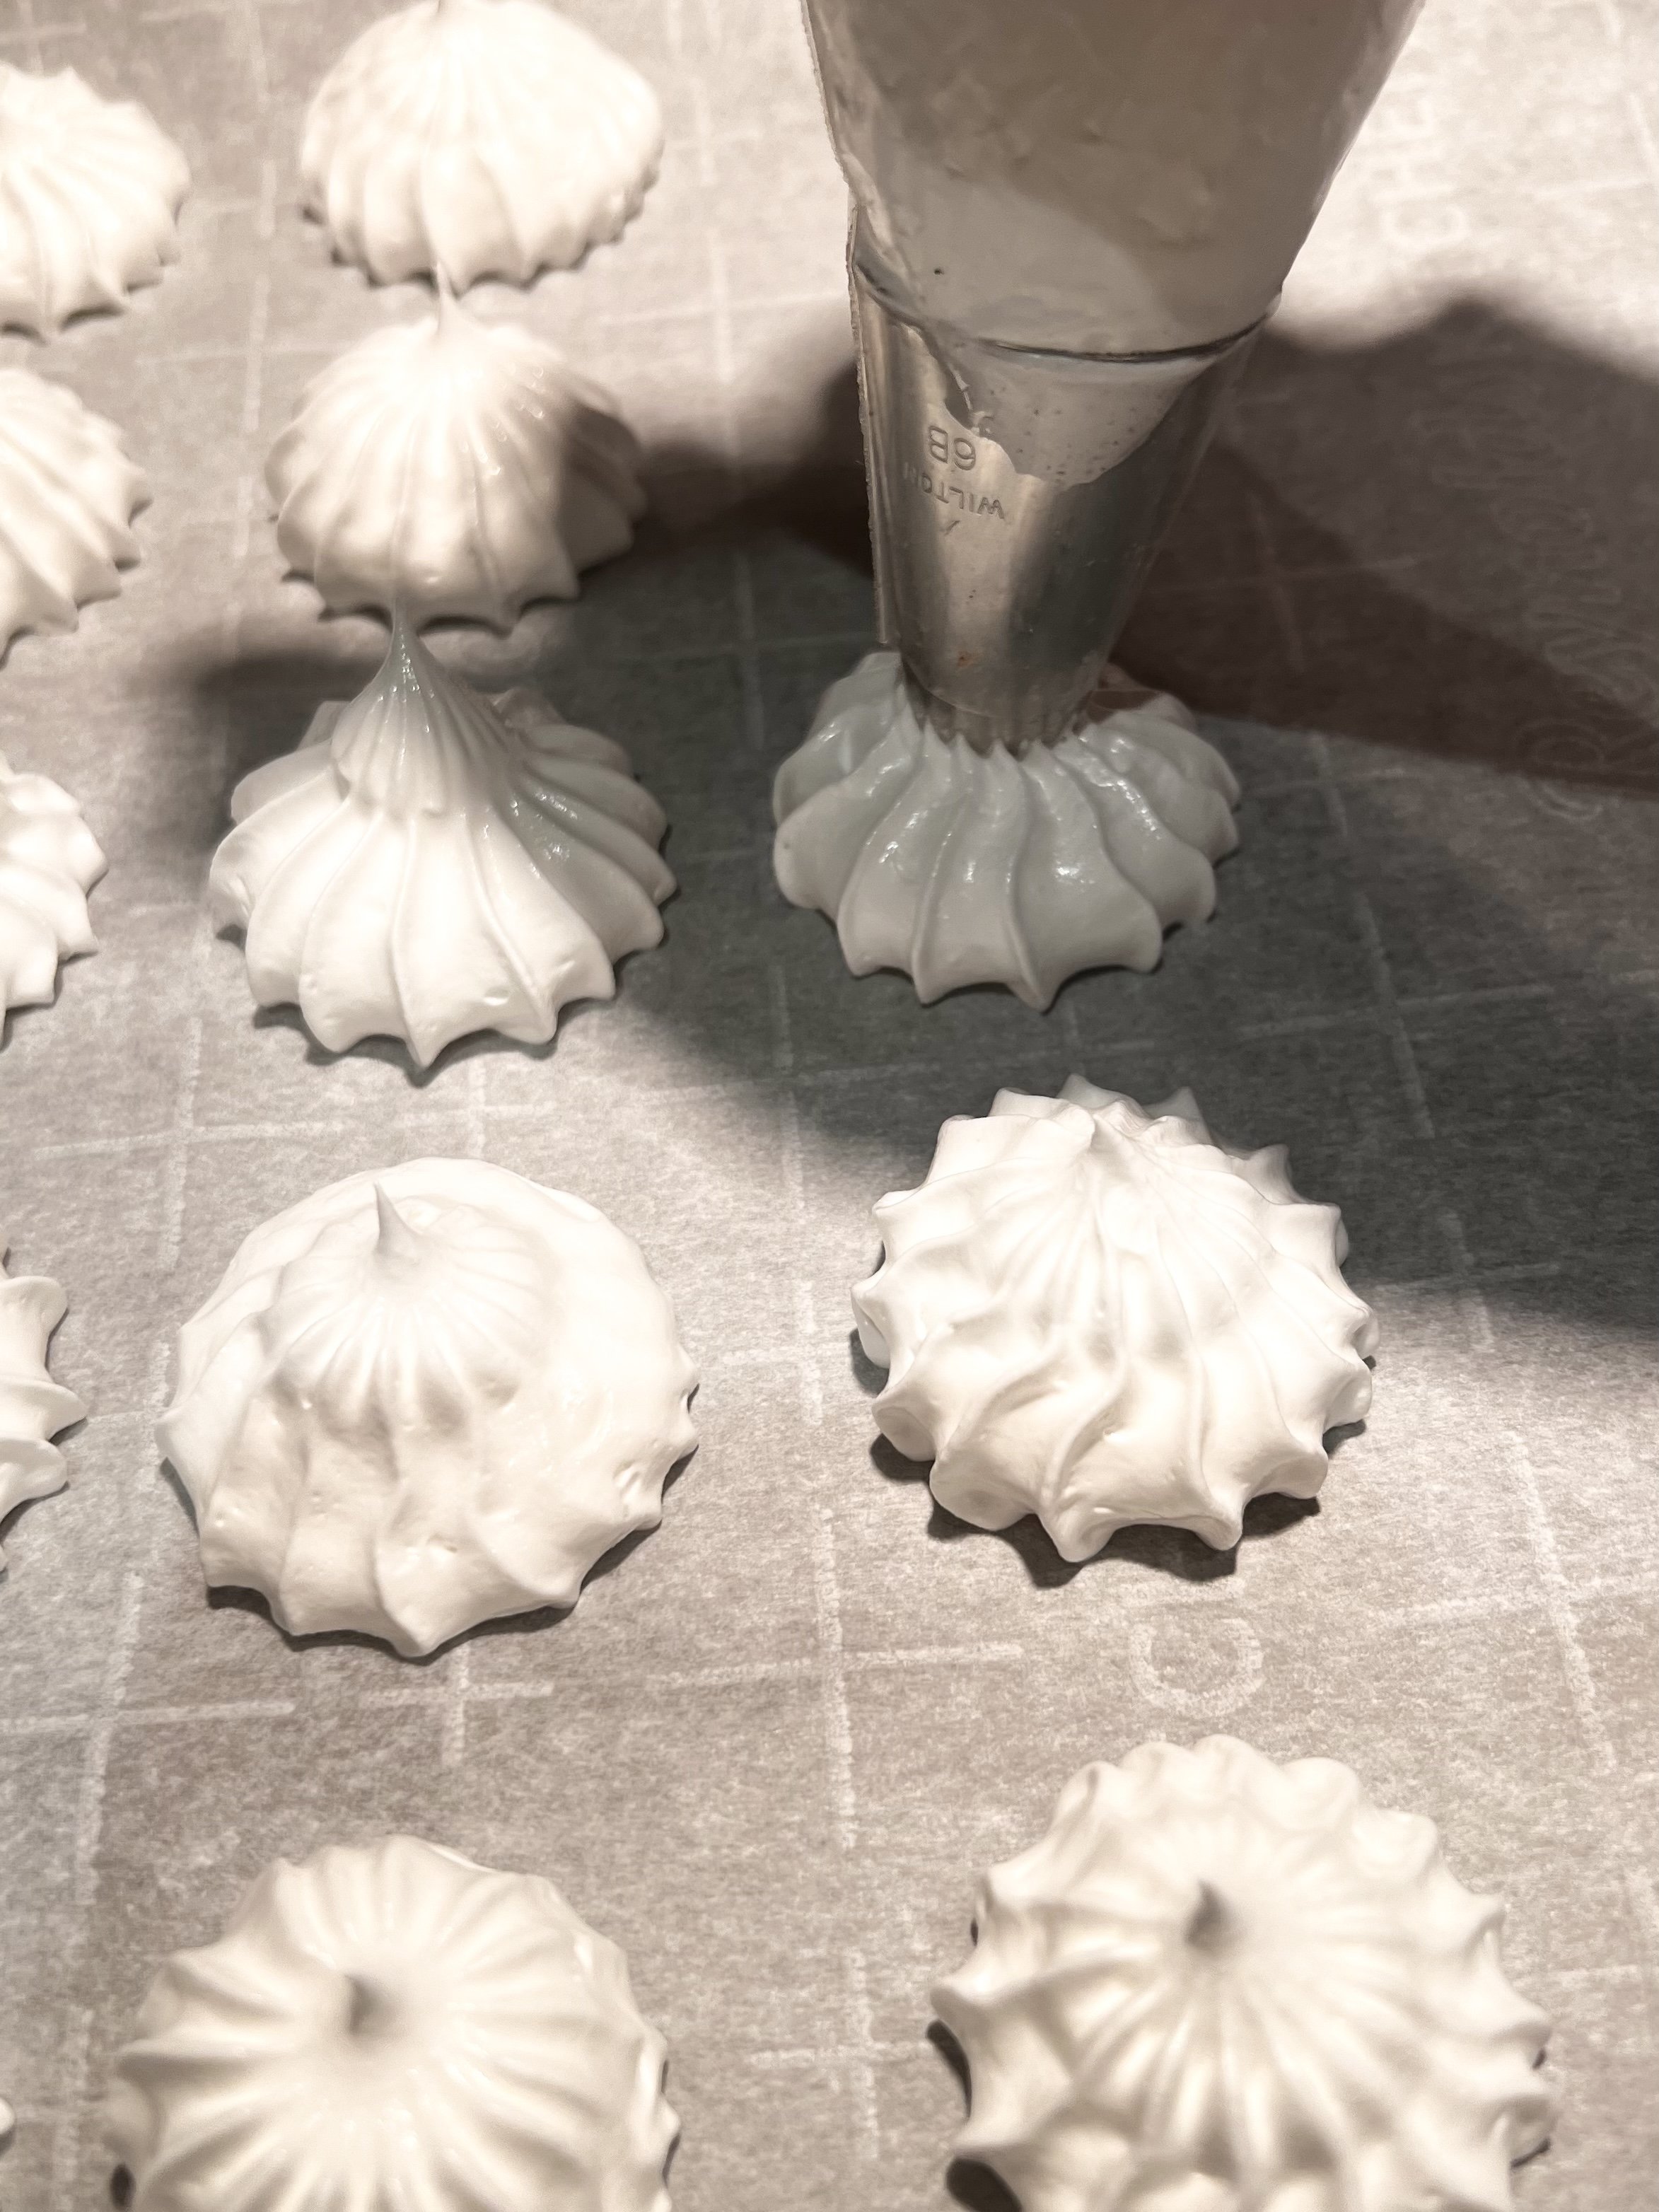
  2. Line two baking trays with parchment paper (place a dollop of meringue under each before piping to hold in place.)

  3. Place room-temperature egg whites in a metal or glass mixing bowl, use whip attachment on stand or hand mixer to mix into a froth.

  4. Add Cream of Tartar and Salt to frothy eggs, continue whipping until soft peaks form.

  5. Add Vanilla to soft peak meringue, combine well.

  6. Begin adding sugar a little at a time to soft meringue, never adding more than the meringue can hold on the top (should not be heavy enough to sink) continue whipping and adding sugar until the cup is fully incorporated and the meringue is holding a stiff peak.

  7. Transfer meringue to piping bag with large star piping tip. Pipe in rows leaving a little space in between for air to circulate.

  8. Bake at 225 degrees for 1 hour. Leave meringues in place, turn off oven and allow to cool.

  9. Meringues should be crisp all the way through. Test. If they still have moisture in the middle, return to 200 degree oven until crisp throughout.

  10. Store in air-tight container until serving. (Meringues draw moisture and become chewy if left unsealed.)

You can also add flavors and colors! Try lemon or peppermint as the season or occasion calls for, or even dip your cooled meringues in chocolate. Mmmmmm.

My 12 Stockings of Christmas 20

It’s the most wonderful time of the year! It’s time for my 12 Stockings of Christmas!!!

Once again I’ve gathered together some of my favorite products that I’ll gift away to 12 lucky winners!

Be listening to my radio program each and every night between November 22nd and December 22nd, when I’ll share the KEYWORDS needed to enter.

Text the keyword to 48484
or enter it at the ENTRY page.

(Hint: If you miss the keyword, you can always use the word STOCKING.)
You can enter once a day.

I’m so grateful to my generous sponsors for providing these wonderful products. When I fall in love with something I can’t wait to pass it along to my listeners!

Here’s a run-down of everything in the prize bundle this year. Good luck my friends and tell all your family and friends about it too!!


“The Greatest Christmas Hits”
Pentatonix

Let’s start things off on a high note with Pentatonix and an autographed copy of their newest holiday CD, “The Greatest Christmas Hits”!

Gearing up for what promises to be an unforgettable holiday season, Pentatonix has unveiled a new greatest hits album, “The Greatest Christmas Hits”! The album features 23 of the band's top holiday songs and eight brand new, never-before-heard tracks - including the new holiday original, “Please Santa Please”!

One of the most innovative, inventive, and inimitable vocal groups of all time, my friends that make up Pentatonix are thrilled to be performing their 2023 North American Christmas tour right now, Pentatonix, The Most Wonderful Tour Of The Year. You’ll want to get tickets if they’re anywhere near your city - or plan a trip and meet them somewhere you’ve always wanted to visit!

In the meantime, order “The Greatest Christmas Hits” for friends and family, so they have a copy in their stockings too!

Get it here: “The Greatest Christmas Hits”


Italian Marble Artistry Collection
Laura Geller

My besties from Laura Geller are contributing an ahhhhmazing cosmetics kit, called the Italian Marble Artistry Collection. It’ll be the second prize I drop into the bundle this year.

This sumptuous, all-in-one set includes the fan-favorite (and Delilah-favorite!) Italian Marble Lipstick for a creamy lip color that blends swirls of pigments for a unique, multidimensional finish, a coordinating Italian Marble Blush Stick to add a romantic flush. (It’s enriched with vitamin E to help soften your skin.) It also includes the show-stopping Italian Marble Baked Eyeshadow Palette, with a silky, blendable texture in five baked marbleized shades. And it even comes with an eyeshadow brush to create your perfect beauty masterpiece!

You might get lucky and win one of my bundles, but if you want to get the kit sooner rather than later, or you want to share the goodness with others…

 Order: Laura Geller, Italian Marble Artistry Collection


“Christmas”
Cher

An autographed “Christmas” CD,  Cher’s first new studio album in five years (and her first EVER holiday album!) is the third prize I’m adding to the pile!

It  includes 13 songs - several holiday classics and four originals, and has a star-studded list of musical besties.

Christmas  includes superstar duet classics including“What Christmas Means To Me" with Stevie Wonder, and "Christmas (Baby Please Come Home)"  with Darlene Love.  (Darlene first recorded the song with Phil Spector and a l7-year-old Cher singing background vocals); in addition to a haunting version of “Home" written and sung with Michael Bublé.  Other standouts include an unexpected pairing with Tyga on “Drop Top Sleigh Ride” produced by Alexander Edwards, Mike Crook and Ryan OG,  the magnificent "Angels in the Snow”, & "Put A Little Holiday In Your Heart", with Cyndi Lauper, and the disco-inspired, “DJ Play That Christmas Song”, the first single to drop from the album.

I had so much fun attending an intimate listening party at Cher’s Malibu Beach home, meeting Darlene, songwriter Sara Hudson and her crew, visiting with Cher, and listening to this incredible album. I just absolutely needed to add it to my 12 Stockings!

You can get it here: Cher, “Christmas”


“Behold - The Complete Set”
Lauren Daigle

Lauren Daigle is a 2-time GRAMMY, 7-time Billboard Music Award, and 4-time American Music Award winner, and an artist I have adored since she hit the scene!

Without a doubt, I’m sharing her incredible Christmas CD, Behold - A Christmas Collection - The Complete Set (autographed!) with my 12 lucky winners!

This expanded edition includes Lauren’s version of “The Christmas Song” and a live version of “Noel”, all available for the first time on a double vinyl or single CD.

 “Behold plays like an audio time capsule built of saxes, trombones and other horns (even tubas!), upright bass, brushes on drums, mellow sounding hollow body guitars, and vocals that are rich and distinctive but still somehow laidback in their feel.”

I’m proud to call Lauren my friend and excited for everyone to add The Complete Set to their holiday music library!

 Behold - A Christmas Collection - The Complete Set


A Family Christmas (Deluxe Edition)
Andrea Bocelli, Matteo Bocelli & Virginia Bocelli

Do you hear what I hear?! It’s a Bocelli Family Christmas! Following the runaway success of their first album together, the Bocelli family announced the deluxe edition of A Family Christmas – with the release of the brand new single ‘Let it Snow’.

“A Family Christmas (Deluxe Edition)” features four brand-new recordings, plus five additional bonus tracks. It will be released on CD and black standard vinyl. I’m definitely adding this one to the mix!

Internationally renowned tenor Andrea Bocelli teams up with his 25-year-old son Matteo Bocelli and his 10-year-old daughter Virginia Bocelli. The album captures the Bocelli’s festive spirit in full flow, with new renditions of traditional carol arrangements.

The trio of complementary voices intertwine and echo on the song ‘Do You Hear What I Hear?’, which provides a stirring opening to the album. Each of the three Bocelli performers gets a chance to shine on the album with solo tracks, duets and trios.

A Family Christmas (Deluxe Edition”)
can be yours and all those you’d like to gift it to!


DigitalAIRE Hair Dryer
by Conair

I’d love to have a hair and make-up team visit me every day, but since that’s not possible, I’m always on the look out for products that make me look and feel just as beautiful.

I’ve discovered the Conair DigitalAIRE blow dryer that does exactly that, and I’m adding it to my impressive pile of presents!

It’s engineered to deliver cutting-edge performance with an innovative, powerful digital motor - that doesn’t drain a lot of juice from your wallet! Accelerated drying digital circuitry (say that 3 time real fast!) spins at 90,000 times per minute generating increased speed and air pressure to make drying times faster — root-to-tip. It’s also got 9 heat and speed settings and a locking cold shot that helps to finish your style - it comes with a diffuser too!

I’m dropping this sleek and lightweight lil’ beauty into the mix, so you too can have a more comfortable drying and styling experience, even if you can’t go to the salon every day! Don’t wait to win one.

Get yours at: DigitalAIRE


“Witnesses of Christmas”
by Jason F. Wright

I love having Christmas themed books on my coffee and end tables that everyone can enjoy during this special time of year like. I’m betting you do too so I’m including…

“Witnesses of Christmas, A Musical Journey Through the Nativity of Jesus the Christ”, by my friend, Jason F. Wright, with Jenny Oaks Baker & Family Four, in my gift-giving.

It’s an adaptation of the narration and music from the original stage production of Joy to the World: A Sacred Celebration, a production conceived of, performed by, and produced by Jenny, that Jason would write the script for and narrate—as a shepherd named David.

This first half of the book includes the script, sheet music, and QR code links to performance recordings and accompaniment tract to re-create a Nativity experience for readers unlike anything they’ve seen, heard, or read before.

The second half explains how readers can adopt five of Christ’s attributes to become better people, encouraging us all to try to live the kind of life that Christ’s life exemplified.

It will enrich your lives and those you chose to share it with, just like the production itself.

Don’t wait to order copies for gift-giving here:
Witnesses of Christmas
A Musical Journey Through the Nativity of Jesus the Christ


The New Curl Secret
by Conair

My 12 Stockings Sweepstakes is all about sharing my new discoveries with you, and I can’t keep Conair’s new ceramic auto curler—The New Curl Secret®—to myself! I’ve got 12 to gift-away.

Its 3 pre-set curl settings (Wavy, Loose & Defined) and its multiple temperature settings means it will work on all types of hair. With the touch of a button, the completely redesigned Curl Secret® with tangle-free technology gently pulls your hair in to it’s peek-a-boo curl chamber and pops out a smooth perfect curl every time that will last all the day through! Buh-bye curl drama, hello curl perfection!

Reduce frizz and fly-aways and get perfect curls and waves, every time with Curl Secret®. The secret is out!

The New Curl Secret by Conair is available at your favorite retailers,
like Amazon, Ulta Beauty and Target.


Seasonal Variety Gift Box & “Let’s Talk About Tea”

Bigelow Tea

My days begin and end with a steaming mug of tea, and in the cooler months you can add several more to this routine!

My dear friends at Bigelow Tea keep me well stocked with a variety for every occasion, whether I need a kick of caffeine in the morning, a thirst-quencher, a health-booster, or a calming digestive, they have a delicious blend perfect for the job! With their help, I’m dropping two more gifts into my generous giving piles.

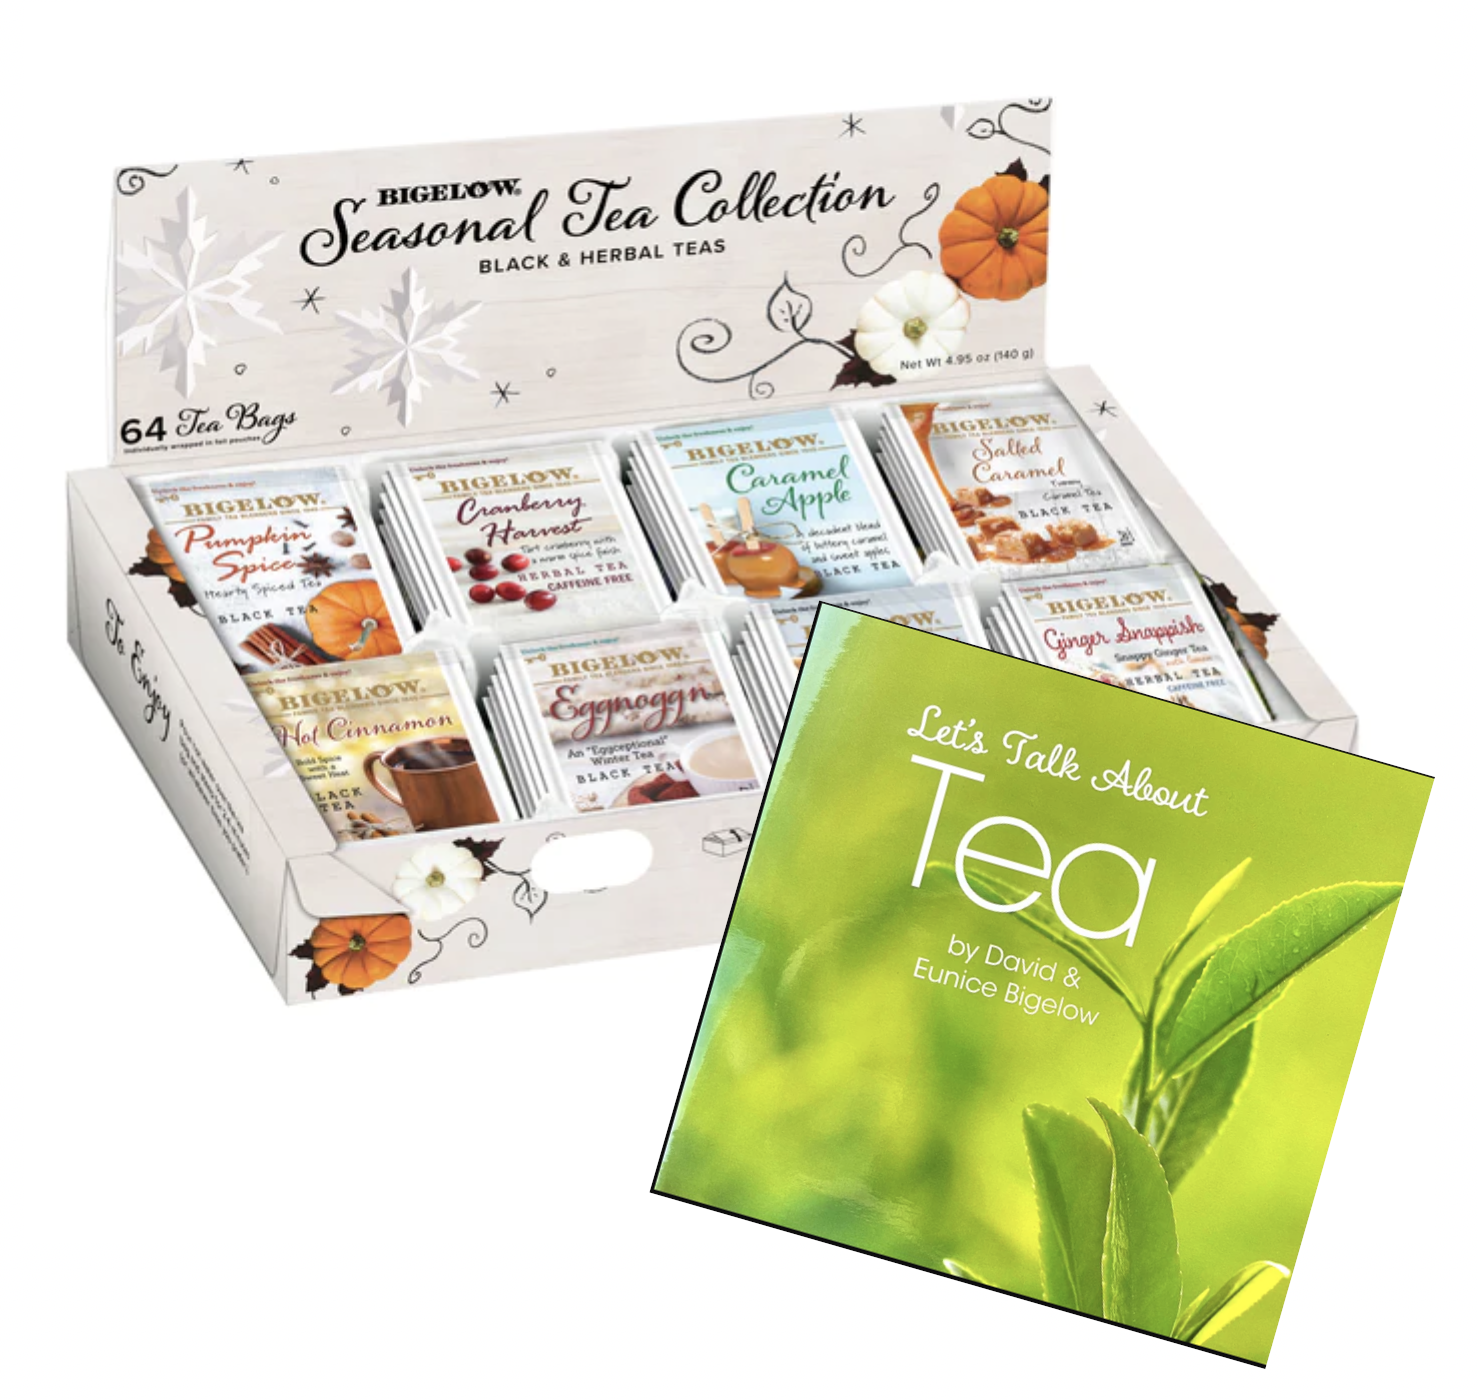
An indulgent Seasonal Variety Gift Box that includes 8 tea bags each of caffeinated black teas, Pumpkin Spice, Salted Caramel, Hot Cinnamon, Eggnogg 'n Caramel Apple, and 8 tea bags each of caffeine-free herbal teas, Cranberry Harvest, Peppermint Bark and Ginger Snappish. It will be welcomed by anyone you want to show some appreciation to and it’s ideal for entertaining.

Bigelow is also providing copies of their sweet little hard-cover book, “Let’s Talk About Tea” by David and Eunice Bigelow. This book shares their knowledge of the business and offers readers a unique perspective about the history of tea.

If you are looking for the perfect hostess gift, teacher or neighbor appreciation gesture,
look no further than Bigelow Tea.


Almond ROCA
100th Anniversary Tin and Collectors Box
Brown & Haley

It’s not a 12 Stockings gift pack without a generous helping of my favorite holiday treat, Almond ROCA. Brown & Haley, the makers of Almond ROCA (and other delicious confections) are celebrating their 100th birthday at their Tacoma, Washington factory in the shadow of magnificent Mt. Rainier.

Founded in 1912, Brown & Haley Candy Co. has been a purveyor of fine confections for over a century. The company's flagship product, Almond ROCA, has become an internationally beloved brand known for its exquisite taste and quality. Brown & Haley remains committed to its heritage of crafting premium confections that bring joy to people worldwide. 

It wasn’t quite 100 years ago when I was waking on Christmas morning to see what Santa had delivered, but close! There was always a pink tin of Almond ROCA, my mother’s favorite, to be unwrapped and enjoyed, and I’m thrilled to continue the tradition.

I’m adding a very special. large, 100th Anniversary Tin of Almond ROCA—a bar of crunchy toffee, enrobed in chocolate, and crusted with delicious almonds—that comes in a wooden Collector’s Box, as the final gift to my 12 Stockings of Christmas Sweepstakes.

Surprise all those you love by picking up a tin of Almond ROCA this holiday season,
it’s a treat that will never go out of style!

NO PURCHASE OR PAYMENT OF ANY KIND IS NECESSARY TO ENTER OR WIN OR CLAIM A PRIZE. A PURCHASE OR PAYMENT WILL NOT INCREASE YOUR CHANCES OF WINNING. THIS SWEEPSTAKES IS INTENDED FOR PLAY IN THE UNITED STATES ONLY AND WILL BE GOVERNED BY U.S. LAW. DO NOT ENTER IF YOU ARE NOT ELIGIBLE AND LOCATED IN THE UNITED STATES AT THE TIME OF ENTRY.

Gobble It Up Cheeseball

CheeseTurkey.JPG

Republished from November 2018

My sis was cruising the internet the other day looking for some holiday party inspiration and found this fine not-so-feathered fella.

He's so cheesy! And completely nuts! In fact, he's gone crackers! (And that is how I humor myself friends...) So if you find this appetizer funny, and clever, and aren't worried about your teenagers groaning and rolling their eyes when you present him with a proud-as-a peacock (er, turkey) flourish. Then get your nutty cheese on as she did!

Ingredients:

  • Your favorite cheese ball recipe (There’s a recipe below if you don’t have one. Don’t be afraid to improvise and add/subtract spices and ingredients.)

  • Red, yellow, and orange bell pepper slices (the mini's do the trick!)

  • Pecan Halves

  • Almond Slices

  • Pumpkin Seeds

  • Crackers for tail feathers - oblong work best

  • Pepper Corns (or other edible "eyes".)


Directions:

  1. Make your cheese ball, wrap in plastic wrap, and refrigerate until firm.

  2. Remove from fridge, place on center of serving plate.

  3. Insert "tail feathers" in a wide fan - place a smaller number in front and in back of the wide row.

  4. Press Pecans in at the "shoulders" working down and toward the back.

  5. Press the sliced almonds in near the tail feathers.

  6. Press the pumpkin seeds in in front of the almonds.

  7. Cut a slice of the Orange Bell Pepper to form a "head and neck (experiment with this) and press into the front of the cheese ball.

  8. Cut a "wiggly" slice of Red Bell Pepper and "glue" to the neck with a bit of the cream cheese.

  9. Cut a tiny bit of Yellow Bell Pepper for the beak. Use the tip of a paring knife to poke a hole in the "head" and insert a bit for the beak.

  10. Find some "eyes." A bit of cracker is used h ere, but pepper corns would work too. “Glue” the eyes on with another little bit of cream cheese.

  11. Now, present that proud fine "bird" with a bowl of crackers and shake your tail feathers!!!

Cheese Ball Recipe

Ingredients:

  • 1 (8 oz) packages cream cheese, room temperature.

  • 3/4 cups finely shredded sharp cheddar cheese.

  • 1/2 cup shredded parmesan cheese

  • 1 tablespoon bacon bits.

  • 1 tablespoon chives, chopped.

  • 1/2 teaspoon seasoning salt

  • Pinch cayenne pepper

  • 1/2 teaspoon liquid smoke

Directions:

  1. Mix together all ingredients by hand, or using a mixer, in large bowl until well blended and an even consistency.

  2. Form into a ball inside the bowl.

  3. Wrap the ball in plastic wrap.

  4. Place in the refrigerator until firm (about 2-3 hours.) Use the freezer for 30 minutes if you rarely think ahead (like me.)

  5. Decorate your bird! OR

  6. Roll in almond slices and serve with a basket of crackers.

Spinach & Feta Orzo with Fresh Dill

IMG_8790.JPG

With the arrival of autumn my taste buds crave savory comfort foods. I’m always on the lookout for delicious new dishes that fit the season, aren’t so difficult to prepare, (that I spend twice as long making it than our time around the dinner table lasts) and will appeal to my kiddos.

This creamy orzo dish loaded with fresh spinach (rich in iron, vitamin K, vitamin A, vitamin C and folate, as well as being a good source of manganese, magnesium, and vitamin B2!) boasting of fall flavors like garlic and dill, is just the ticket!

The feta cheese makes it somewhat filling, while the lemon zest keeps it light enough to pair along side a salmon or chicken fillet, or even some pork tenderloin medallions.

This dish comes courtesy of my nephew Dalton, who loves to try new recipes and is happy enough to share those that delight with me, and I in turn, with you.

This recipe serves about 4. I triple it for my brood!

Enjoy!


Spinach & Feta Orzo with Fresh Dill

Ingredients:

  • 2 tablespoons unsalted butter

  • 4 scallions, trimmed and thinly sliced

  • 2 large garlic cloves, minced

  • 8 ounces spinach leaves (about 8 cups), coarsely chopped

  • 1 teaspoon kosher salt

  • 1 ¾ cups vegetable stock

  • 1 cup uncooked orzo pasta

  • zest of one lemon

  • ¾ cup crumbled feta cheese, plus a bit more for garnish

  • 1 cup chopped fresh dill

Directions:

  1. Melt butter in large skillet over medium heat. Add chopped garlic and scallions (reserving a bit of the green for garnish,) - cook until softened.

  2. Stir in chopped spinach and about 1/2 teaspoon salt. Cook, stirring occasionally, until spinach is wilted, (about 5 minutes.)

  3. Pour in stock and bring to a simmer.

  4. Add orzo, lemon zest, and another 1/2 teaspoon salt. Stir together well, then cover and simmer over medium-low heat until orzo is plump and most of the stock is absorbed, (10 to 15 minutes.)

  5. The last step is to stir in crumbled feta cheese and the chopped dill, then cover and cook for about another minute or two, so that the cheese begins to melt into the mixture.

  6. To serve, dish onto plates, garnish with reserved scallions and another sprinkle of feta cheese.


New Christmas Movie | "Journey To Bethlehem"


A young woman carrying an unimaginable responsibility. A young man torn between love and honor. A jealous king who will stop at nothing to keep his crown…

“Journey To Bethlehem” is a live-action Christmas musical adventure for the entire family that weaves classic Christmas melodies with humor, faith, and new pop songs in a retelling of the greatest story ever told—the story of Mary and Joseph and the birth of Jesus.

Screenplay by: Adam Anders & Peter Barsocchini

I got a sneak-peak and was thrilled with it! It's the first musical recounting Mary and Joseph's journey and our entire family was absolutely mesmerized from start to finish. It has some really incredible talent; Fiona Palomo, Milo Manheim, Joel Smallbone (from one of our favorite musical groups, for King & Country!), singer/rapper, Lecrae, AND... Academy-Award Nominee, Antonio Banderas portraying the jealous ruler we love to hate, King Herod.

This movie was directed by Adam Anders, and written by Adam and Nikki Anders. Adam is a four-time Grammy nominee and two-time People’s Choice Award winner. For many years, he served as the executive music producer of “Glee”, and you'll see his writing and directing credits extend to an impressive variety of television, movie and music projects. 

Award-winning recording artist and songwriter, Nikki, has written, performed, or produced for many major motion pictures and television shows, including the Golden Globe-winning hit TV series “Glee.” This talented and passionate husband and wife powerhouse joined me on a recent podcast episode that you can listen to HERE.

You will absolutely LOVE this unique new entry into the collection of holiday classic movies, this epic Christmas musical is unlike any before it.

See JOURNEY TO BETHLEHEM in theaters beginning November 10
The Greatest Story Ever COMES ALIVE!

Rated PG for Thematic Elements


Garlic and Sumac Roasted Broccoli with Sweet Dates

Screen%2BShot%2B2020-11-02%2Bat%2B12.17.05%2BPM.jpg

From the Live Life Deliciously cookbook, by Tara Teaspoon - comes this tasty selection perfect as a Thanksgiving - or weeknight dinner - side; Garlic and Sumac Roasted Broccoli with Sweet Dates.

Kids and adults alike will absolutely gobble this up!

My sis is always the one to bring a big roasting pan of veggies to our holiday gatherings but perhaps I’ll do her proud by tossing this together and serving it up alongside that beautiful bird this year.

Garlic and Sumac Roasted Broccoli with Sweet Dates
4-6 servings
10 Minutes Hands-On / 20 Minutes Total Time

LLD.jpg

Ingredients:

  • 2 pounds broccoli

  • 3 tablespoons olive oii

  • 2 cloves garlic, thinly sliced

  • 1 teaspoon sumac

  • 1/4 teaspoon kosher salt

  • 1/2 teaspoon ground black pepper

  • 4-5 dates sliced crosswise on the bias

Directions:

  1. Heat oven to 450 degrees F. Place a rimmed baking sheet in the oven to heat while you prepare the broccoli.

  2. Cut broccoli into small florets, slicing large florets in half. (You’ll need 6-7 cups of florets.) In a large bowl, toss broccoli with olive oil, garlic, sumac, salt, and pepper.

  3. Carefully remove the hot pan from the oven and transfer the broccoli mixture to the baking sheet, using a rubber scraper to get all the goods bits out of the bowl.

  4. Return pan to the oven and roast broccoli until tender and a bit charred, about 15 minutes.

  5. Add dates and serve broccoli immediately.

For more information on Live Life Deliciously, and buy links to purchase your own, visit my Book Club blog HERE.

Delilah Logo.png

Fall Book Craft | Paperback Pumpkins!

Some time back, I posted a picture of some adorable paper pumpkins made out of book pages on my Facebook page. Everyone seemed to LOVE the idea!

So I enlisted my niece, Charisa, who caught the crafting bug at an early age - and terrifically out-does her aunties by wide margins these days, (book craft - “wide margins” - see what I did there?!) and I ask her to see how easy this little project really was.

She took an old paperback, tore the cover off, and just started cutting the pages, rounding the corner at the top, with a bit of a dip towards the spine, kind of like when you fold a piece of paper in half and cut out a heart - but not so narrow and pointy at the bottom.

thumbnail_IMG_8791.jpg

She cut all the pages of the book, then coaxed the pages around and connected front to back with some double-sided craft tape. She actually wrinkled the pages up a bit to make the pumpkin appear fuller, and to give it some stability.

More double-sided tape was used where needed to get the pages to behave like she wanted them to.

She added a stick from her yard for a stem, and a pretty piece of ribbon at the top.

In the photo I’d found on the internet, the crafter had used spray paint to make the pumpkins orange, but Charisa decided she loved the look of the type on printed pages and left her sample in its pure state and color.

She’s not sure if she wants to add more embellishments or leave it as-is. I think it’s perfect!

Will you try it?

Delilah Logo.png


Here’s a link to some instructions I found on line Paperback Pumpkins - or you can be like Charisa and just make it up as you go along!


Kneaders Bakery & Cafe | October Book Club

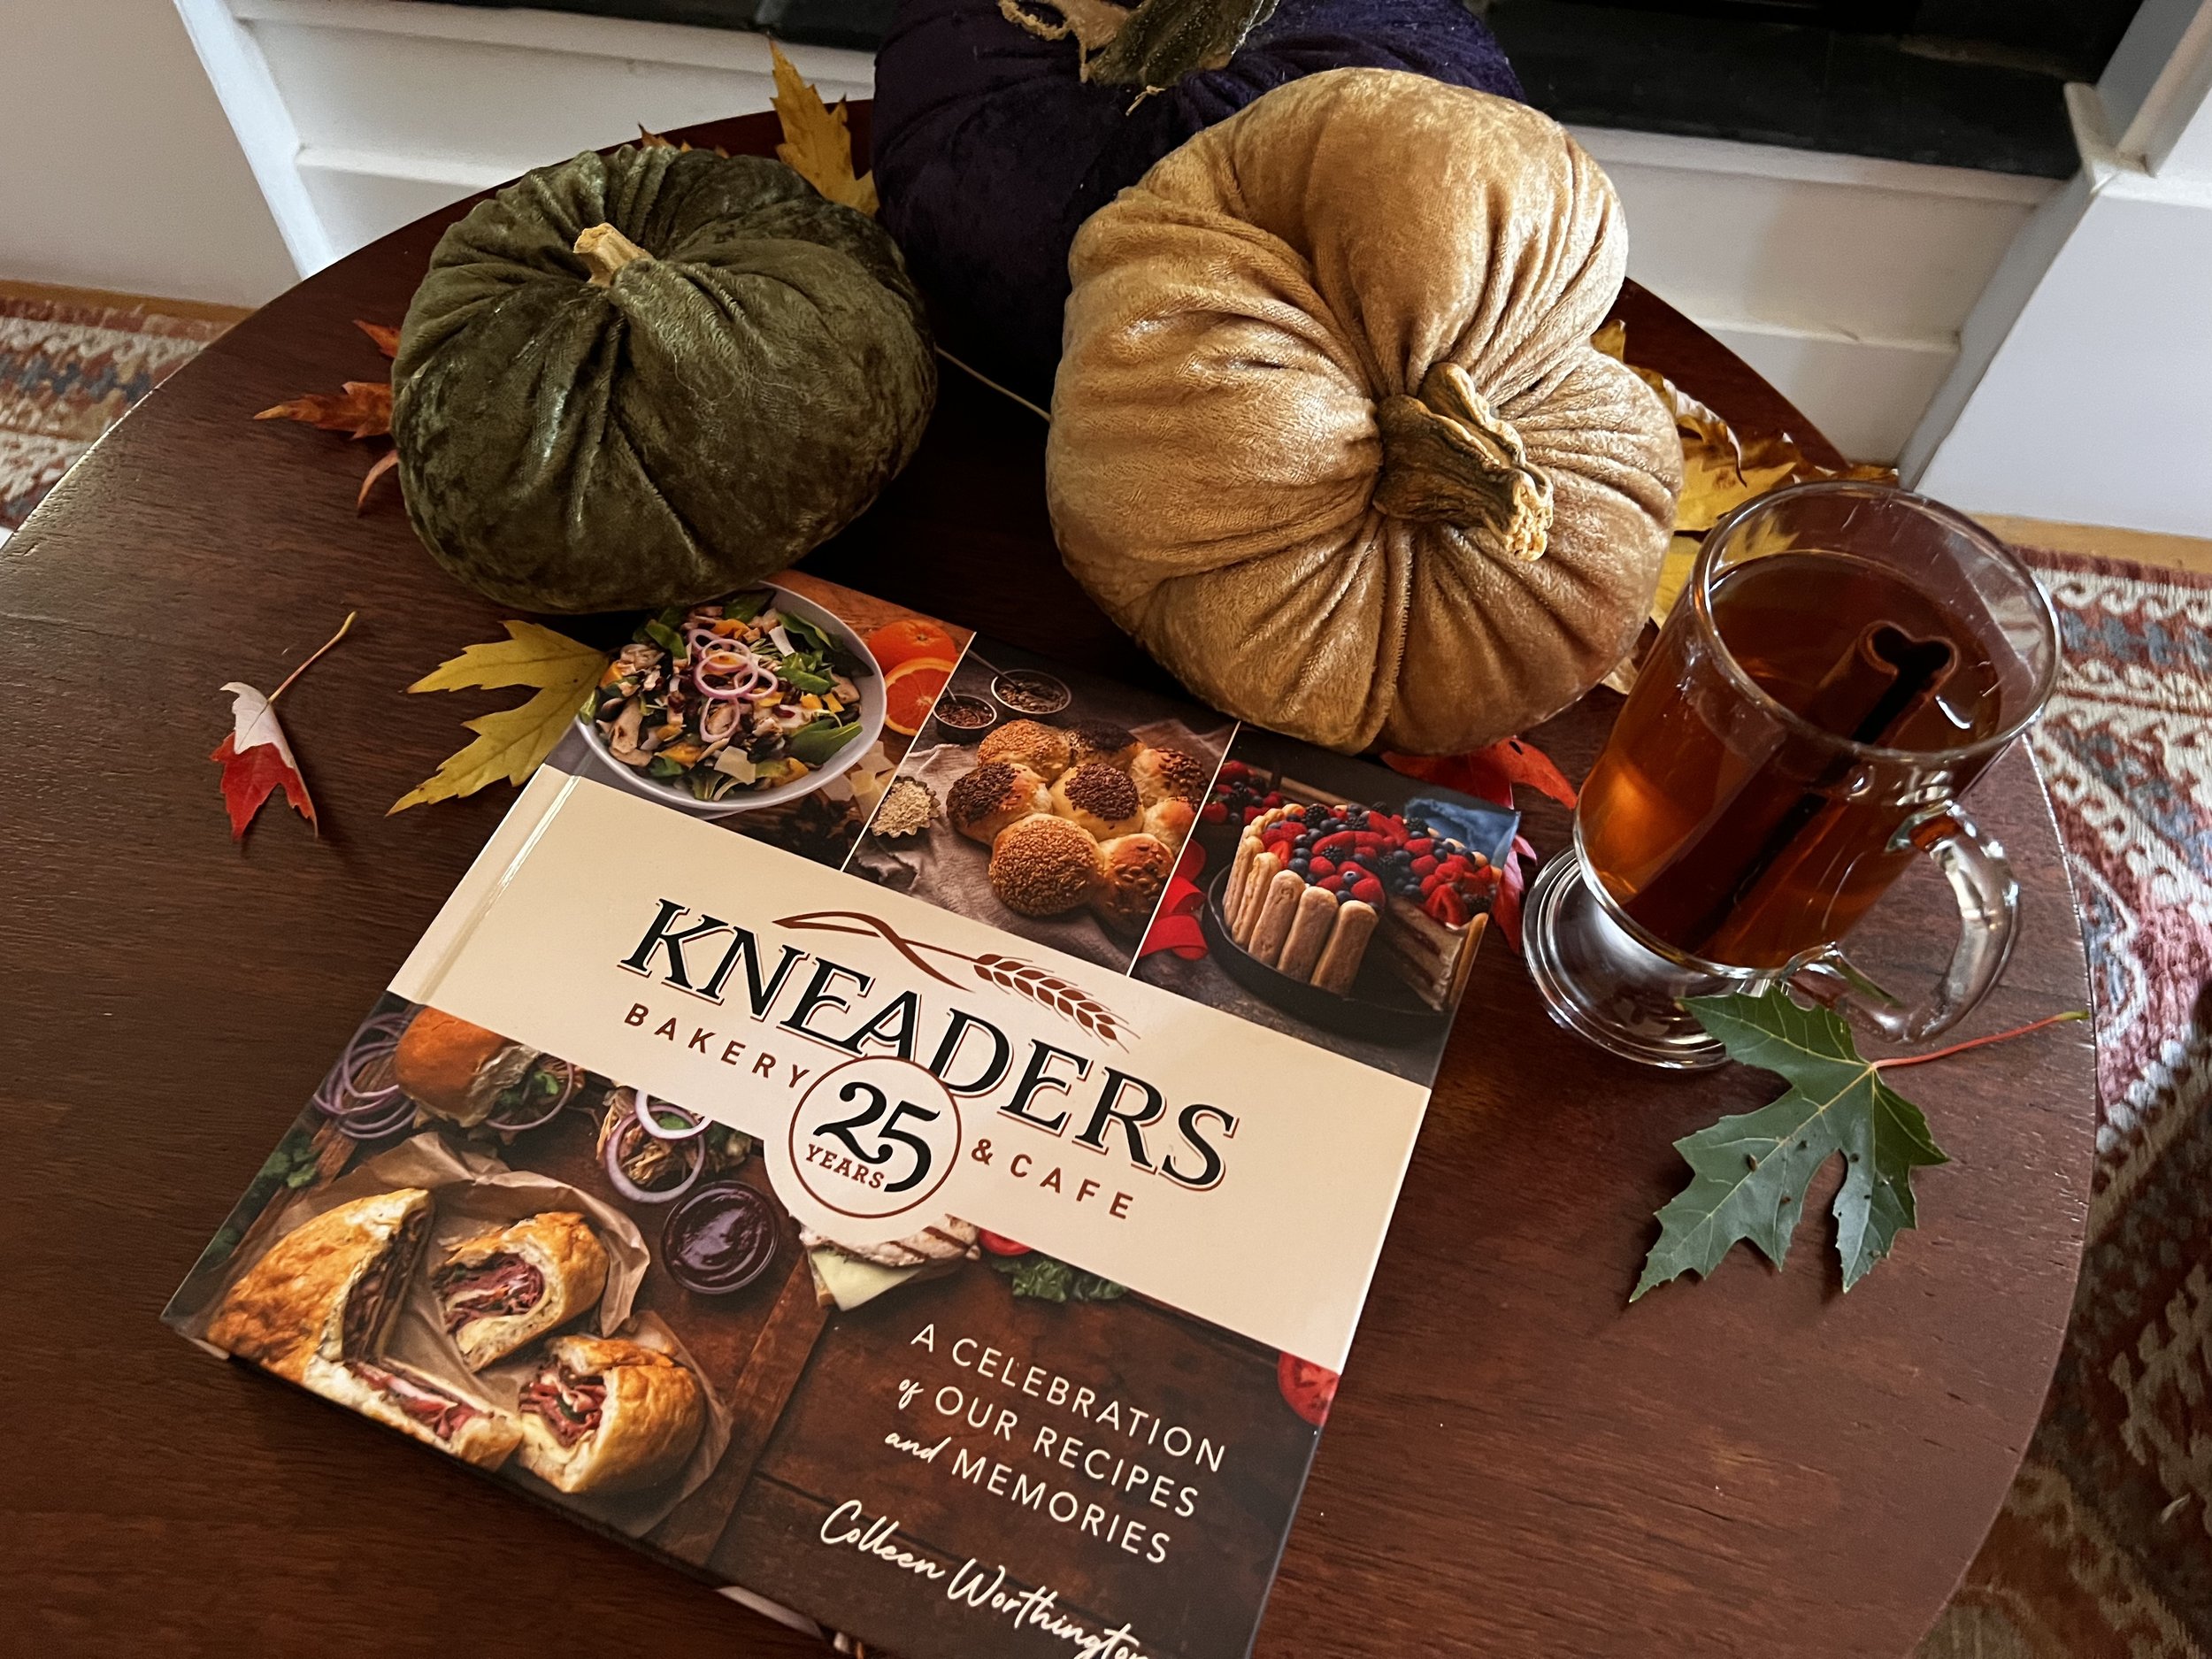
Wow! Wow! Wow! Have I chosen the PERFECT book for my October Book Club!

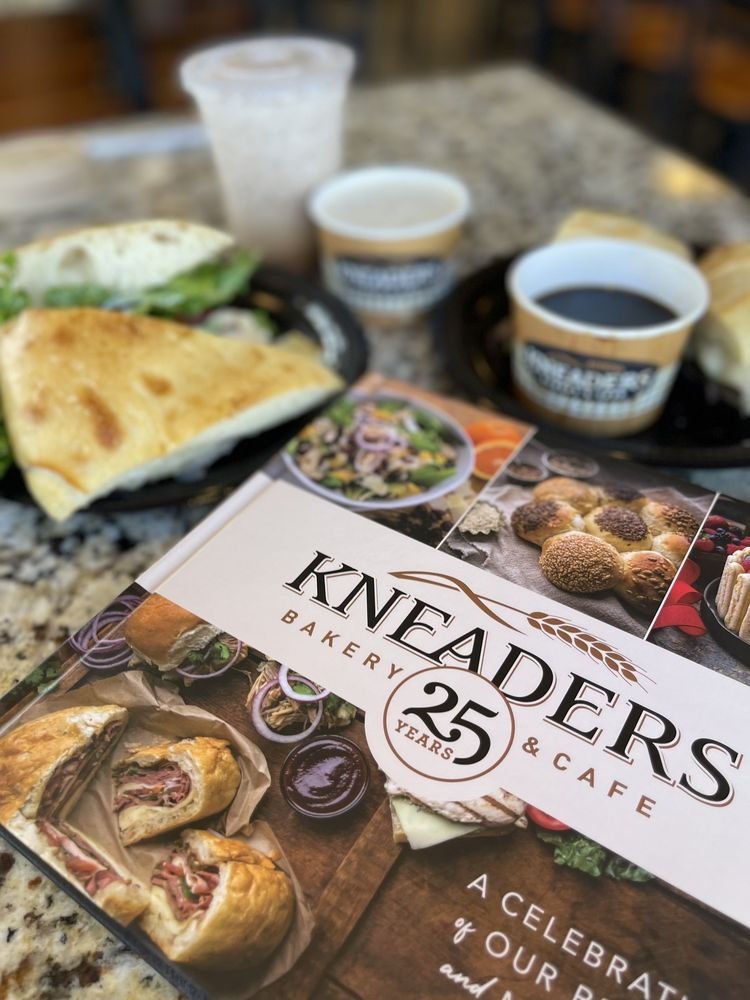
Kneaders Bakery & Cafe: A Celebration of Our Recipes and Memories by Colleen Worthington.

This big, heavy, hard cover volume contains all the recipes you’ll need to see you through the coming months (including the holidays!) and beyond! So many delicious artisan and sweet breads, as well as the soups, sides, and salads you want to go with them! Then they add scrumptious sandwiches, dips, and desserts too. And if that weren’t enough, there’s a whole section on drinks and smoothies!

The recipes are accompanied by the most stunning full-page, color photographs that will make your tastebuds tingle just looking at them.

How does Turkey Curry Chowder sound on a cold winter’s eve? That’s one of the many soup recipes I’m looking forward to trying with and on my big brood! I’m sure it will be a hit, especially paired with the Kaiser Rolls (which we could also use for sandwiches or burger buns.) There are just so many intriguing ideas between the covers of this book!

“The story of Kneaders Bakery & Cafe began with Colleen and Gary Worthington baking traditional European bread in their kitchen. After mastering old-world bread-baking techniques and testing countless recipes, Colleen, Gary, and their growing team of bakers moved onto their signature artisan bread.

But bread is just the beginning. Kneaders is well-known for their mouth-watering soups, sandwiches, and breakfast as well as their delectable pies, cakes, and pastries. For the first time, home cooks have access to popular recipes such as Overnight Chunky Cinnamon French Toast, Artichoke Portobello Soup, and Blueberry Sour Cream Pie. Beautiful and appetizing photos accompany each recipe.

What began in Colleen Worthington’s kitchen a little more than twenty-five years ago has grown into a successful family-owned bakery and cafe business with time-tested, delicious recipes gathered in this one-of-a-kind cookbook.

Kneaders also has 48 restaurant locations.
Find the one closest to you here:
KNEADERS LOCATIONS

You’ll want your own copy of Kneaders Bakery & Cafe: A Celebration of Our Recipes and Memories of course and I suggest you waste no time before placing your order!

ORDER: Kneaders Bakery & Cafe


Sweet Treat | Fairy Bread

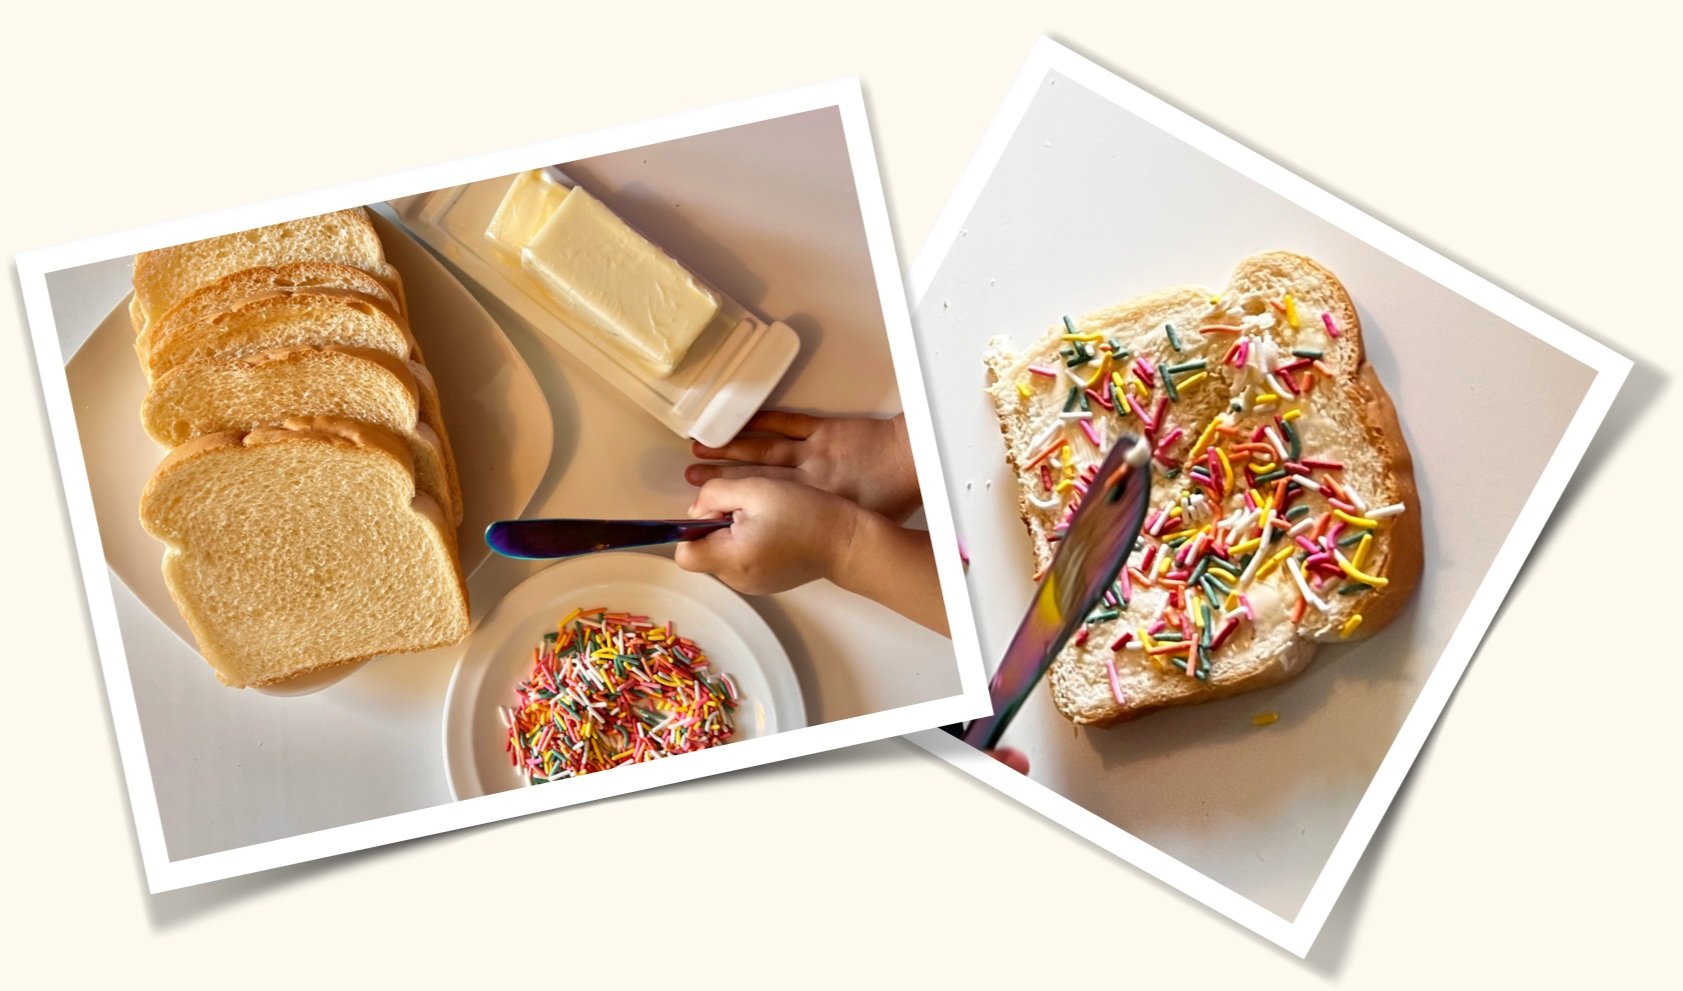
Fairy Bread, that Down-Under-Come-Northward treat, seems to be all over our social media feeds these days; white bread, slathered with a thick layer of butter, covered in rainbow sprinkles...

But did  you know it's origins are nearly one hundred years old?!

No? Neither did I until my Googling fingers got itchy and I did a little internet sleuthing. From Wikipedia:

"The first known reference to this dish as Fairy Bread was in the Hobart Mercury in April 1929. Referring to a party for child inmates of the Consumptive Sanitorium, the article proclaimed that "The children will start their party with fairy bread and butter and 100s and 1,000s, and cakes, tarts, and home-made cakes..."

The origin of the term is not known, but it may come from the poem 'Fairy Bread' in Robert Louis Stevenson's A Child's Garden of Verses published in 1885, and had been used for a number of different food items before the current usage.”

Sprinkles have a culinary moniker some of us may remember from our childhood, nonpareils. (Look up that word and it's a little confusing as to why it's used for little candy bits.) I remember my mother’s baking cupboard had a container of shiny round silver candies labeled nonpareils - they were used sparingly and we were always warned not to eat them, because although “edible” they’d probably break a tooth! Rainbow sprinkles are a favorite with children, and a peak at any baking aisle shows they come in all kinds of shapes, flavors, and sizes. ( A lot like the people who enjoy them!)

Other countries have different terms for them. In Australia and New Zealand, where Fairy Bread hails, for  example, they're called "Hundreds & Thousands."  And in Holland, they're "Hagelslag" (hail storm).  In fact, the Dutch have their own version of Fairy Bread that also originated way back in the 1920's. It’s basically the same, a slice of bread — though a denser country bread is typically used — coated with butter, and liberally sprinkled with chocolate hagelslag.

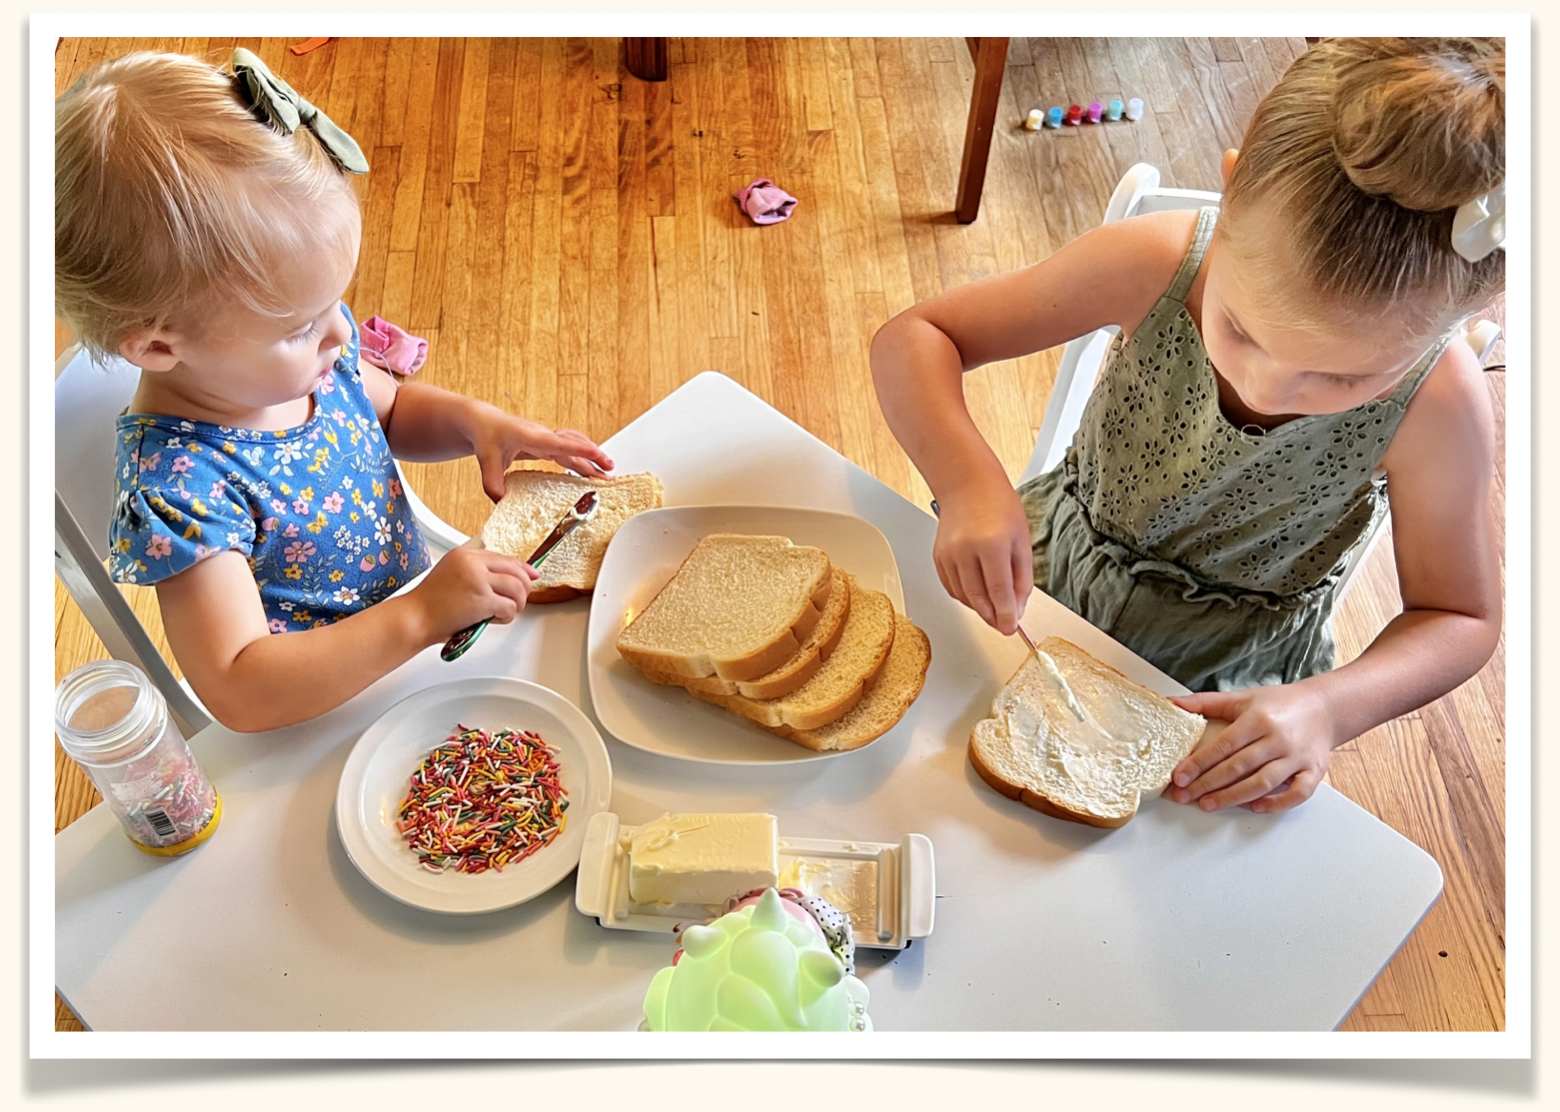
My granddaughters demonstrating that half the fun is making it themselves!

My readings also tell me that hagelslag is a bit different than our American sprinkles. They are larger and the chocolate variety used in this tasty example, according to The Spruce Eats, must contain at least 32 percent cocoa. I don’t think you’ll find the same to be true here.

… and the rest of the fun comes from eating it!

Does any of this sound remotely yummy to you? Well, kids LOVE it! And because I know I'll get a lot of backlash if I were to ever recommend it as a super easy, novel, after-school-treat, I won't do that.

(But you know, what happens in your kitchen with your kiddos is between you and their dentist!)


Come up here, O dusty feet!
Here is fairy bread to eat.
Here in my retiring room,
Children, you may dine
On the golden smell of broom
And the shade of pine;
And when you have eaten well,
Fairy stories hear and tell.

~ RLS


Not That Fancy | September Book Club

Anyone that knows me knows that I’m not that fancy. Really. And apparently neither is one of my biggest inspirations, Ms. Reba McEntire.

Her new book, “Not That Fancy, Simply Lessons on Living, Loving, Eating, and Dusting Off Your Boots” tells it like it is.

Plain. Simple. And down to earth. Just like Reba… with some amazing talent, hard work, and tenacity thrown into the mix!

The best things in life are really not that fancy. This photo-driven book featuring all-things-Reba invites you to get back to the basics of life: fun, food, friends, and family. In her first book in over two decades, actress and country music legend Reba McEntire takes you behind the scenes and shares the stories, recipes, and Oklahoma-style truths that guide her life.

“Not That Fancy“ includes:

  • Nearly 200 photographs from Reba’s childhood, career, and personal life—many of which are straight from Reba’s phone

  • Never-before-told stories from rodeoing with her family to pranks with Brooks & Dunn to falling in love over a plate of tater tots

  • Behind-the-scenes anecdotes from her music and acting career, with inspiration on how to follow your passion, trust your gut, and take a chance on yourself

  • More than 60 recipes of appetizers, mains, sides, desserts, and cocktails from Reba’s personal kitchen, from friends and family, and from her restaurant, Reba’s Place

  • Lighthearted lifestyle tips on how to achieve Reba’s signature hairstyle, plan a down-to-earth date night, throw an effortless dinner party, and more.

    WATCH the behind the scenes SNEAK PEAK

This heavy, hard bound volume is as beautiful as Reba herself. It’s going to look gorgeous on your coffee table right next to a little autumn decor, begging to be opened and read.

It’s available on October 10, so pre-order yours now so you have it in hand to lend all the fall inspo you need for recipes, relationships, and realizing your self-worth!

 Pre-Order HERE


Great American Family | Christmas In July

There’s a new kid in town, and they love Christmas as much as I do!

Great American Family is America’s destination for family friendly TV, holiday movies, rom-coms , fan-favorite series… and Christmas, Christmas, Christmas!!!

Great American Family presents the second annual Great American Christmas in July beginning June 30 with 24/7 Christmas movies and the world premiere of A Belgian Chocolate Christmas! Join them for this all-new original premiere on July 8 at 8/7c.

In A Belgian Chocolate Christmas, a photographer takes her best friend's place at a Belgian culinary school during the holidays and connects with the chocolatier leading the class. A case of mistaken identity impacts their blossoming romance

You can find Great American Family on your provider or streaming service by visiting their channel finder at greatamericanfamily.com.

Then, Great American Autumn returns this September with all-new, fall-themed original movies followed by Great American Christmas beginning in October!

Follow along on Great American Family’s social media and newsletter for special announcements and movie schedules!

I’m a firm believer that Christmas is something to be celebrated all the year through, and I’m looking forward to several July evenings with the kids (maybe some mornings too!) having a little “down-time” from our activity-packed summer, watching Christmas movies on Great American Family! How does that sound to you?


Red, White, and Blueberry Beet Salad

thumbnail_Facetune.jpg

Reprinted from July 2019

Here’s a fun, festive, 4th of July salad for your holiday table. My sister made this one up just for the occasion (and because she knows I LOVE beets, even if she doesn’t!)

It calls for 4 very basic ingredients as well as a basic vinaigrette dressing made with red-wine vinegar. You can whisk one up yourself, or use a bottled one you’ve purchased, whichever get’s the job done to your satisfaction and gets you out of the kitchen and back into the celebration as quickly as possible.

You’ll wow your guests (or your hosts) when you place this on the banquet table!

Red, White, and Blueberry Beet Salad

Ingredients:

  • 5-6 large beets, peeled, cooked (you may boil or roast - your choice), cooled, and cubed

  • 2 pints of blueberries, washed and drained

  • 6-8 ounces feta cheese, crumbled

  • a bed of baby spinach

For the dressing:

  • ½ cup olive oil

  • 4 tablespoons red wine vinegar

  • 1 tablespoon Dijon mustard

  • 1 tablespoon honey or agave syrup

  • 2 medium cloves garlic, pressed or minced

  • ¼ teaspoon fine kosher salt, to taste

  • Freshly ground black pepper, to taste

Directions:

  1. Make the vinaigrette dressing:

    1. In a liquid measuring cup or bowl, combine all of the ingredients except oil. Stir well with a small whisk.

    2. Drop a single drop of oil into the mixture and whisk briskly, add another drop and continue to whisk, then add remaining oil in a stream, continuing to whisk until well blended.

    3. Taste, and adjust as necessary.

  2. Place cooked cubed beets in large bowl, add blueberries, pour viniagrette over top and mix well.

  3. Place baby spinach leaves on serving platter.

  4. Layer dressed beets and blueberries over the top of spinach, then sprinkle liberally with crumbled feta cheese.

  5. Refrigerate until serving.

Enjoy this salad, bursting with red, white, and blue flavor, as we celebrate our great nation’s birthday! I hope your 4th full of your favorite ingredients, and mixes up to be a happy and safe holiday!

Freedom Fudge

Screen Shot 2021-07-02 at 7.43.19 AM.png

Reprinted from June 2021

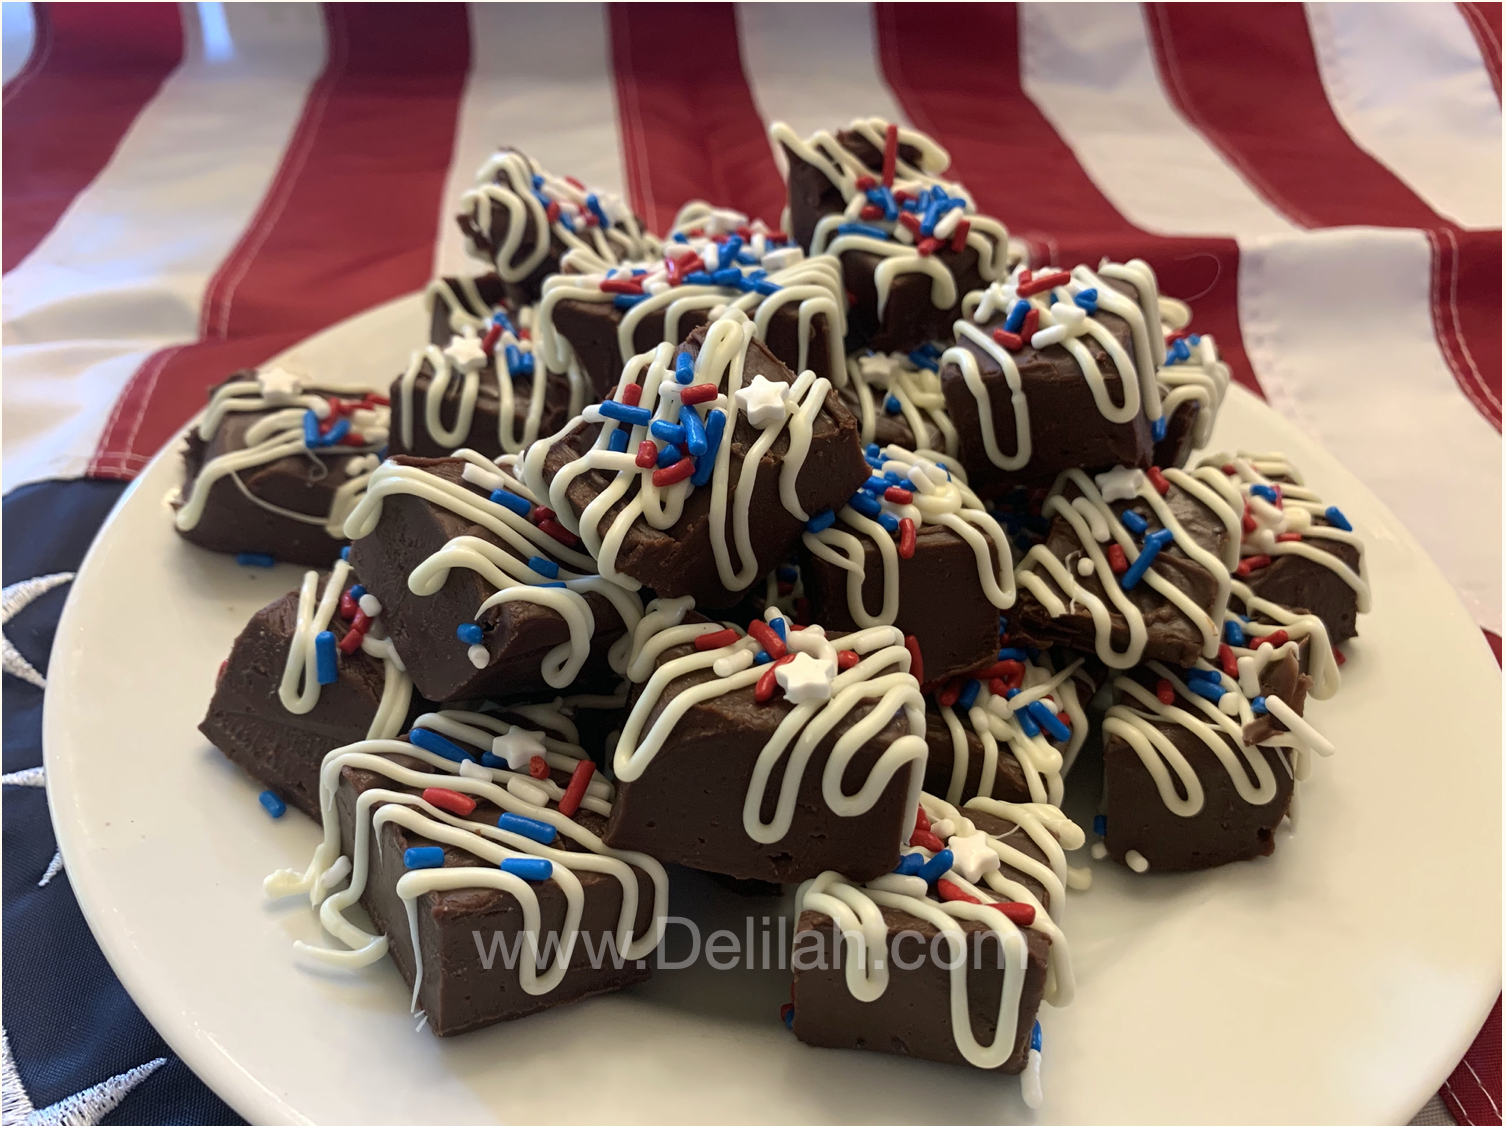
Am I the only one that gets a hankering for “out of season” foods? I think not. So when a friend said they were making “Freedom Fudge” to share at an Independence Day gathering, my eyes lit up and my mouth watered.

And besides, as someone who grew up in a coastal town, summer tourism and fudge shops are pretty synonymous. But you don’t see fudge recipes circulating much in the summer time, they usually show up in our feeds around Thanksgiving. I mean to change that with this post!

This quick-fudge recipe, that makes a plate-full of rich little morsels in a jiffy, calls for only 3 ingredients.

It’s so quick and easy, you can make them any day of the year and the recipients will almost certainly erupt in smiles of gratitude.

My friend dressed them up for the 4th of July by drizzling melted white chocolate over the top and adding some red, white, and blue sprinkles. That seems like a lot of work to me, but if you want to, go ahead!

Ingredients:

  • 1 12oz package semi-sweet chocolate chips

  • 1 14oz can sweetened condensed milk

  • 2 Tablespoons unsalted butter


Directions:

  1. Place sweetened condensed milk and butter in saucepan and heat on stovetop on medium heat until butter is melted.

  2. Turn off heat and add chocolate chips, stirring until melted and mixed thoroughly.

  3. Pour into 8”x8” baking dish lined with waxed paper.

  4. Chill in refrigerator 3 hours or over night.

  5. Cut into squares and serve.


Double this recipe for a larger crowd and use a 9”x13” pan. Feelin’ nutty? Add half a cup chopped walnuts. Going soft? Toss in a cup of mini-marshmallows. Trying to lighten up? Substitute white chocolate chips….

Keep it simple, or make it a show-stopper, ‘cuz hey, it’s a free (and almost fully open) country!

Freedom Fudge; your fudge, your way. Any time of the year!

Delilah logo red.png


Red White & Blue - Berry Bites

Screen Shot 2020-06-29 at 12.09.09 PM.png

Reprinted from July 2020

President’s Day, Memorial Day, Flag Day, Independence Day, or Veteran’s Day… there are many designated holidays throughout the year that encourage us to celebrate the American Spirit. One way to do that is to serve up a little red, white, and blue on the buffet table.

I'm not quite sure that Red White & Blue - Berry Bites qualify as a "recipe" as much as it does as a "craft", but since it is definitely edible (very, deliciously edible) I'm filing under both categories.


Ingredients:

  • Red ripe strawberries, rinsed, stem on

  • White chocolate chips - melted

  • Blue sugar crystals

  • Waxed or parchment paper

Instructions:

  1. Take a sweet, red, beautiful strawberry, holding the stem end in your fingers, dip the tip - up to about 3/4  of the berry into melted white chocolate, then immediately dip it again - leaving a band of white - into blue sugar sprinkles. Place on parchment or waxed paper to "set".  Voila! 

Friend, and Point Hope Director, Jan, made some up with daughter Erin and grandkids; while she thought that perhaps they weren't as picture perfect as the ones from a magazine, there's no doubt a ton of fun and even more love went into their creations.

This is an uncomplicated but showy display of patriotic pride with a berry big blast of flavor! Have fun with it!